Overview
Deploying bookmarks as an admin is deeply off putting. Every web browser does it differently, files change often and if you do it wrong, your users lose 100's of saved websites that they have accumulated over the years. Using a configuration profile to toggle a setting enforces that setting on a device when the profile installed. By pushing bookmarks into Google Chrome in this fashion, they end up in a managed bookmarks folder that:
- the user is not able to change.
- has no effect on the user's existing bookmarks.
I have not found a great step-by-step guide to perform this task online so here's my attempt at this. Feedback is not only welcome but encouraged.
You will need the following:
1. A macOS device
2. Basic knowledge of the Terminal application (or Xterm or similar)
3. The ability to create, read & update a computer configuration profile in the JSS.
Part 1: Use Terminal to create a basic .plist file
1. Open Applications > Utilities > Terminal.app
2. Run the following command to create a blank .plist file on your Desktop with a blank Managed Bookmarks array.
defaults write ~/Desktop/com.google.chrome.plist ManagedBookmarks -array-add
3. Convert the .plist file to xml using the following command in terminal (yup I know, it looks like xml already, but it's not)
plutil -convert xml1 ~/Desktop/com.google.chrome.plist
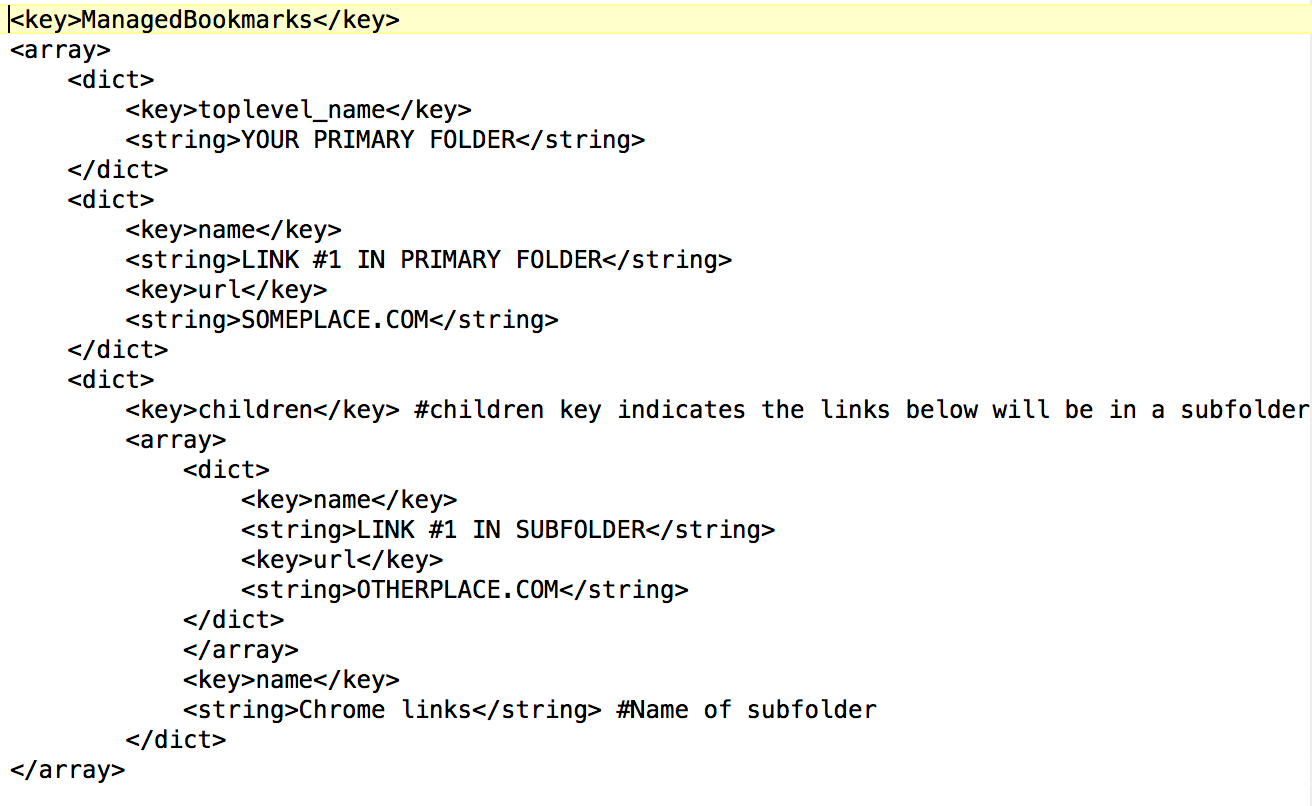
4. Open the file in your favorite text editor and start adding bookmarks in the following way. Notice that a bookmark is broken into 4 parts, two keys: Name and URL and two strings: the name and the URL.
<key>ManagedBookmarks</key> <array> <dict> <key>name</key> <string>Google HomePage</string> <key>url</key> <string>http://www.google.com</string> </dict> </array>
Optional (but recommended): Check the file for syntax errors. Save the file and return to Terminal. Use the following command to check your plist for formatting errors:
plutil -lint ~/Desktop/com.google.chrome.plist
Part 2: Import the .plist into a custom Computer Configuration Profile Payload
1. Log into your Jamf Pro Server
2. Navigate to Computers > Configuration Profiles and Click "New"
3. Give your profile a Name and a Distribution Method on the General Payload Pane
4. Scroll down to the Custom Settings Payload Pane and click "Configure"
5. Enter the Preference domain: com.google.Chrome (NOTE: Do not add the .plist extension.)
6. Click the Upload Property List File button
7. In the pop-up, click "Choose File" and Select the com.google.chrome.plist file on your desktop and click "Upload"
8. Verify your plist uploaded successfully by looking at the JSON code that is added below the "Update Property List File" button. It should look like this:
9. Save the Configuration Profile (I know it's not scoped yet, trust me.)
Part 3: Testing and Validation
1. Download the profile by clicking the download button at the bottom of the page.
2. Install the profile on your computer.
3. Open Chrome and checkout the bookmarks menu. You should see a folder called Managed Bookmarks with the Google Home Page in it like this: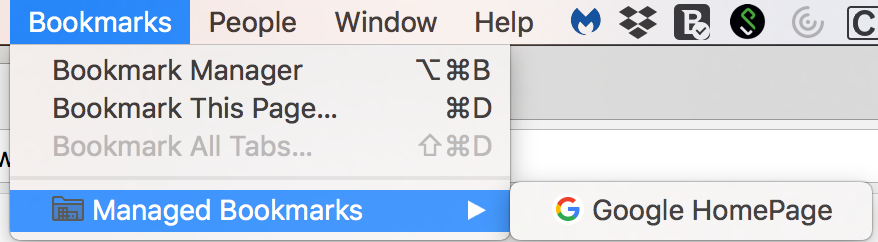
4. Quit Chrome
5. Open System Preferences and navigate to the Profiles Pane
6. Remove the profile you downloaded
7. Fix any errors and try it again - or - add a scope to the Profile on the JSS and push the Profile down from the Jamf Pro Server
Suggested Next Steps:
Read up on Bookmarks definition for Chromium and add folders to your managed bookmarks folder as necessary.
Sources:
• Managed Bookmarks Definition from Chrome Enterprise
Thanks to the following contributors:
• @MDhaliwal - Optional step in Part 1 to check the plist for syntax errors.