Instead of using the Okta Authentication API, Jamf Connect can also use the Custom identity provider type with an application set up for OIDC/ROPG in the Okta tenant. This allows for granular application of Authentication Policies in the new Okta Identity Engine tenants.
Create App Integration in Okta
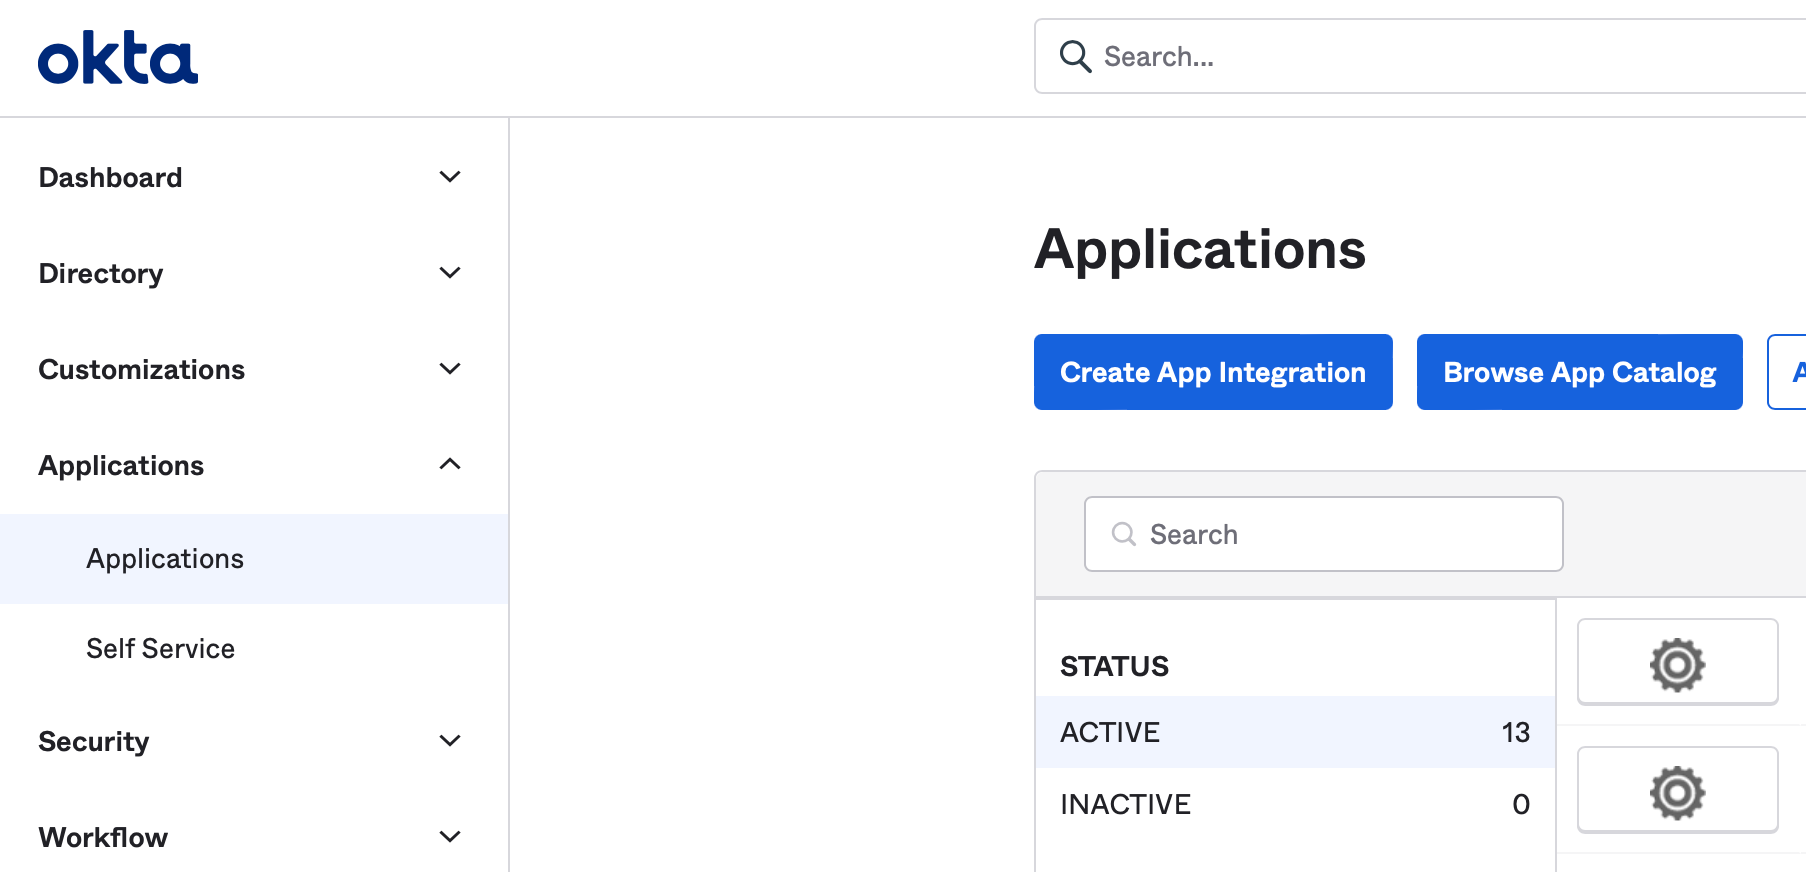
Navigate to the organization Okta administration page. Select Applications → Applications and pick the Create App Integration option.
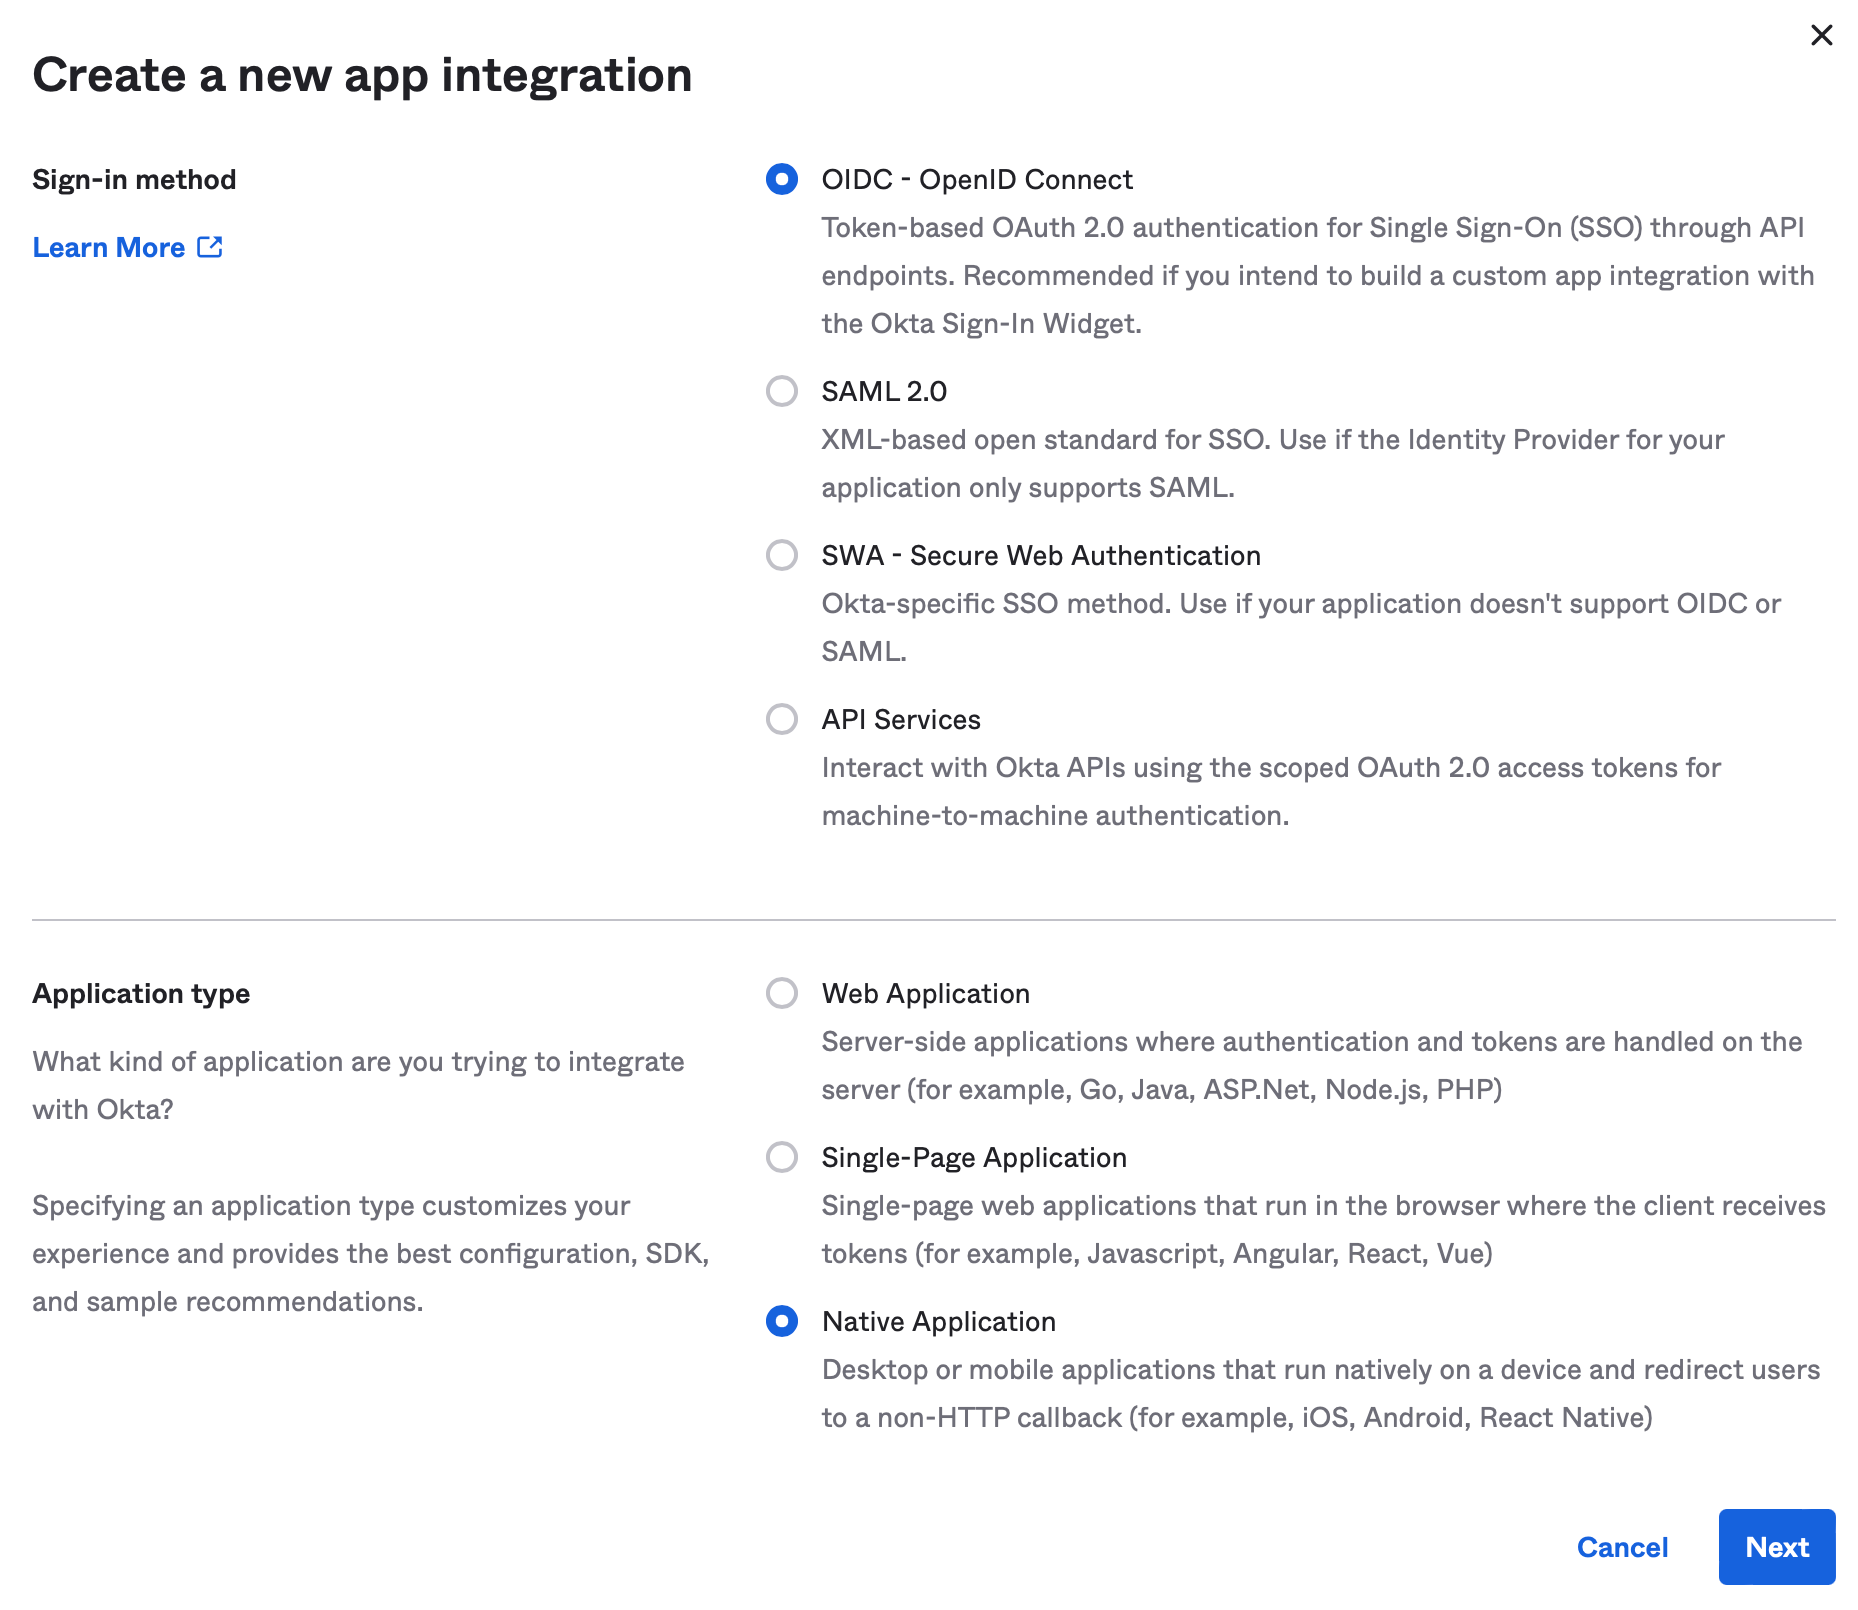
Select the options for OIDC - OpenID Connect and Native Application. Select Next to continue.
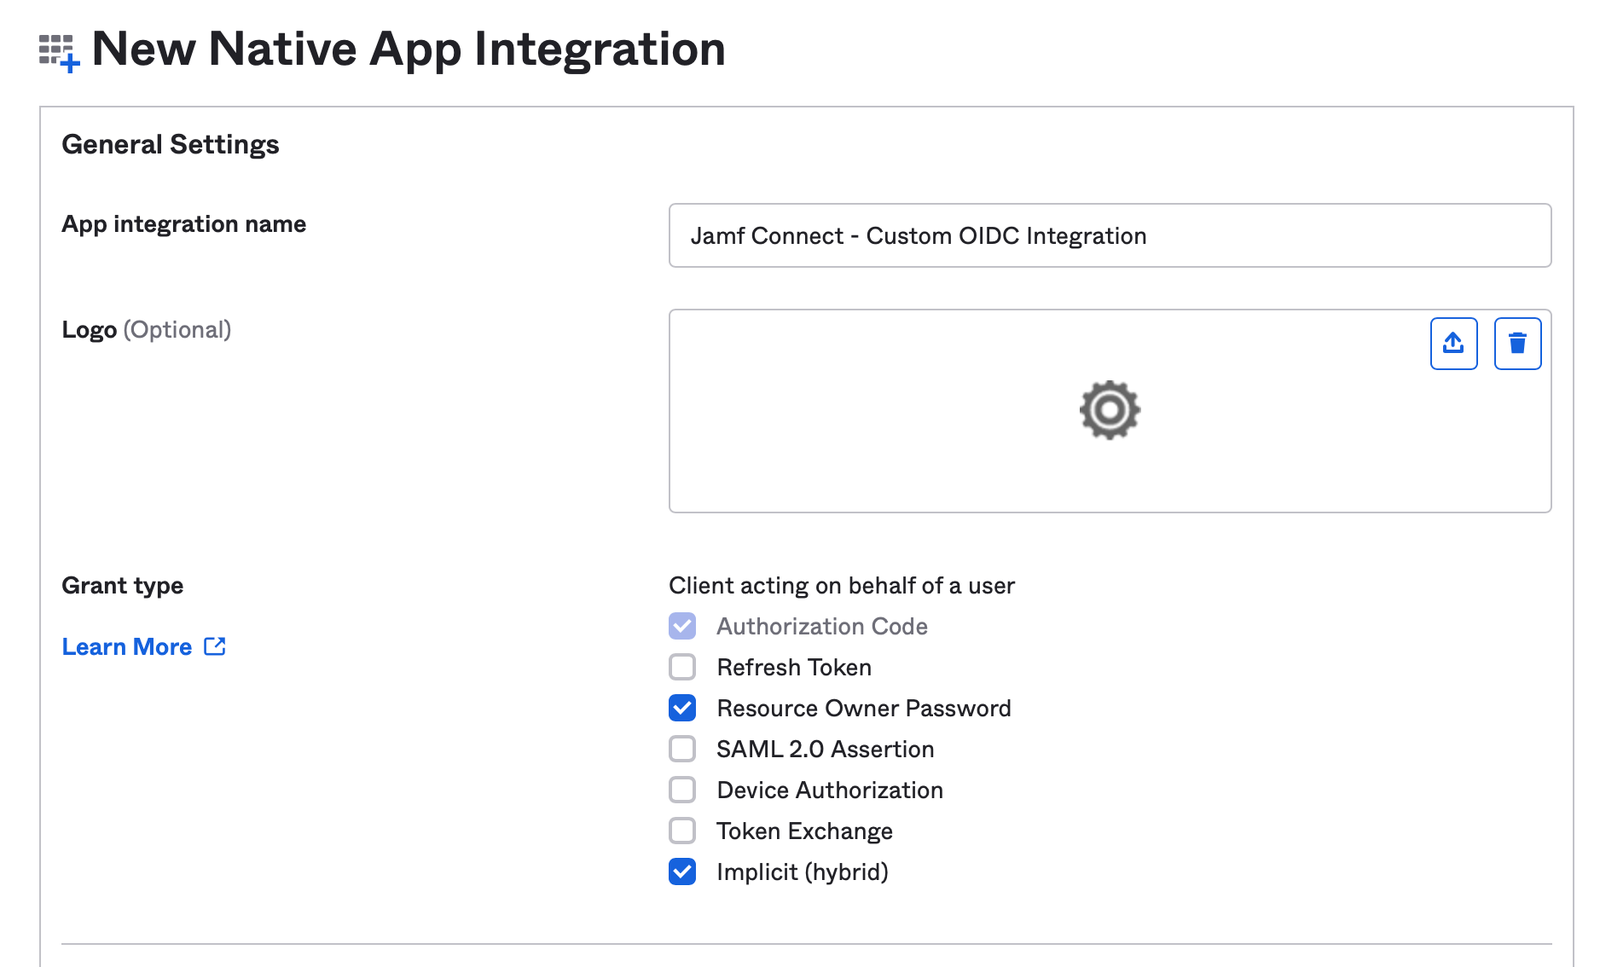
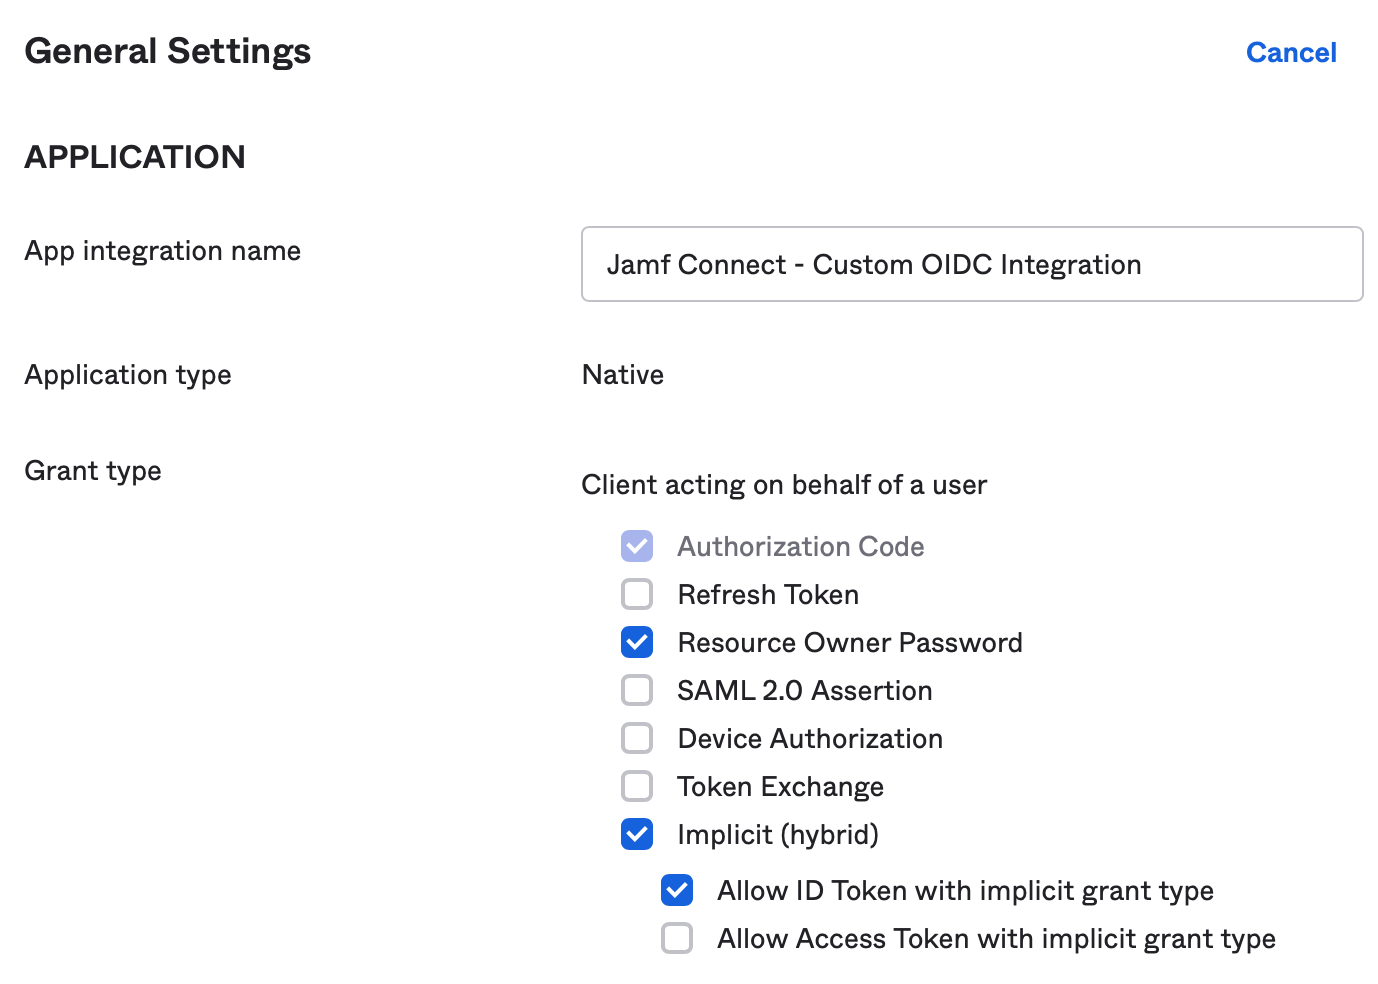
Select a name for the App integration name. In Grant type, select the options for:
- Resource Owner Password (this enables ROPG for ongoing password checks)
- Implicit (hybrid)
Scrolling down for more options, remove the default entries with the X option for Sign-in redirect URIs and Sign-out redirect URIs. Enter a new sign-in redirect URI with the value https://127.0.0.1/jamfconnect
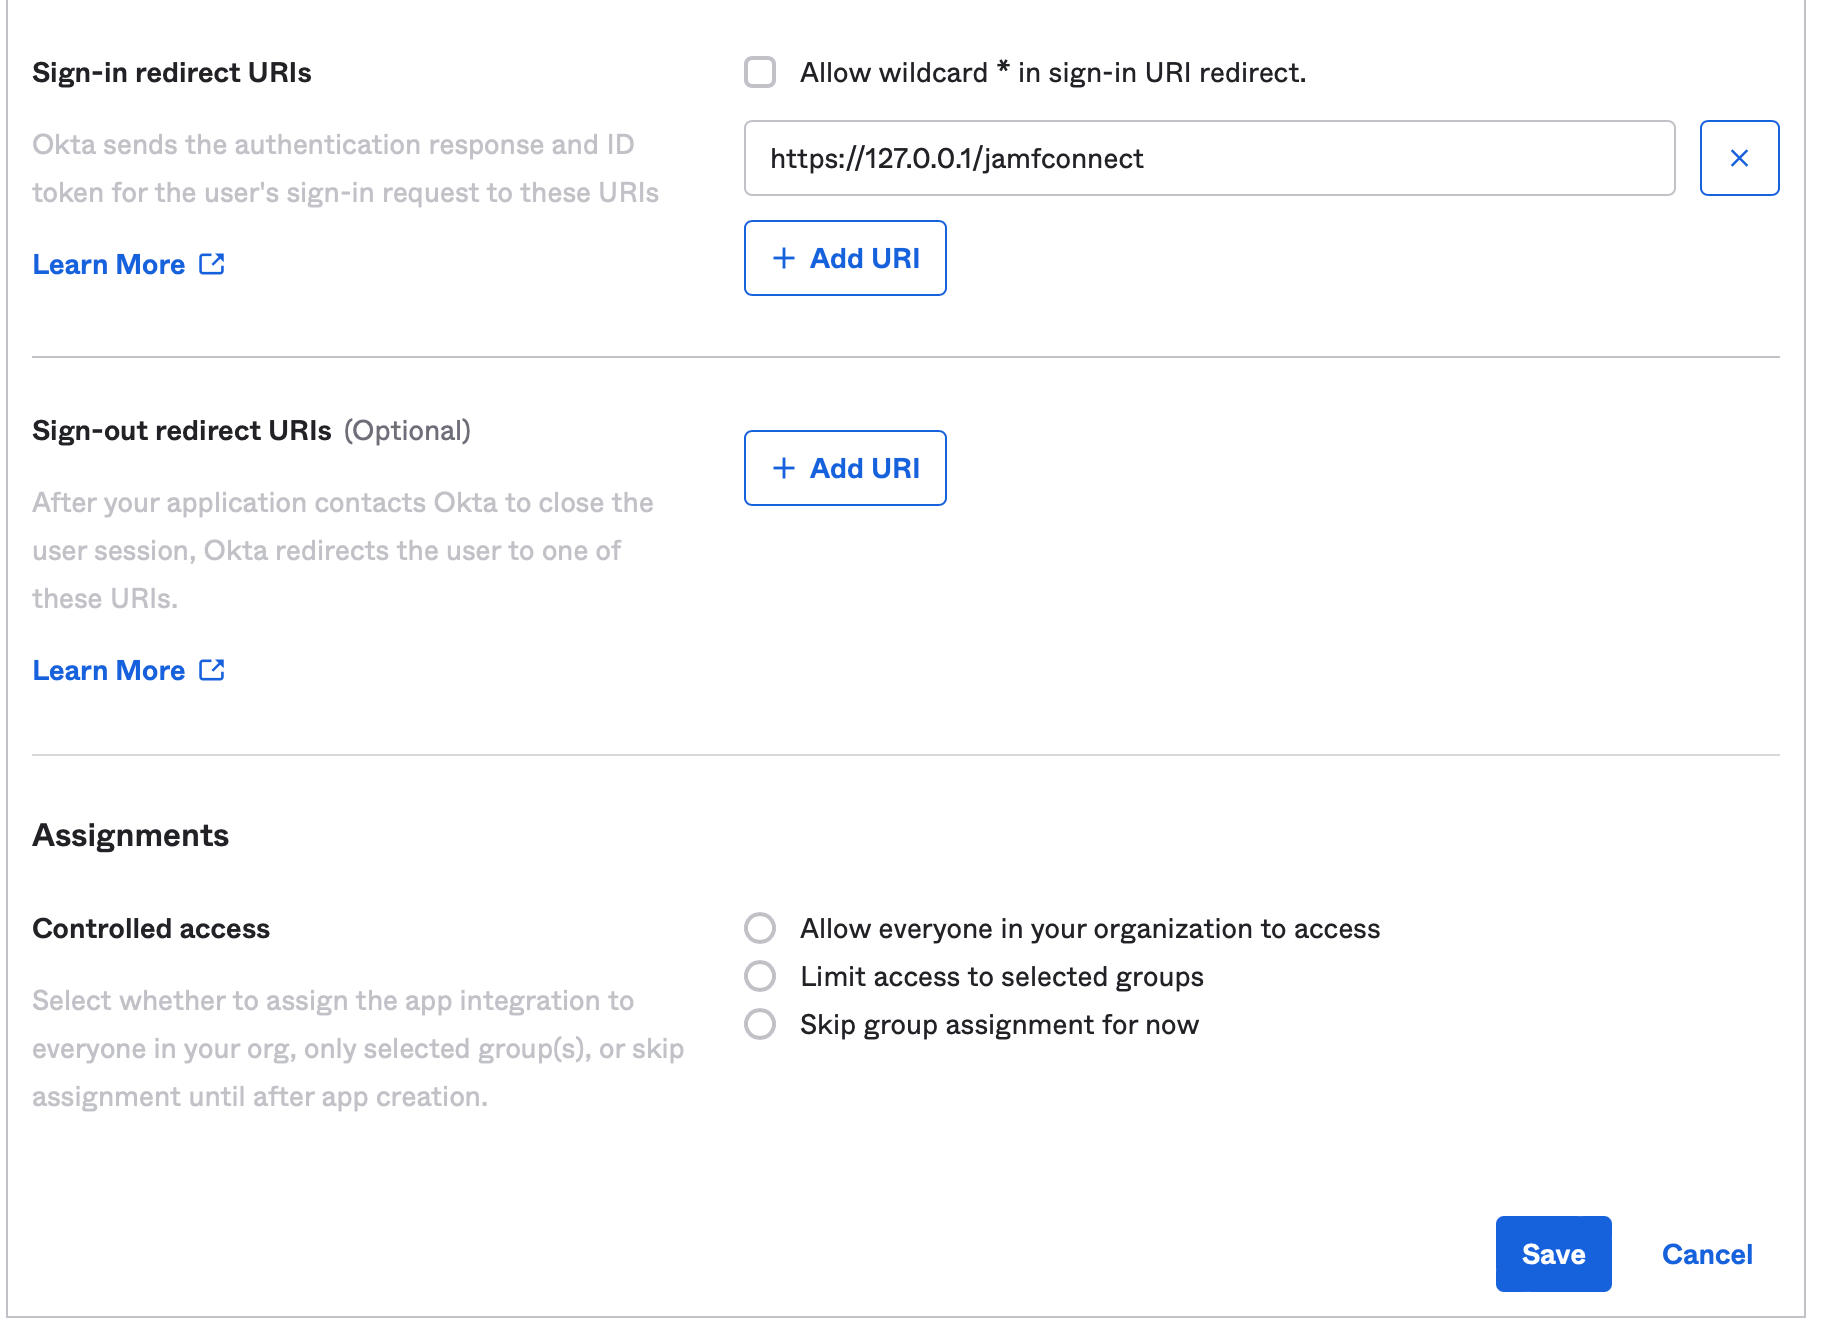
Optionally, assign users to the Jamf Connect application or select Skip group assignment for now. Save your integration.
Once saved, navigate to the General Settings section under the General tab. Select Edit.
In the Grant type section, deselect the option for Allow Access Token with implicit grant type. Select Save in the bottom of the section to save the settings.

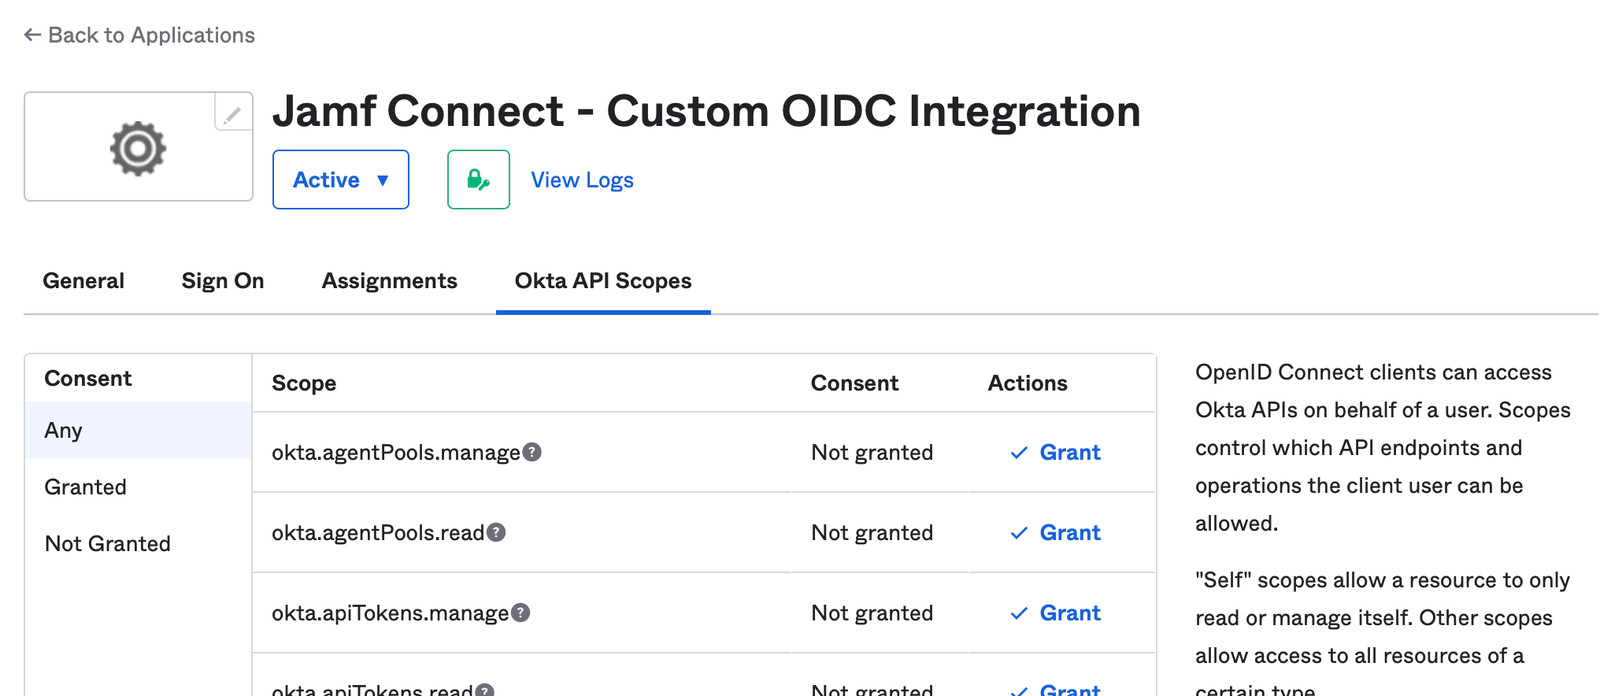
Navigate to the Okta API Scopes option. Find the option named okta.users.read and select the Grant option.

(Optional) Enable Groups in Identity Token
Navigate to the Sign On tab and select the Edit option on the OpenID Connect Token section.
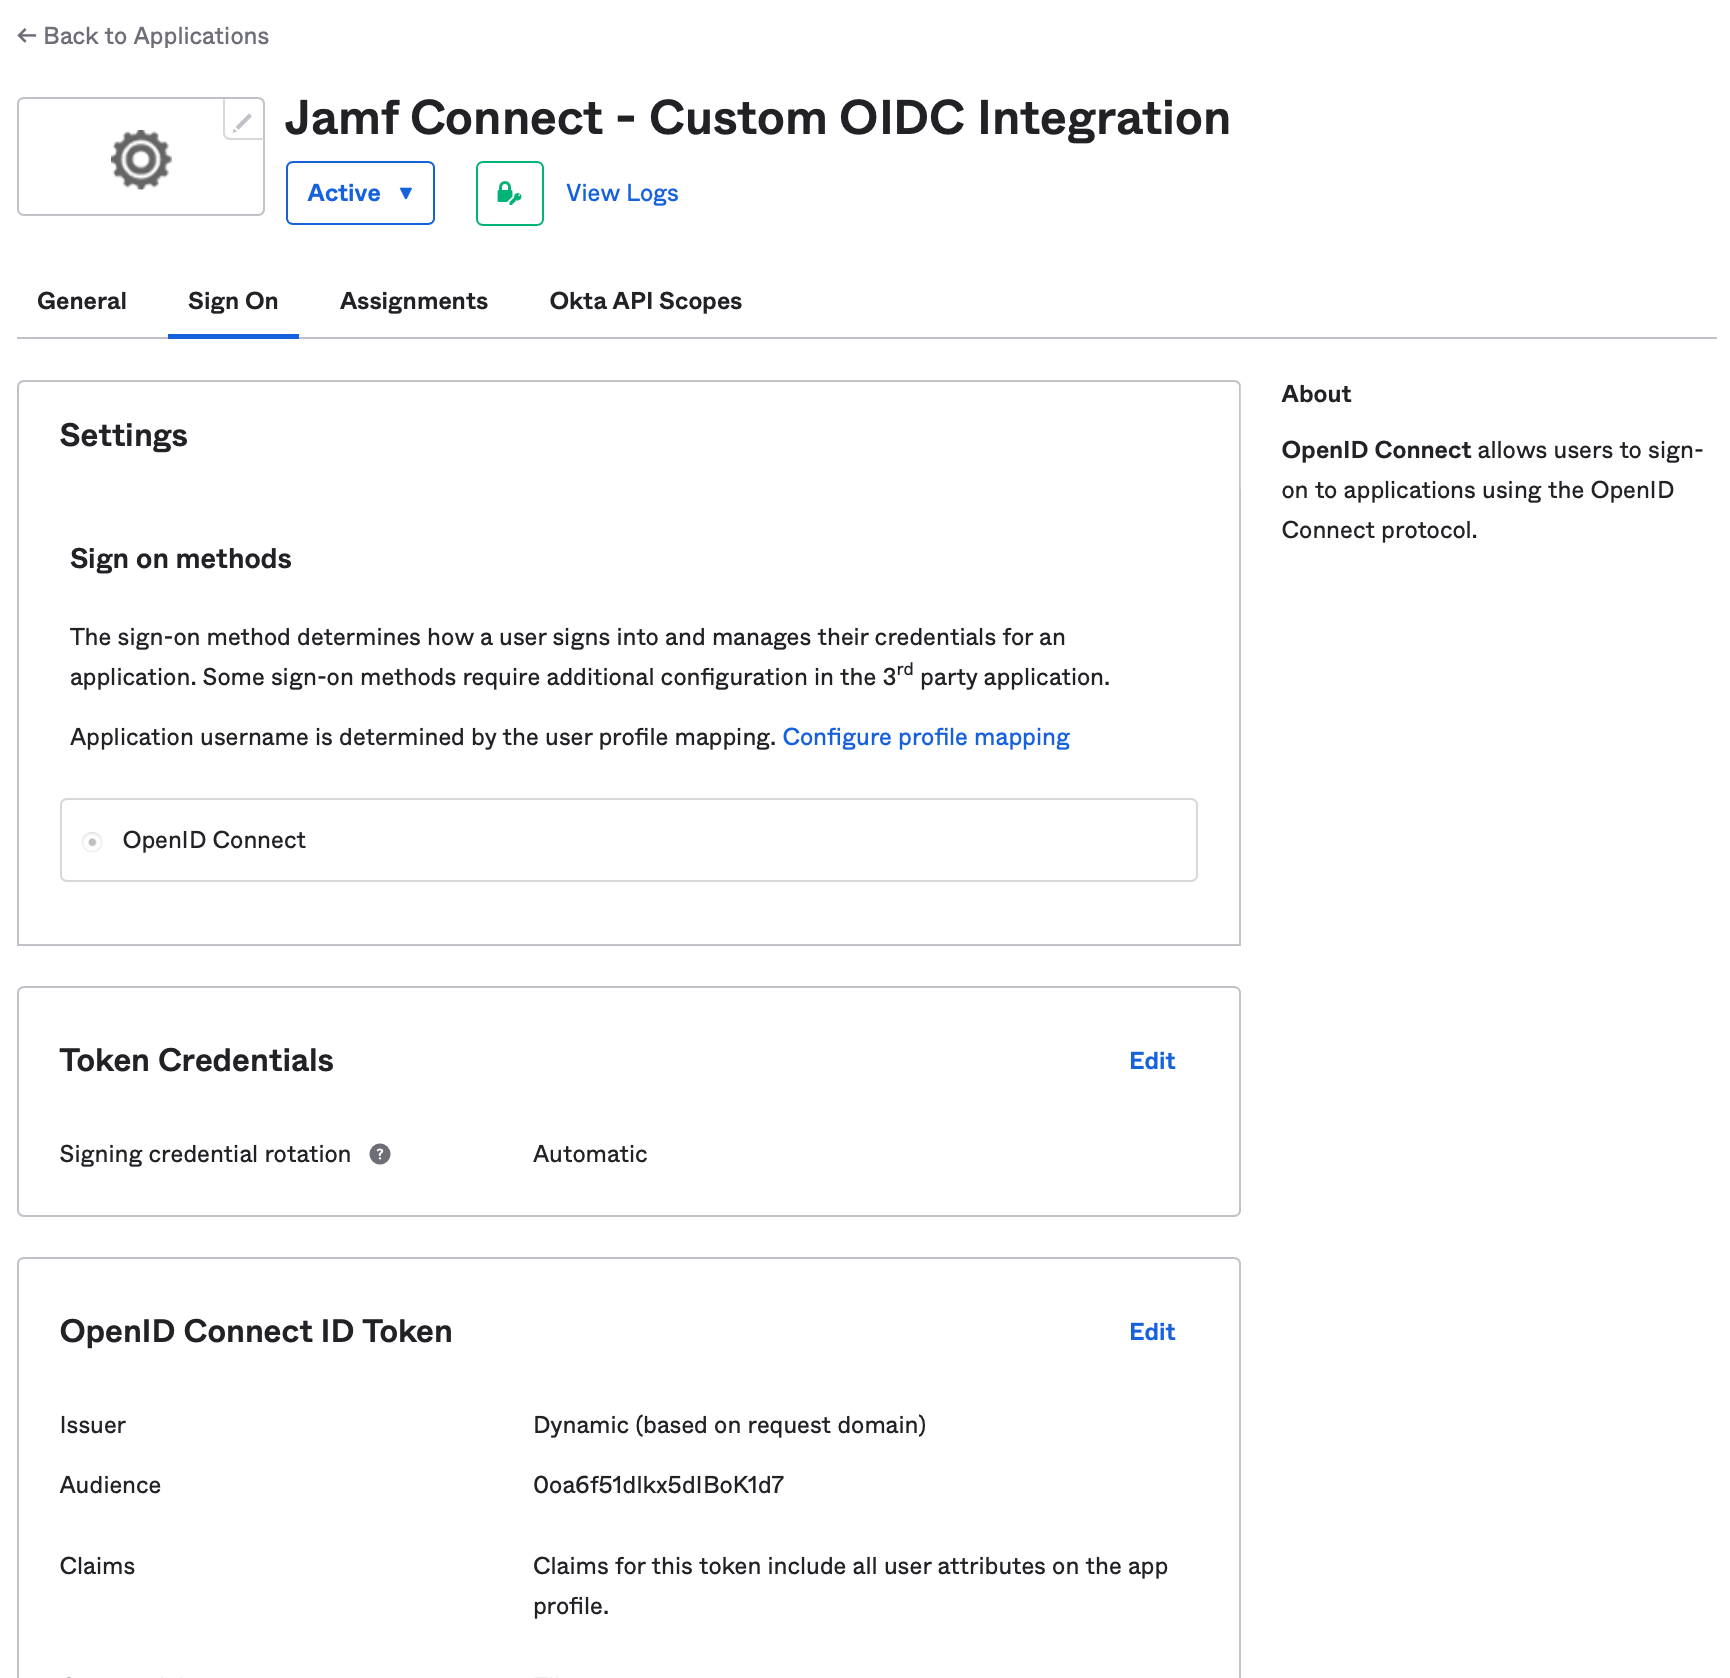
Change Issuer to Okta URL ([your Okta domain]). Change Groups claim type to Expression. Set Groups claim expression claim name to the value groups and the input expression to one of the following options:
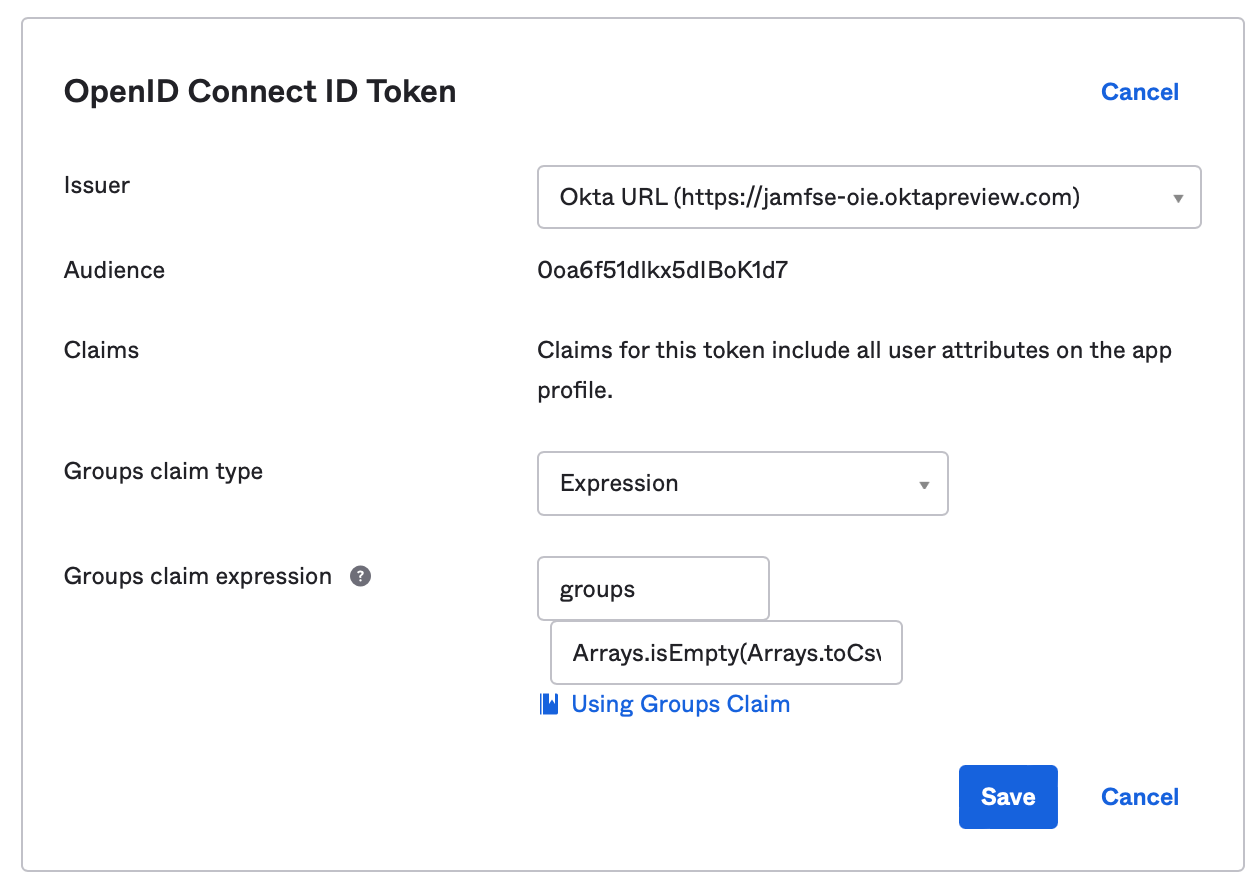
- To select all Okta and all on-premises Active Directory groups (if federated):
Arrays.isEmpty(Arrays.toCsvString(Groups.startsWith("active_directory","",100))) ? Groups.startsWith("OKTA","",100) : Arrays.flatten(Groups.startsWith("OKTA","",100),Groups.startsWith("active_directory","",100))- For additional options, refer to https://support.okta.com/help/s/article/Can-we-retrieve-both-Active-Directory-and-Okta-groups-in-OpenID-Connect-claims?language=en_US&_ga=2.187755176.1689564160.1671132017-1468192215.1669229164
Use the Save button to save changes.
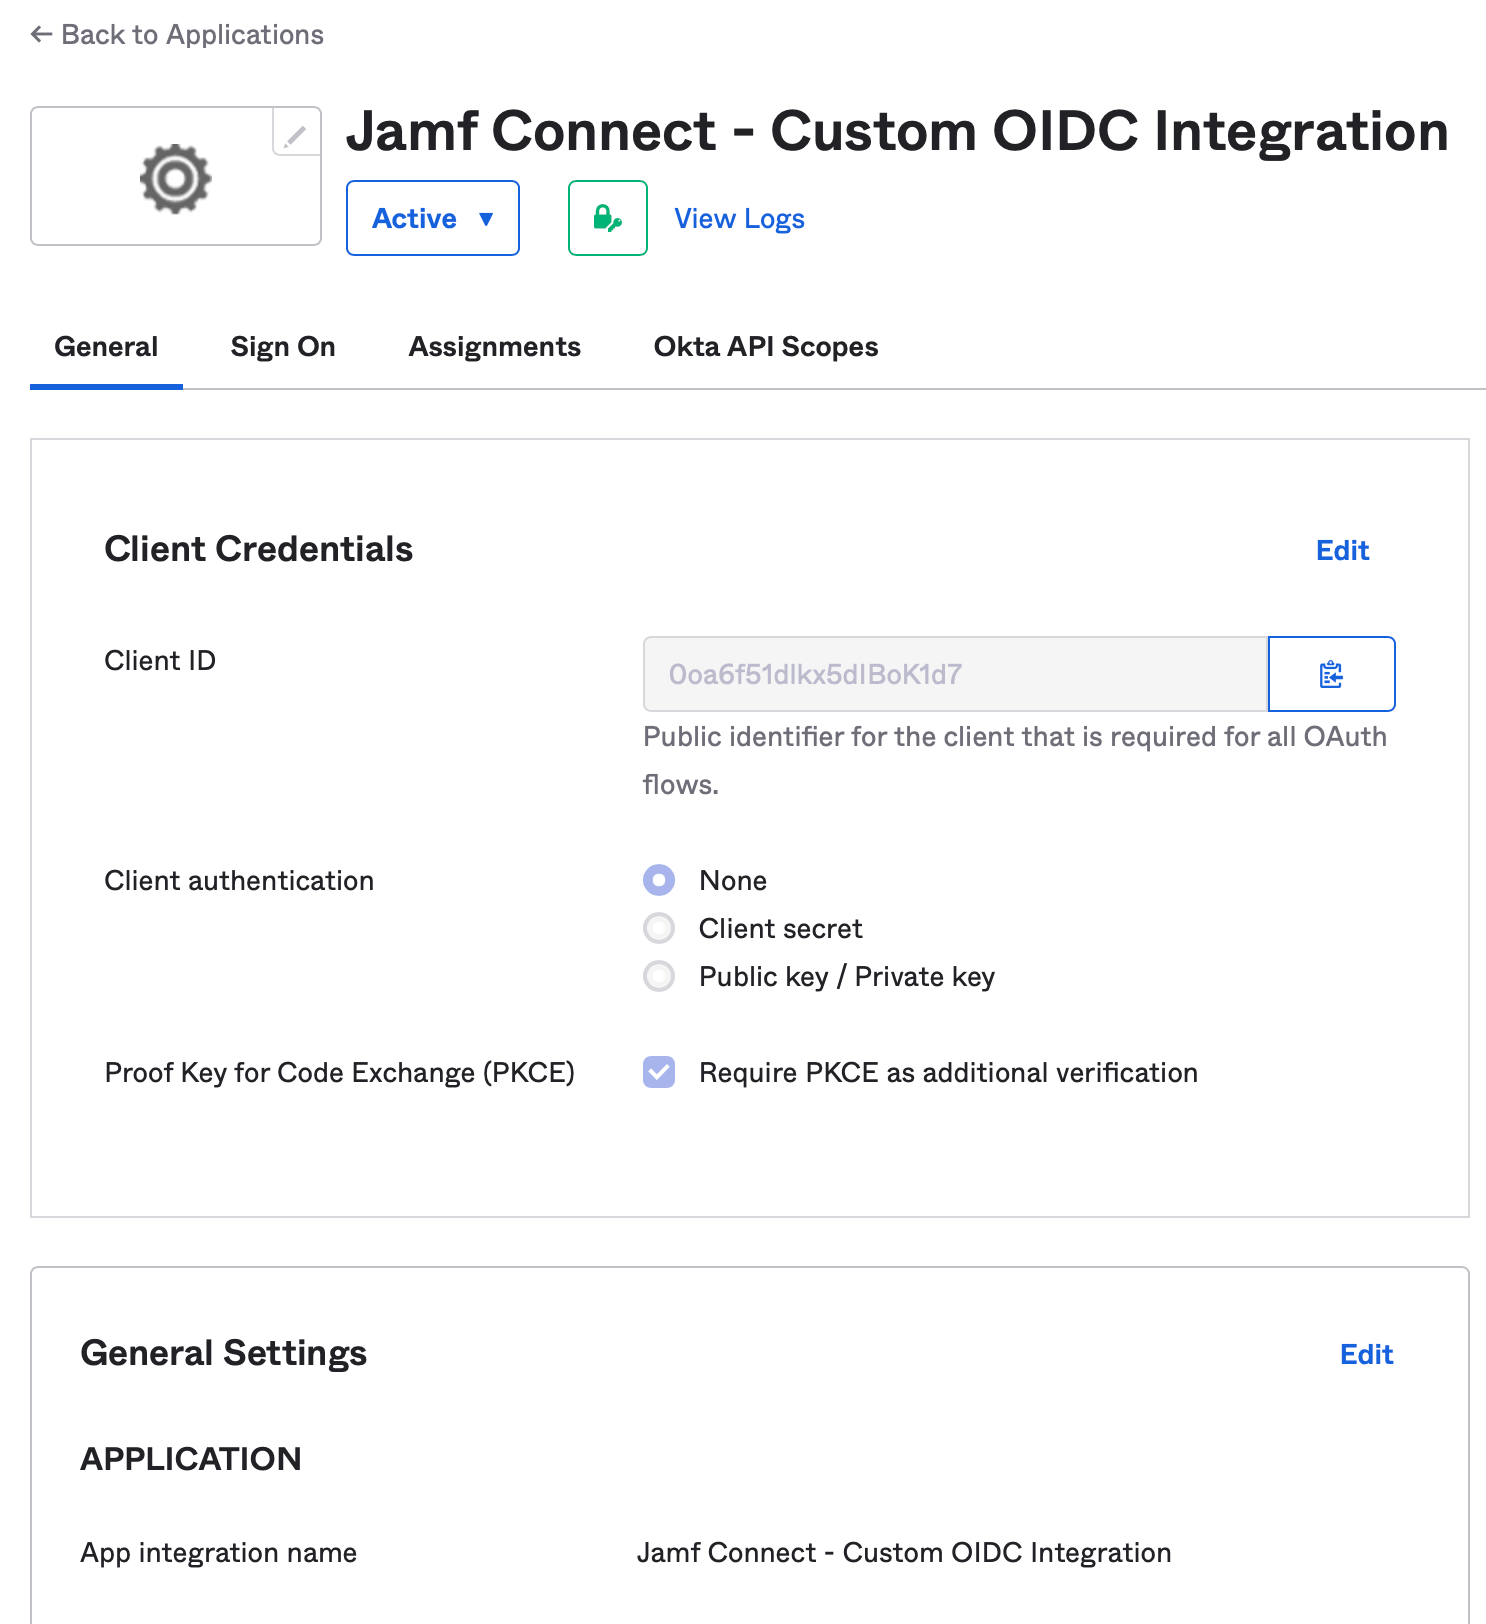
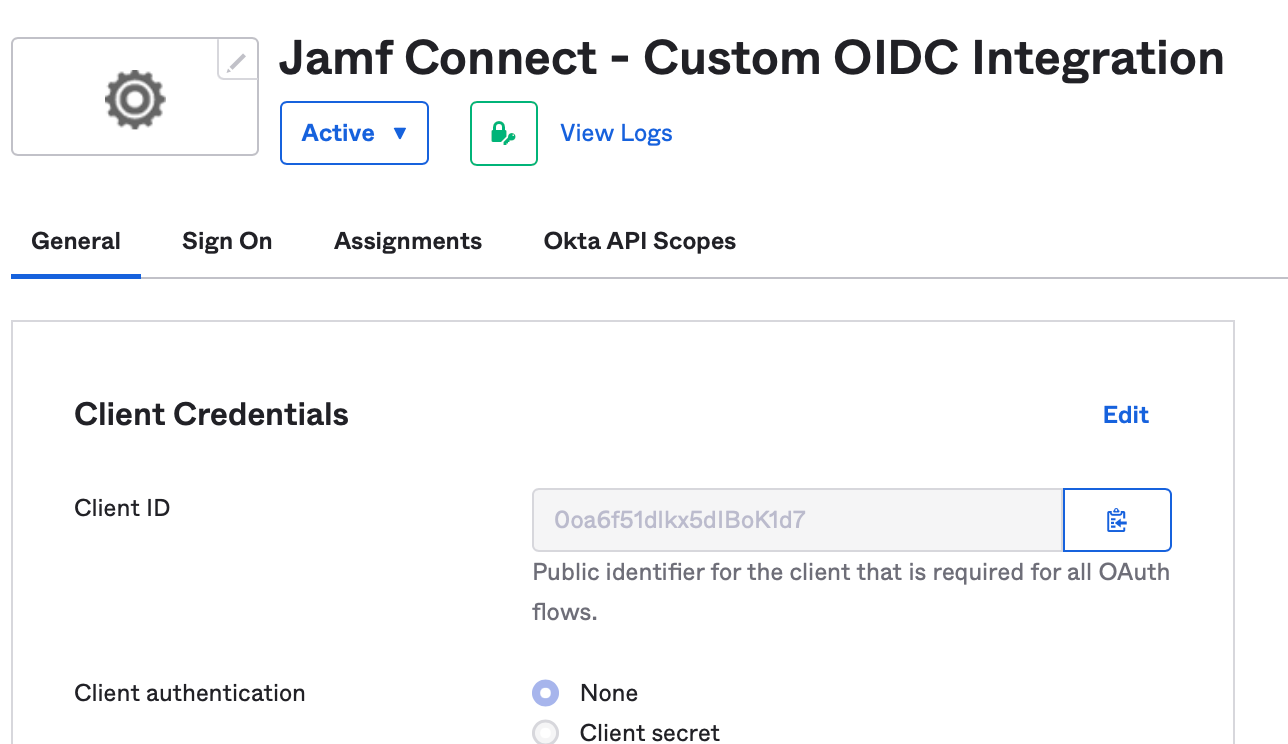
Navigate to the General tab and copy the Client ID value to a safe location. This value will be used to configure Jamf Connect in a later step.
(Optional) Creating a second application to apply multi-factor authentication policies to the Jamf Connect login screen
Repeat the process above to create a second application. In the General tab, navigate to General Settings, select Edit. Deselect the option for Resource Owner Password.
Select the Client ID from the General tab and save this value to a safe location. We will refer to this value as the OIDC Application Client ID in future instructions. This value will be used to configure Jamf Connect.
Assigning users to the Jamf Connect applications
Select the Assignments tab. Users can be assigned to the Jamf Connect application either individually or through group membership. If you are using the optional second application for enforcing MFA at login, make sure the membership assignments match for both applications.
Security settings
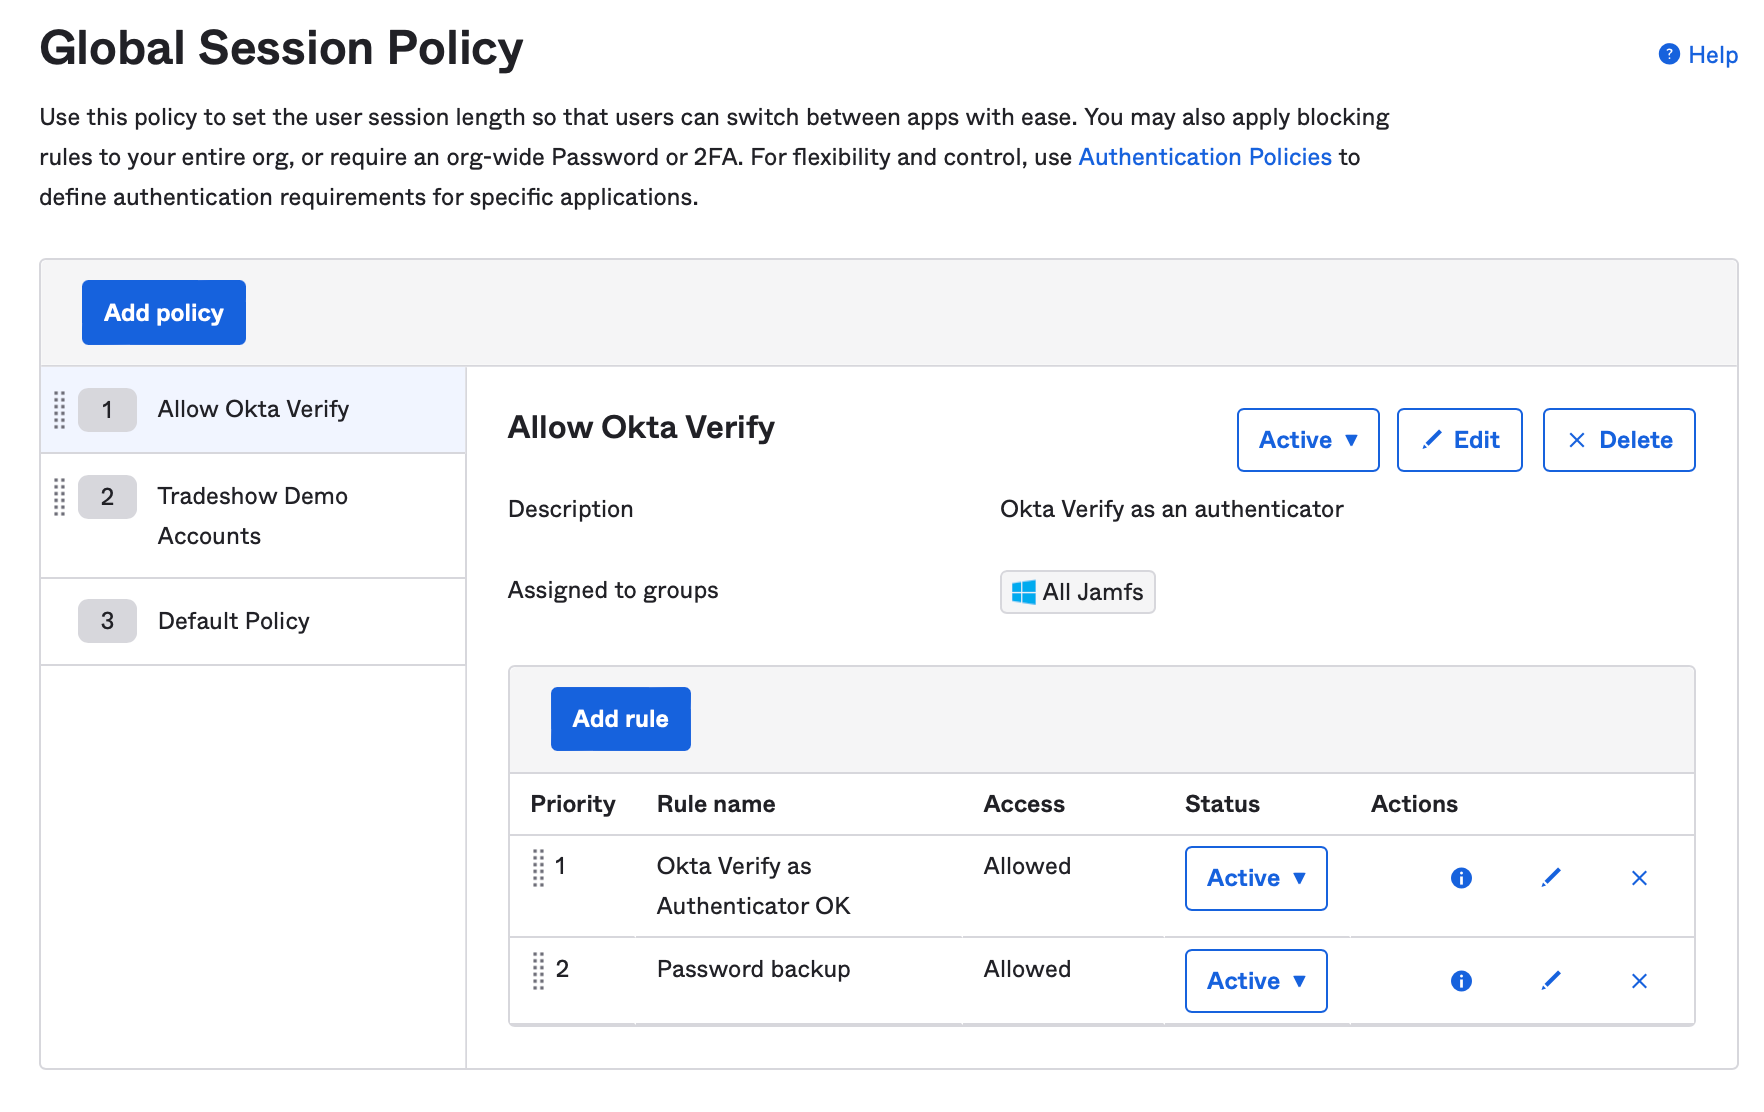
Okta Identity Engine applies login policies in two ways:
- Global Session Policy - Applies a high level requirement to all logins for a group of users, regardless of the application. This was used in Okta Classic engine to enforce MFA for Jamf Connect logins.
- Authentication Policies - A very granular set of rules that can be applied to an individual application.
With Identity Engine and Jamf Connect as a Custom OIDC app, create a security policy that:
- Global Session Policy:
- Allow for the use of a user name and password for authentication
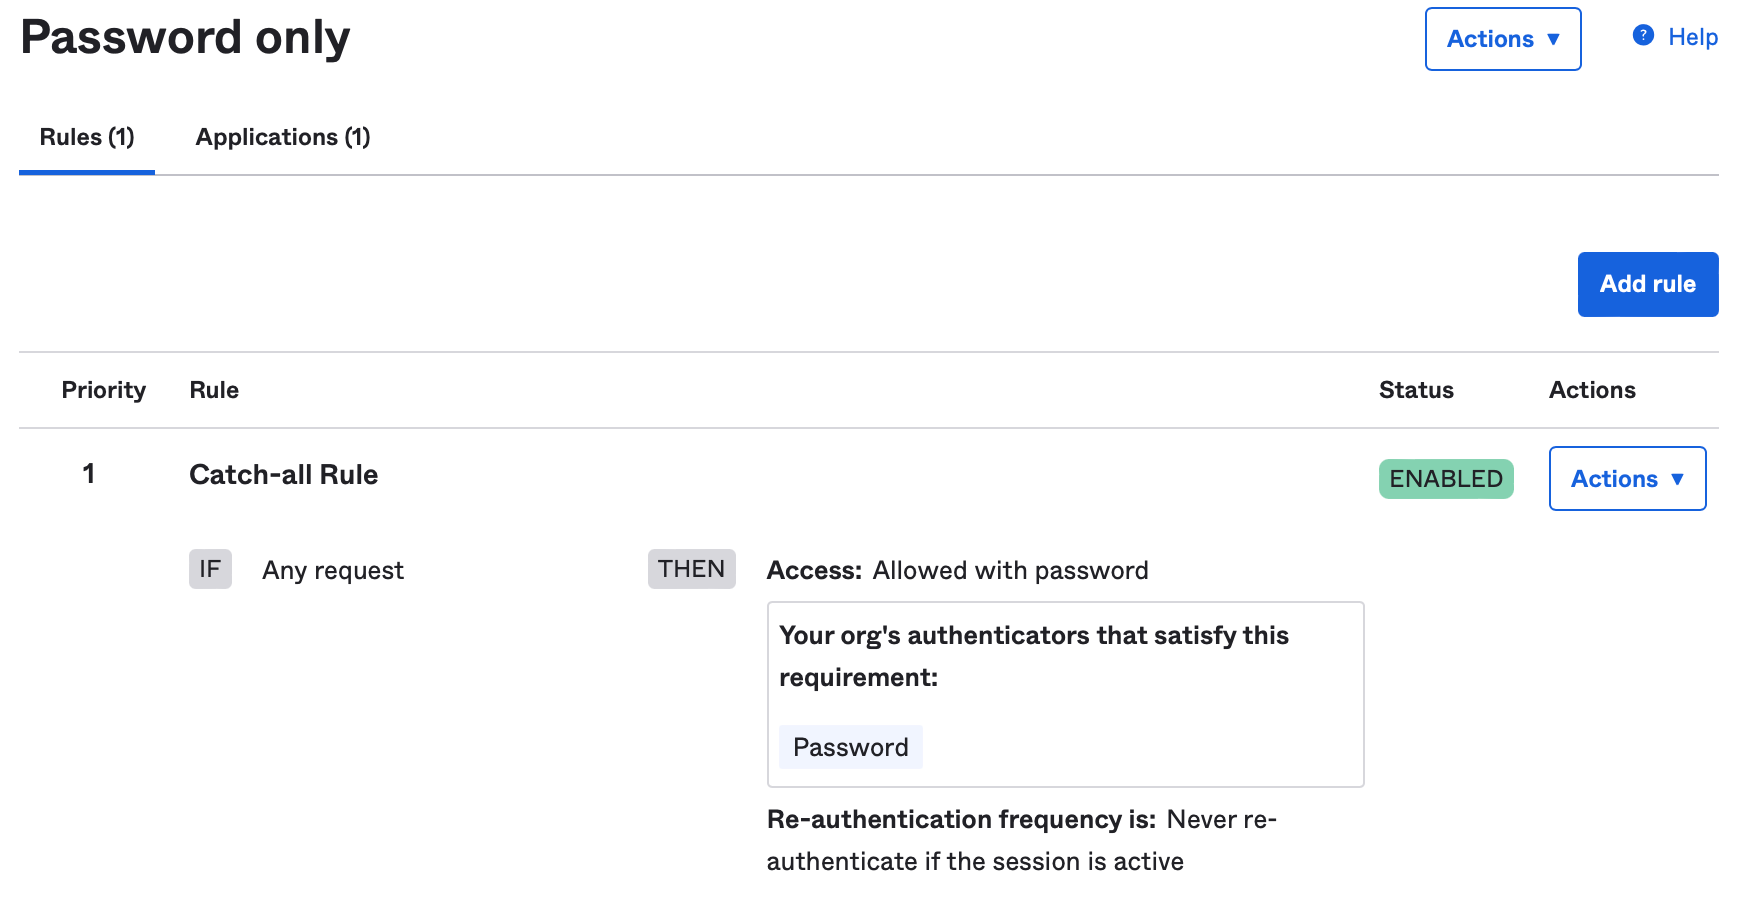
- Authentication Policies:
- A password only policy to allow for silent non-interactive background check of the password. If using one app, apply this to the Jamf Connect application created in the first step.
- (Optional) If using two applications to enforce policies at the macOS login screen, create a policy with your organization requirements for the login screen. Apply this policy to the second application which does not have the resource owner grant applied.
- Avoid policy requirements that require the device be a managed device or a registered device. Keychain items to validate this requirement may not be available at the login window.
- Avoid policy requirements that check for a device compliance state. If a device is out of compliance, a user could not log into the machine to get the device back into compliance.
- Do not allow for the use of hardware authenticators like FIDO2 tokens. Hardware authenticators cannot be used by WebKit as of the writing of this article (15DEC2022).
Use Jamf Connect Configuration to test configuration
Download the latest version of Jamf Connect from your assets located at account.jamf.com. In the Jamf Connect software disk image package, copy the Jamf Connect Configuration application to your Applications folder on your Mac.
Open the Jamf Connect Configurations app and create a new configuration. If this is your first time creating a configuration, a new config is created by default. If not, use the + in the lower left corner of the window to create a new configuration.
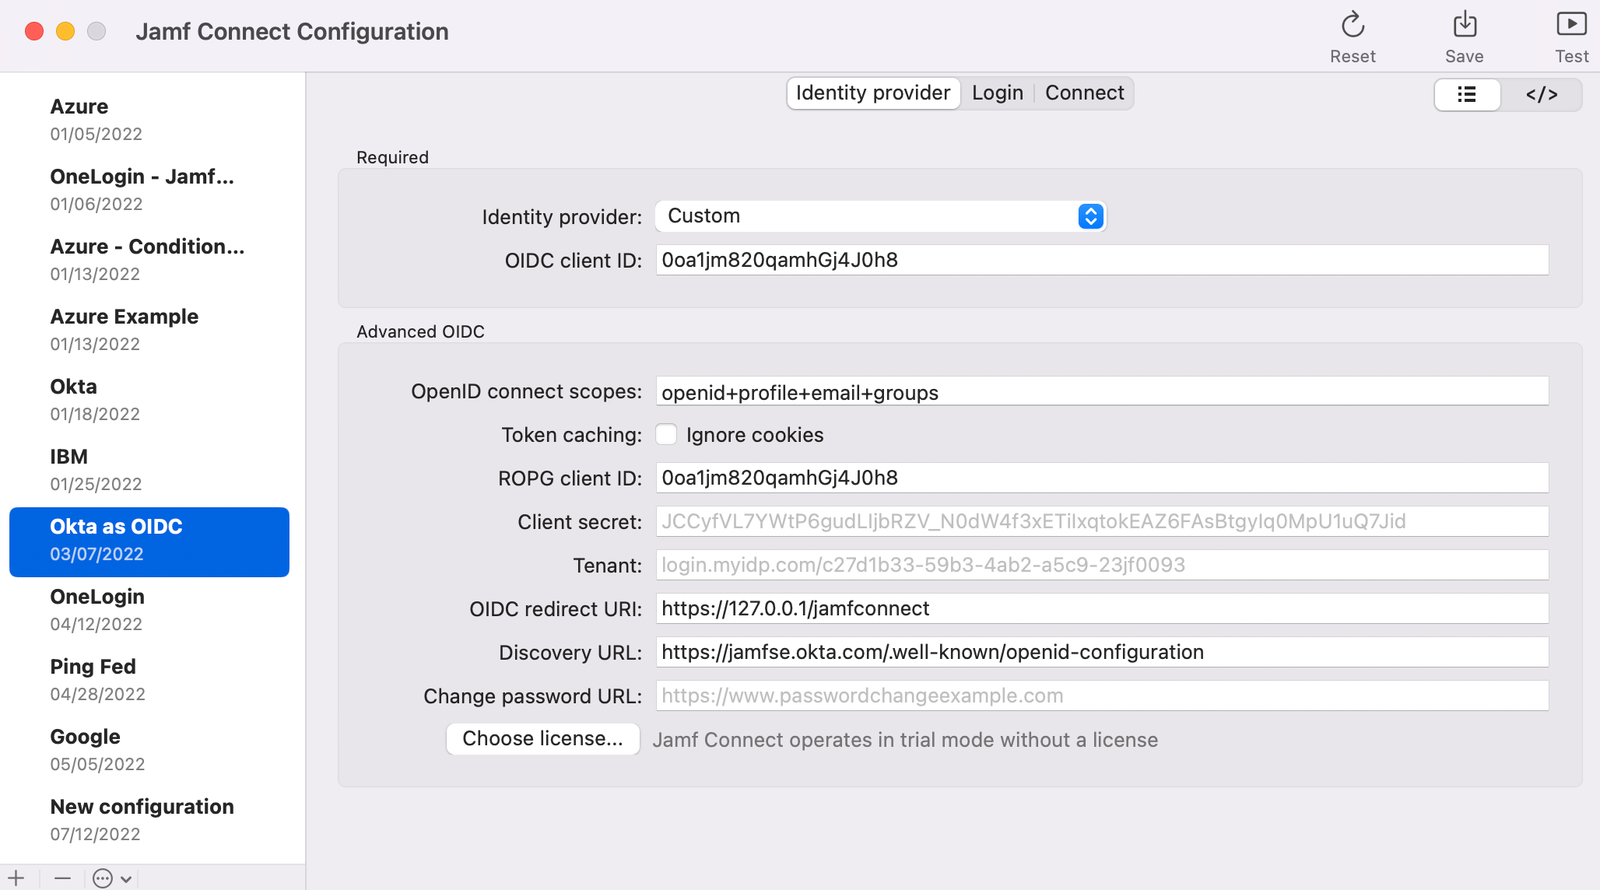
Identity Provider: Select Custom
OIDC client ID:
- If you have created two applications, use the second application Client ID where the resource owner grant is not selected
- If you are only using one application, use the Client ID you recorded in the first step.
OpenID connect scopes: Use the value
openid+profile+email+groupsROPG client ID: Use the Client ID you recorded in the first step.
Discovery URL: Substitute the name of your Okta tenant in the following format
https://[your Okta tenant like org.okta.com]/.well-known/openid-configurationNote: Do not use the domain that contains a -admin like organization-admin.okta.com. This is the URL for your administration page, not your Okta login page.
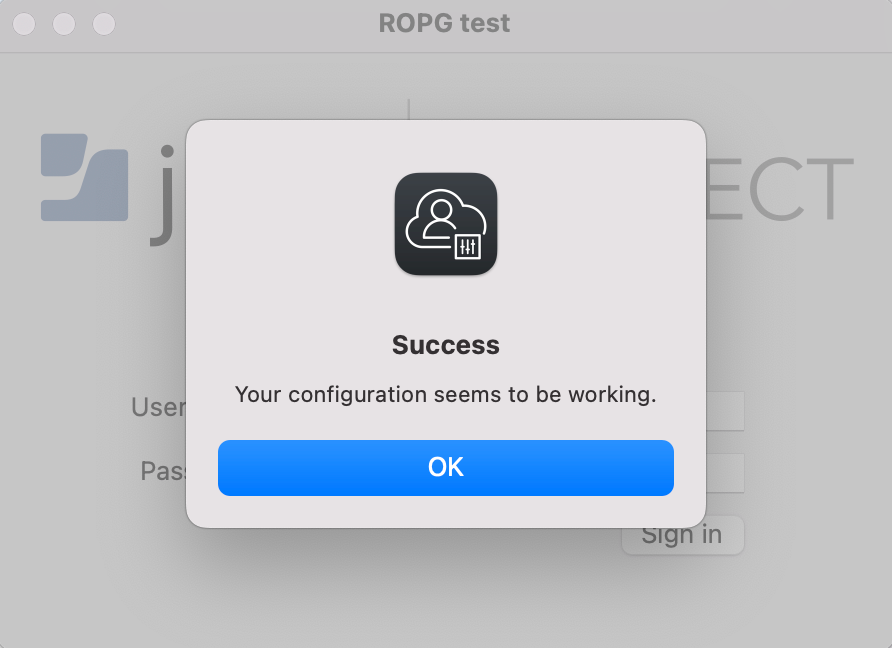
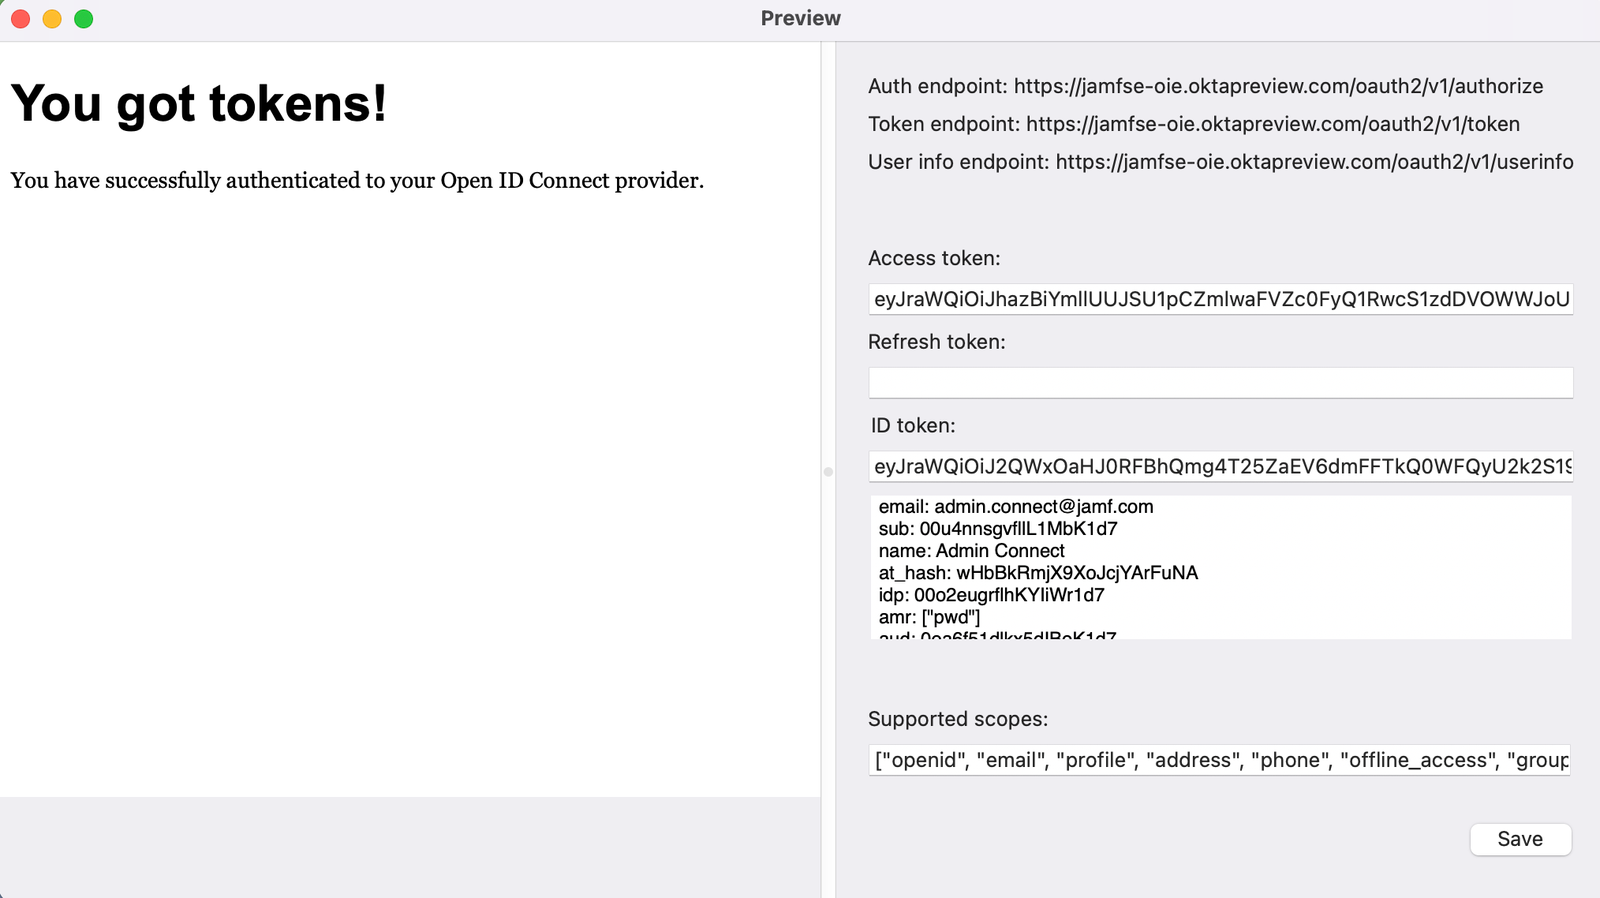
Test the configuration. Use the Test button in the upper right corner of the window to test both OIDC and ROPG.
A successful OIDC test will appear like the following:
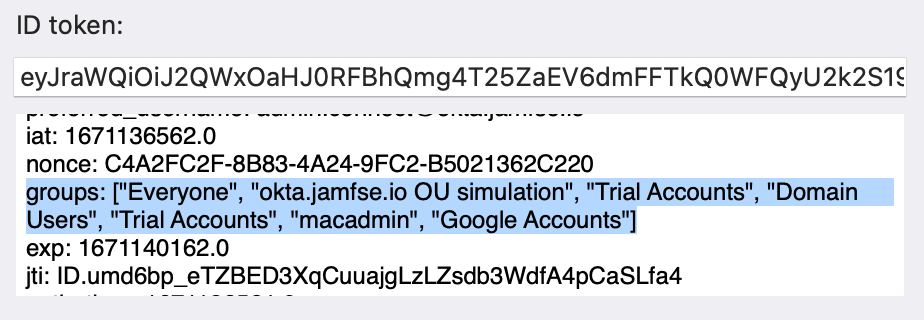
The decoded ID token field is a scrollable text box. Use this to determine if the groups you expect have been sent in the token:
A successful ROPG test will appear like the following: