

Hi everyone, I. HATE. PRINTERS. That being said, we have to work with them.

and... Canon does not make it easy.
Here is what I was able to find out from several places online, in order to get this "installer" to actually work. So let's jump on to our Macs and get this over with.

Downloading the "Installer"
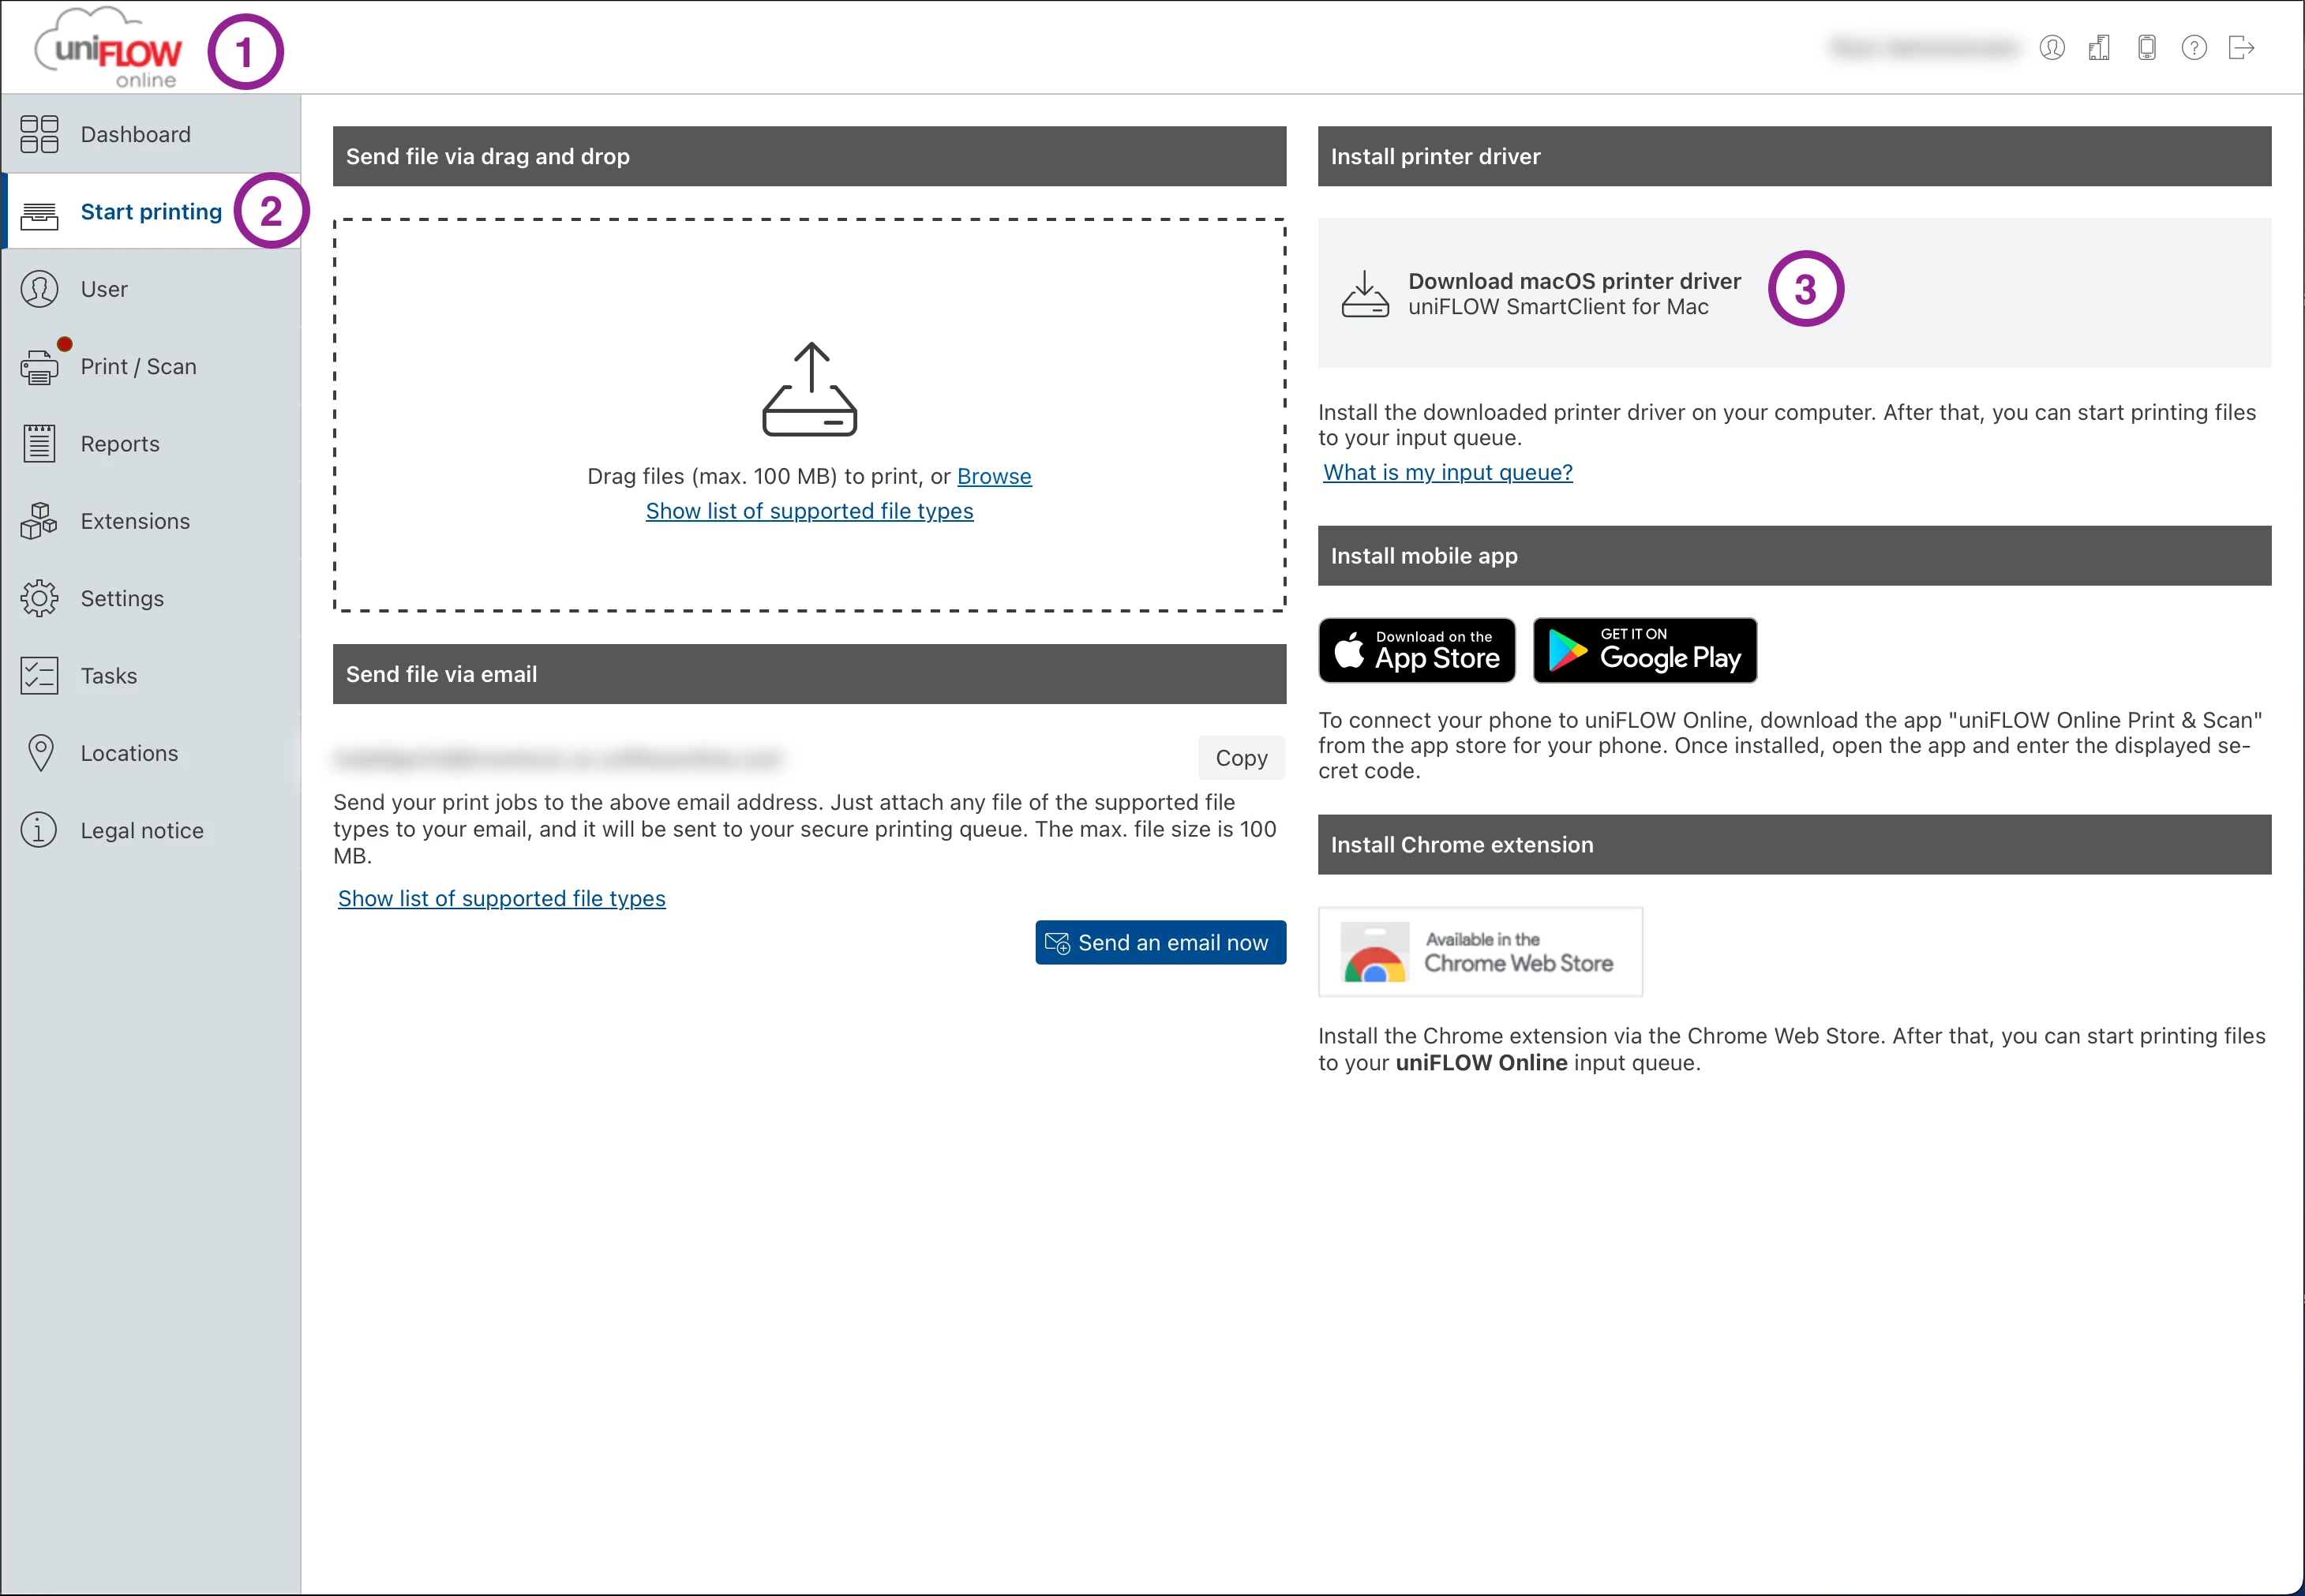
1. Log into your Uniflow Online (web)
2. Start Printing (Side Bar)
3. Install Printer Driver > Click [Download macOS printer driver]
- Navigate to Download Folder
- Open SmartClientMac.iso > Open SmartClientMac Volume >
- Notice here you only have 1 file. But actually there are 4. 3 are hidden.
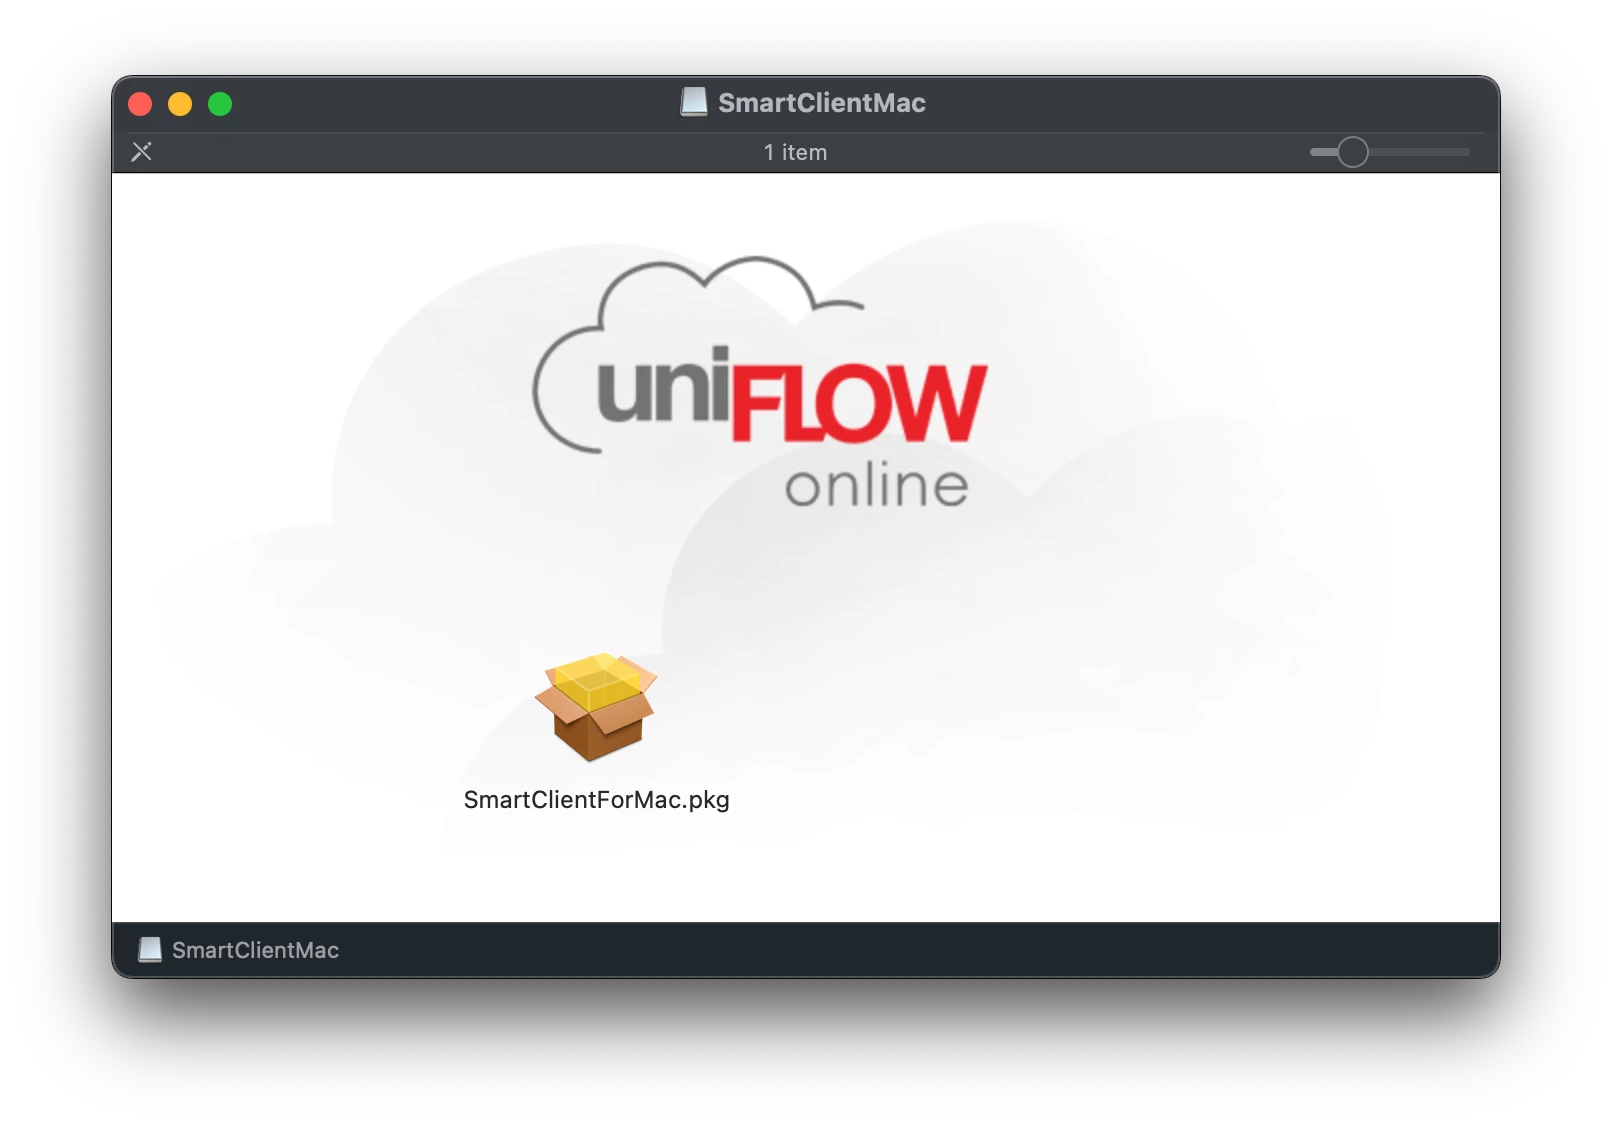
- On your Keyboard us the show hidden files shortcut: Command+Shift+.(Period)
Getting Files in the Right Location
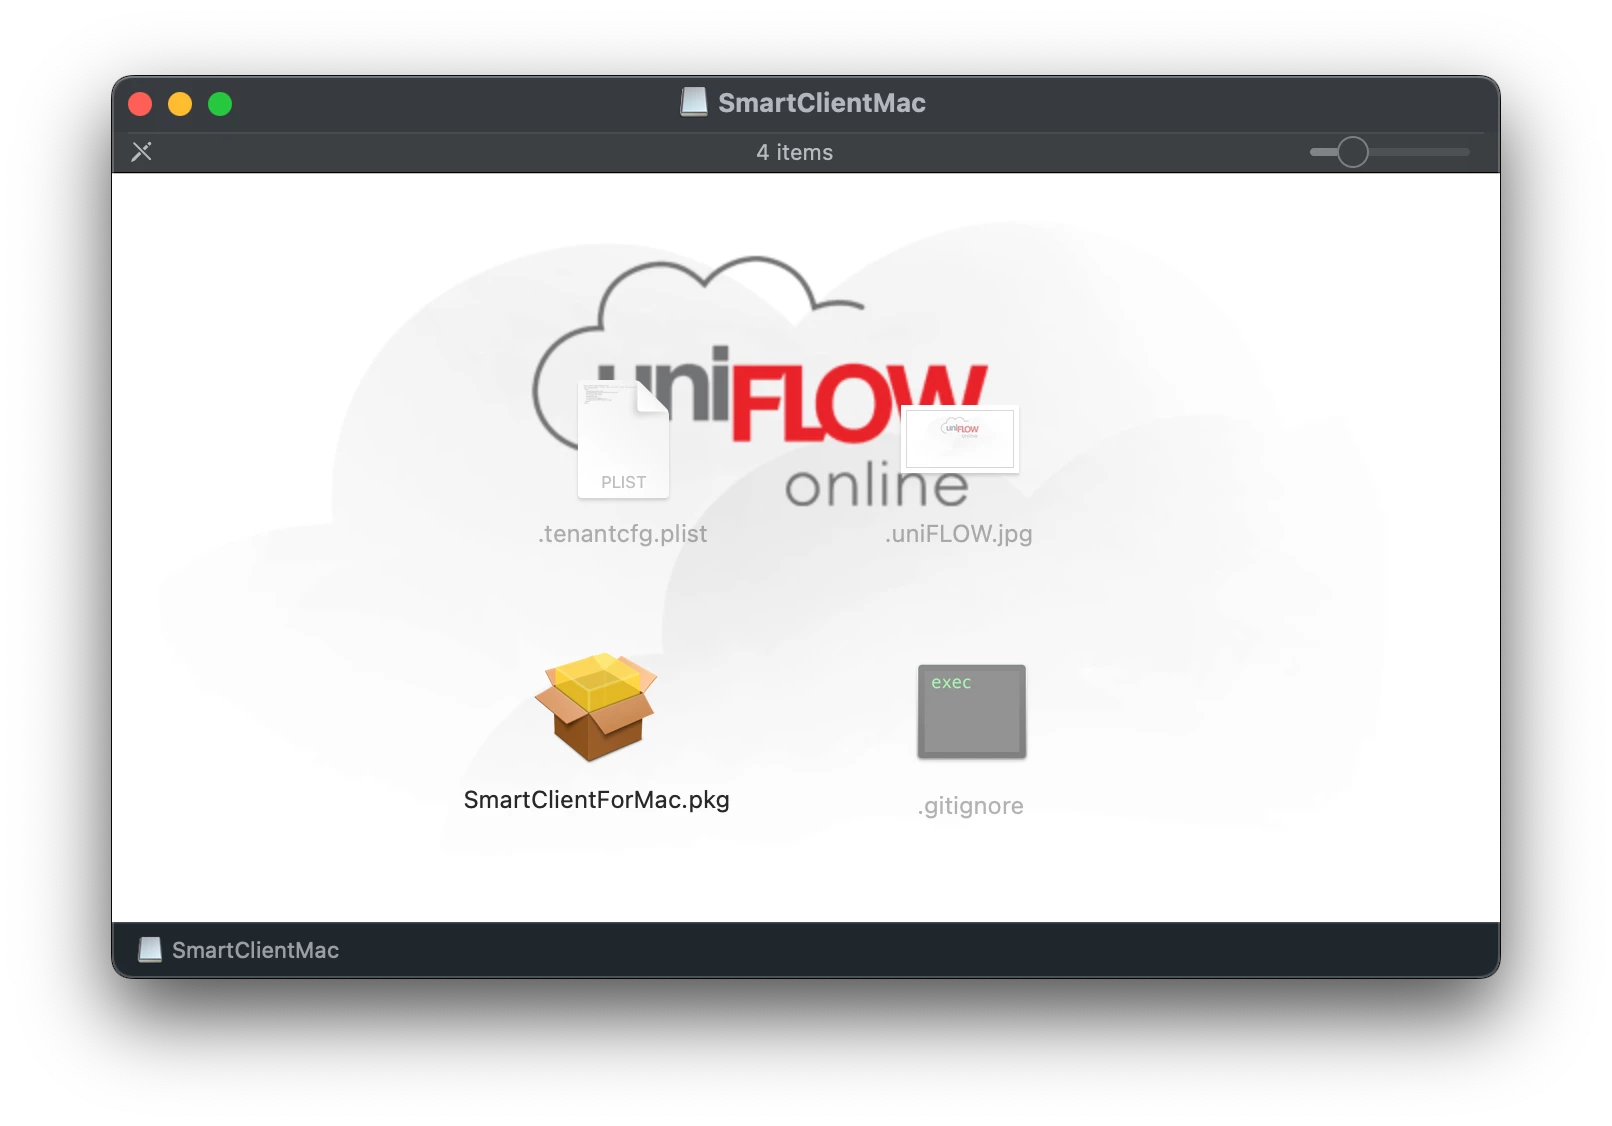
- You will now see 3 other files. We only need the SmartClientForMac.pkg and tenantcfg.plist files.
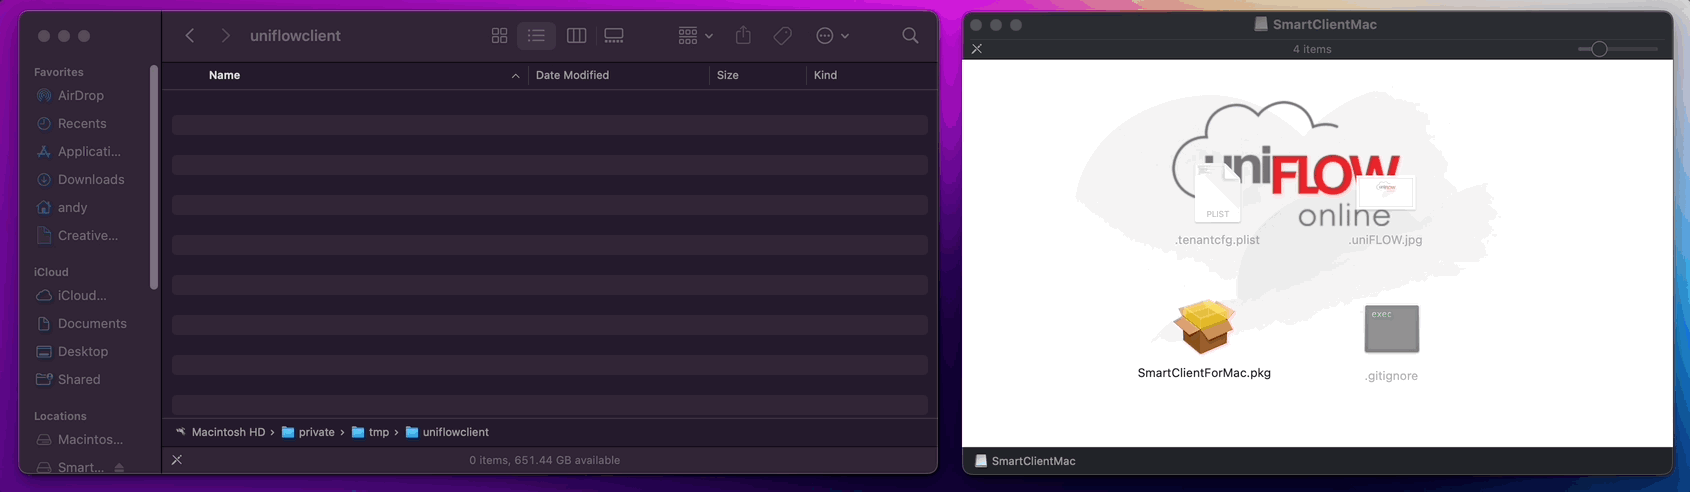
- Next, Go to Finder > Go > Go to Folder (Shift+Command+G)

- Enter 'private/tmp'
- Next create a new folder called 'uniflowclient'
- Which is now located in private/tmp/uniflowclient

- Drag the two files (SmartClientForMac.pkg and tenantcfg.plist) from the mounted SmartClientMac to the private/tmp/uniflowclient folder
- Close the SmartClientMac window.
Using Composer to Create the PKG
- Next Open Composer
- Drag the uniflowclient folder from finder into composer
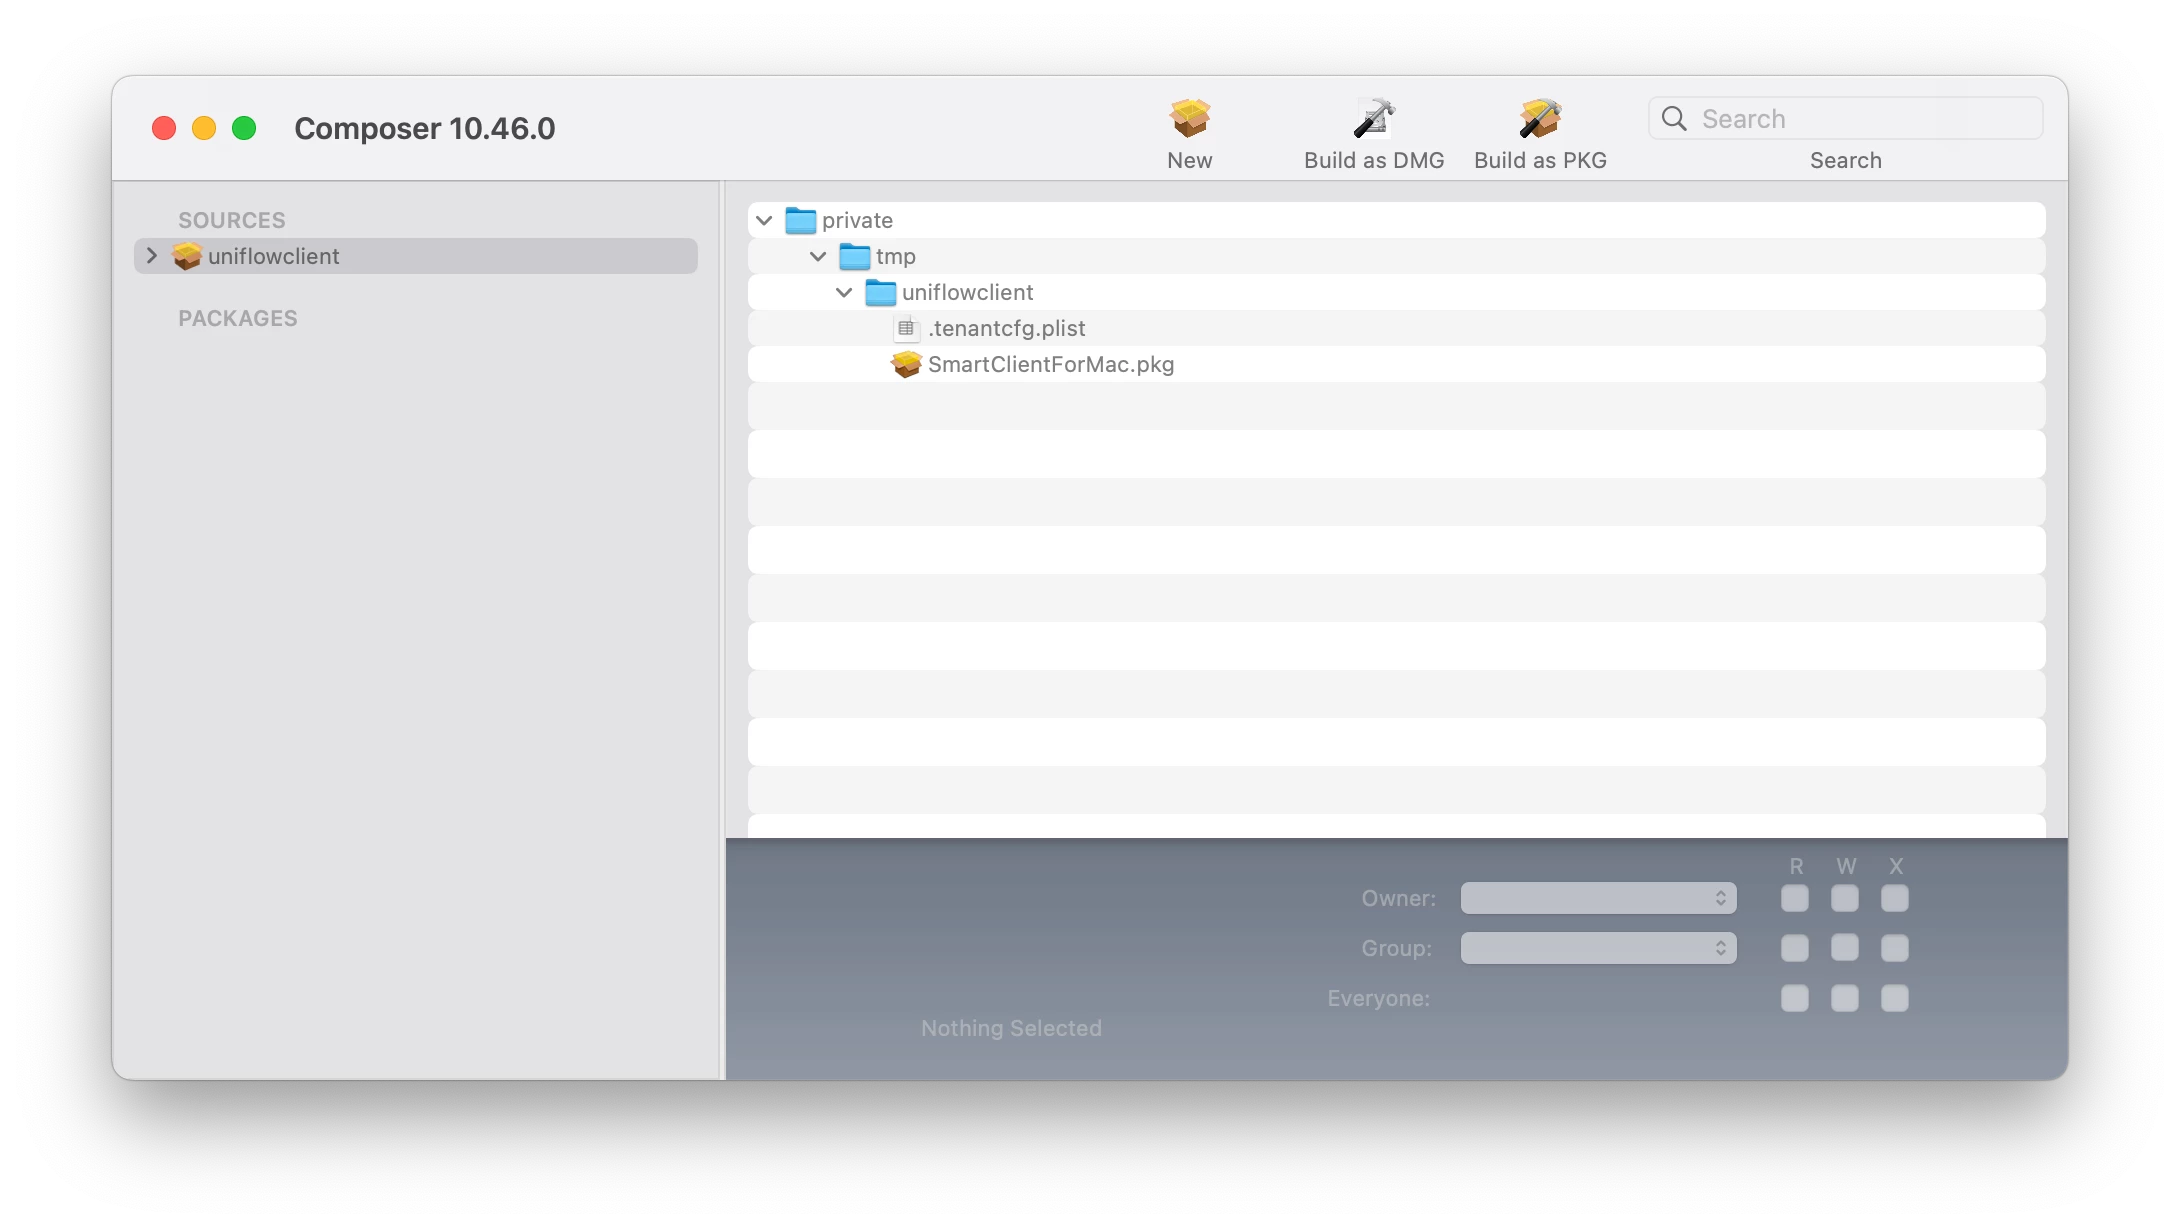
- Click on uniflowclient under Sources, navigate private > temp > uniflowclient to confirm files are there
Next click the ⬇️ next to Sources
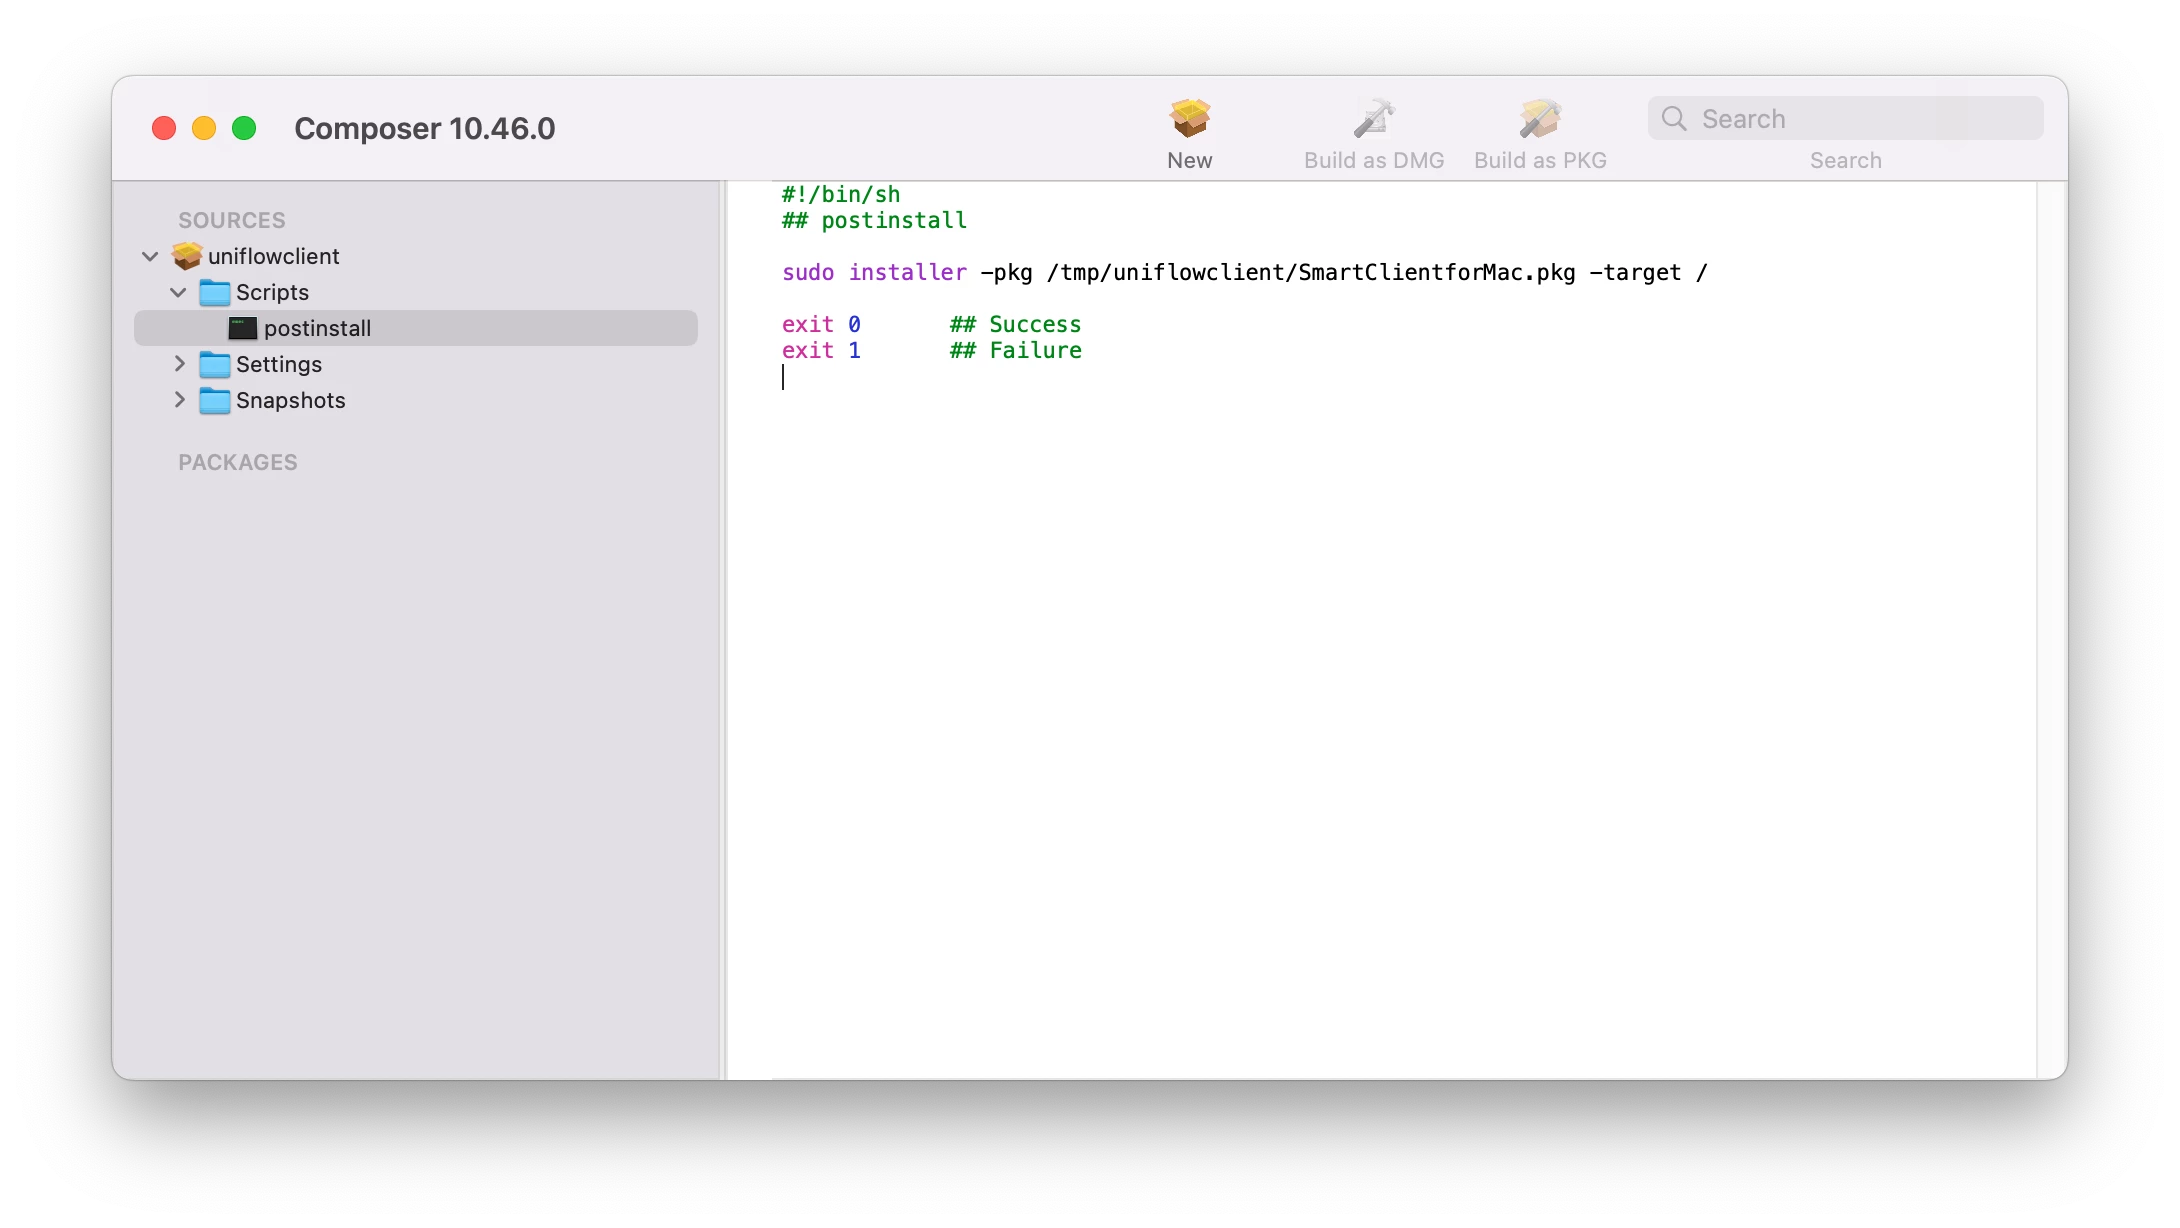
Right click on Scripts > Select [Add Shell Script] > Select [postinstall]
Next replace all text with the following:
#!/bin/sh
## postinstall
sudo installer -pkg /tmp/uniflowclient/SmartClientforMac.pkg -target /
exit 0 ## Success
exit 1 ## Failure
Now click [Build as PKG] in the composer toolbar. Save it to your Mac.
Boom. Chef's Kiss, You're PKG is ready to take out of the oven.

Now you can upload it to Jamf Pro, then put into a Policy to push out to your Macs.
Hope this helps you out!


