If you're struggling to get this going, here is a full guide step for step. I've attached screenshots of my original guide with details and formatting. What a pain in the neck it was to get this going. The guide is pasted in plain text at the bottom.
Follow the steps found here for configuring the image
https://www.jamf.com/jamf-nation/articles/313/creating-a-minimal-base-os-image
Install the following applications
Adobe Reader
Slack
Office 2016
Konica printer driver
Google Chrome
forticlientsslvpn
Capture image on time machine back up (so you can go through and make updates later as needed)
Additional resources:
http://resources.jamf.com/documents/technical-papers/Imaging-OS-X-Computers-with-the-Casper-Suite.pdf
Follow the steps in the next section to capture the image in Composer.
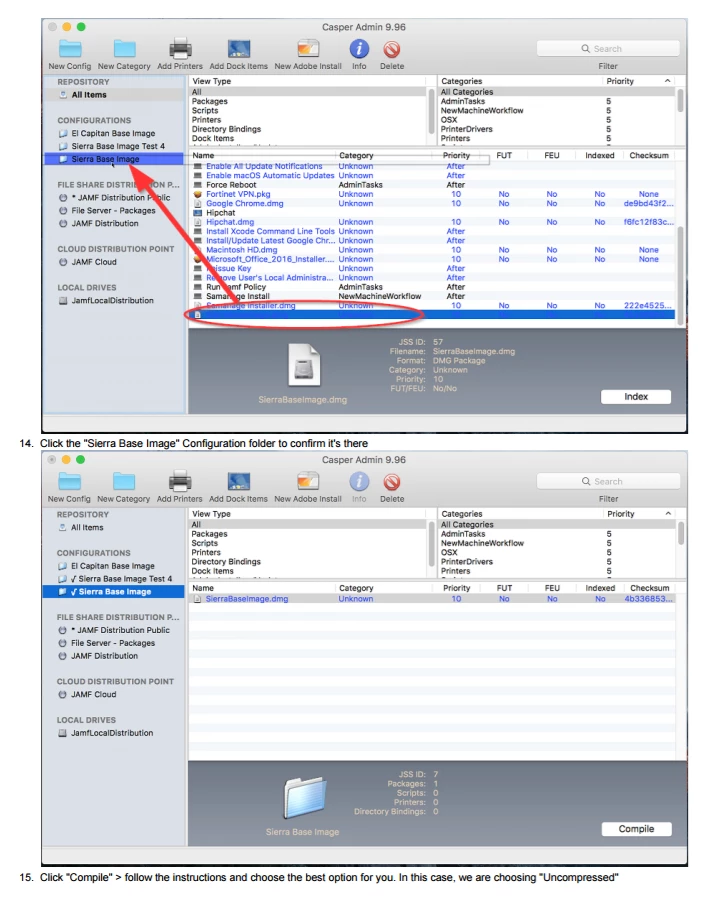
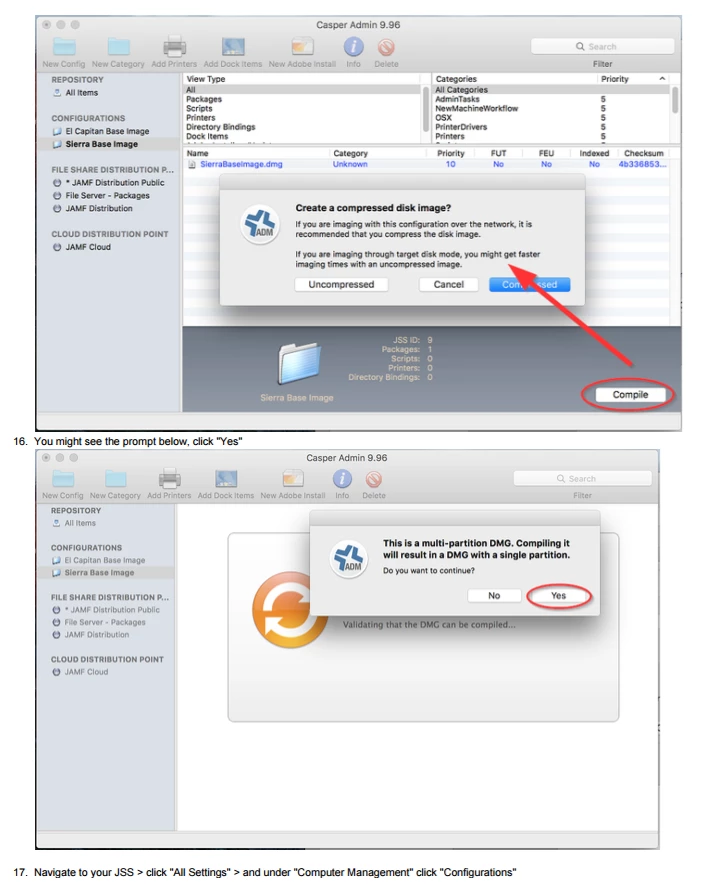
How to take a snapshot image in Casper Composer
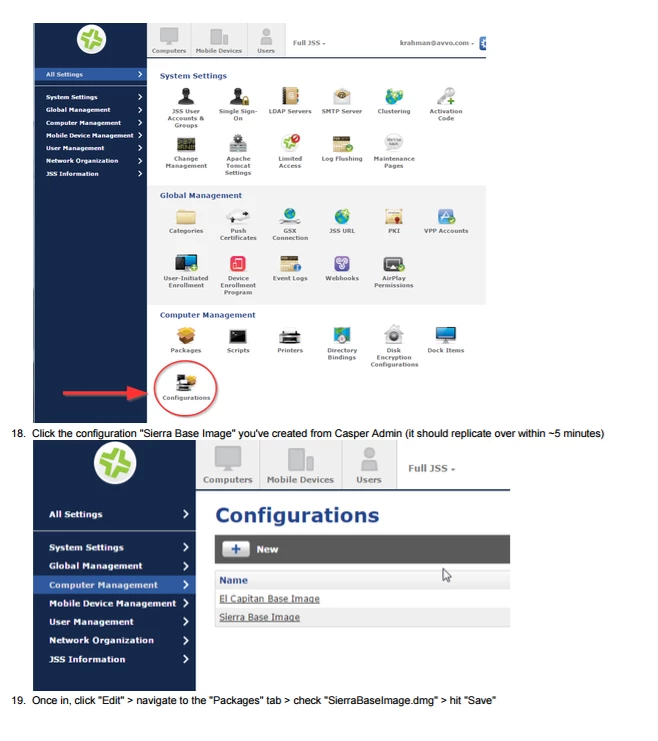
Build the base image on the target computer you want a snapshot of
Connect the target computer to the host computer via Thunderbolt cable
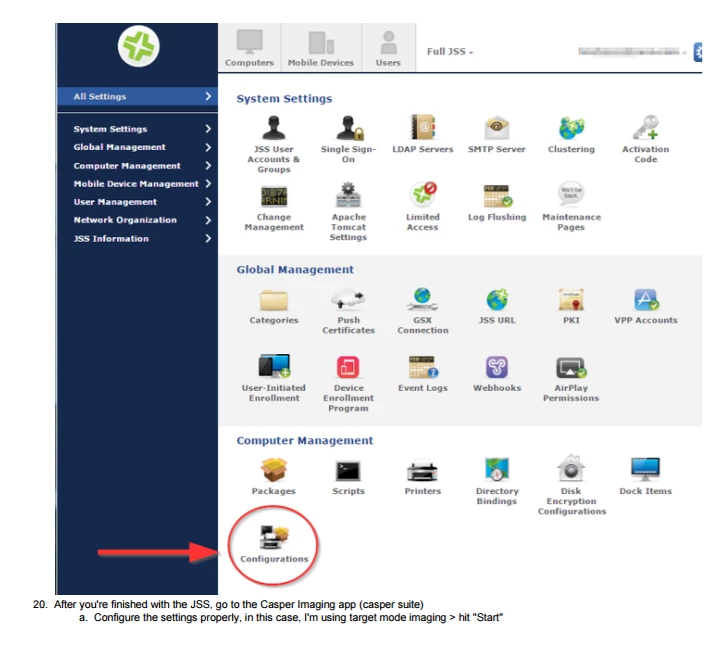
Restart the target computer in Target Disk Mode by holding on T during boot
On the host computer, open Casper Composer
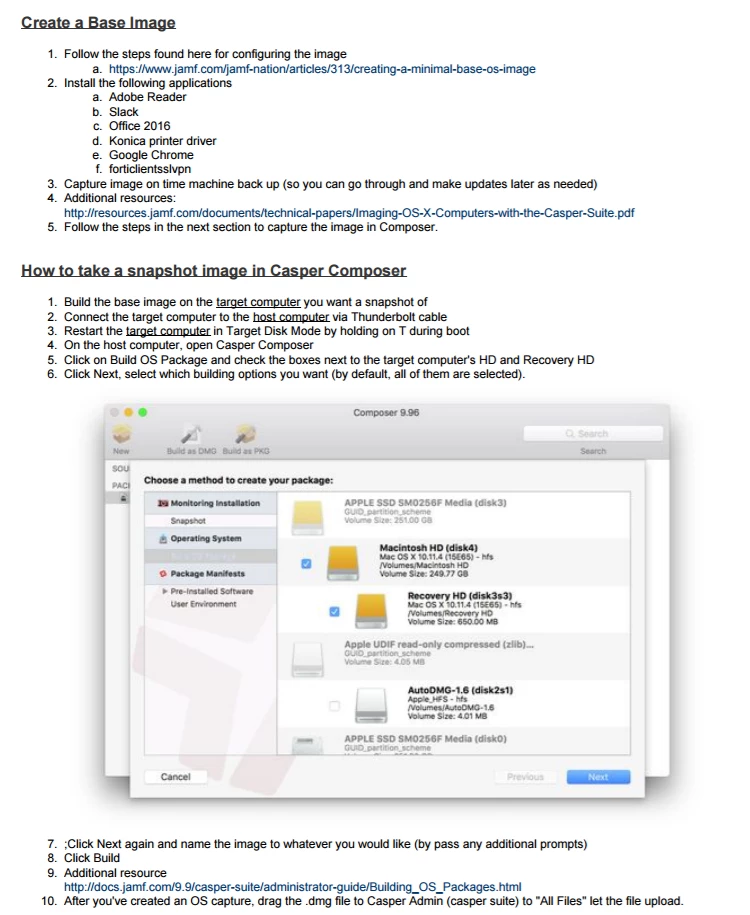
Click on Build OS Package and check the boxes next to the target computer's HD and Recovery HD
Click Next, select which building options you want (by default, all of them are selected).
Corporate IT > Casper Imaging Configuration Guide > Screen Shot 2016-10-25 at 11.45.50 AM.png
;Click Next again and name the image to whatever you would like (by pass any additional prompts)
Click Build
Additional resource
http://docs.jamf.com/9.9/casper-suite/administrator-guide/Building_OS_Packages.html
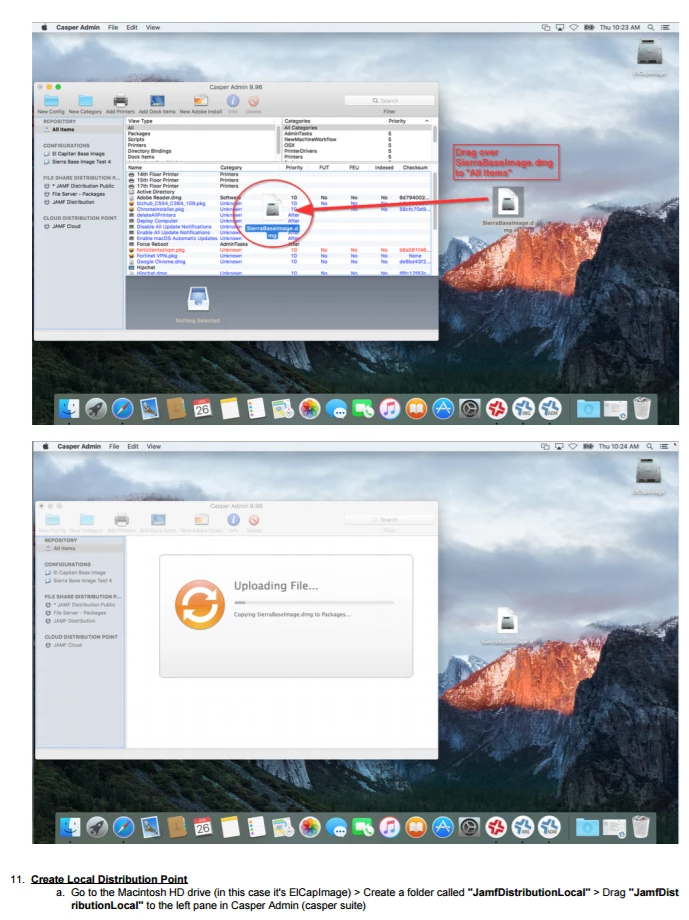
After you've created an OS capture, drag the .dmg file to Casper Admin (casper suite) to "All Files" let the file upload.
Corporate IT > Casper Imaging Configuration Guide > image2017-1-26_10-38-16.png Corporate IT > Casper Imaging Configuration Guide > image2017-1-26_10-38-37.png
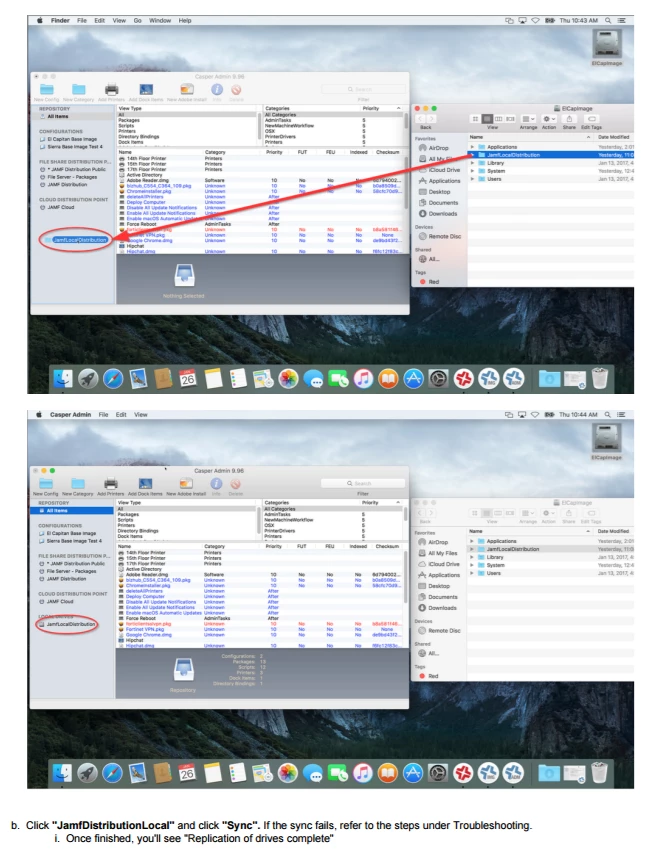
Create Local Distribution Point
Go to the Macintosh HD root folder > Create a folder called "JamfDistributionLocal" > Drag "JamfDistributionLocal" to the left pane in Casper Admin (casper suite).
Corporate IT > Casper Imaging Configuration Guide > image2017-1-26_10-44-18.png Corporate IT > Casper Imaging Configuration Guide > image2017-1-26_10-45-7.png
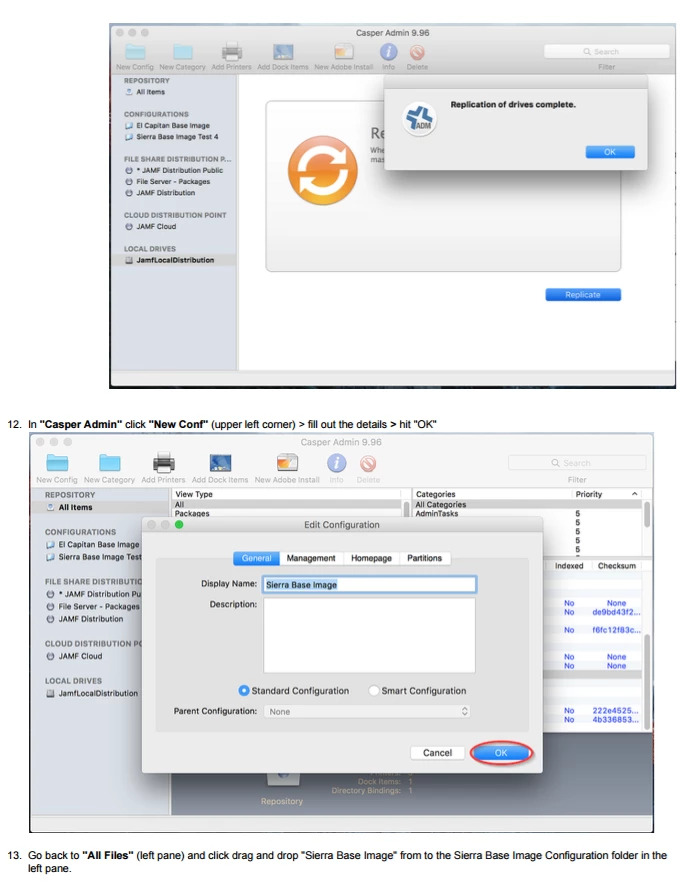
Click "JamfDistributionLocal" and click "Sync". If the sync fails, refer to the steps below.
Once the sync completes, in "Casper Admin" click "New Conf" (upper left corner) > fill out the details > hit create
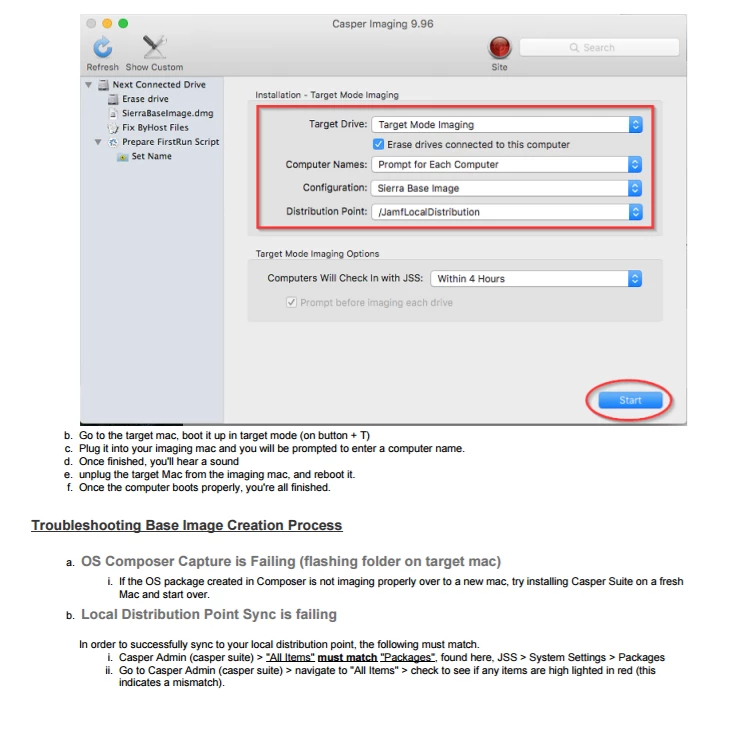
Troubleshooting Base Image Creation Process
OS Composer Capture is Failing (flashing folder on target mac)
If the OS package created in Composer is not imaging properly over to a new mac, try installing Casper Suite on a fresh Mac and start over.
Local Distribution Point Sync is failing
In order to successfully sync to your local distribution point, the following must match.
Casper Admin (casper suite) > "All Items" must match "Packages", found here, JSS > System Settings > Packages
Go to Casper Admin (casper suite) > navigate to "All Items" > check to see if any items are high lighted in red (this indicates a mismatch).
Corporate IT > Casper Imaging Configuration Guide > image2017-1-26_10-2-6.png
If an item is in red, track down that file and drag it to "All Items" or simply delete the item in red (I don't recommend this unless your confident that the file is unnecessary).