Hey everyone, I recently got passed handling our Netskope deployment. My predecessor claims that with the v71 client, due to us using Azure AD for our IDP we cannot auto populate the tenant information. Basically once the install finishes we get a popup where we have to input our company name.

I know there has to be a way around it, anyone have any familiarity with it?

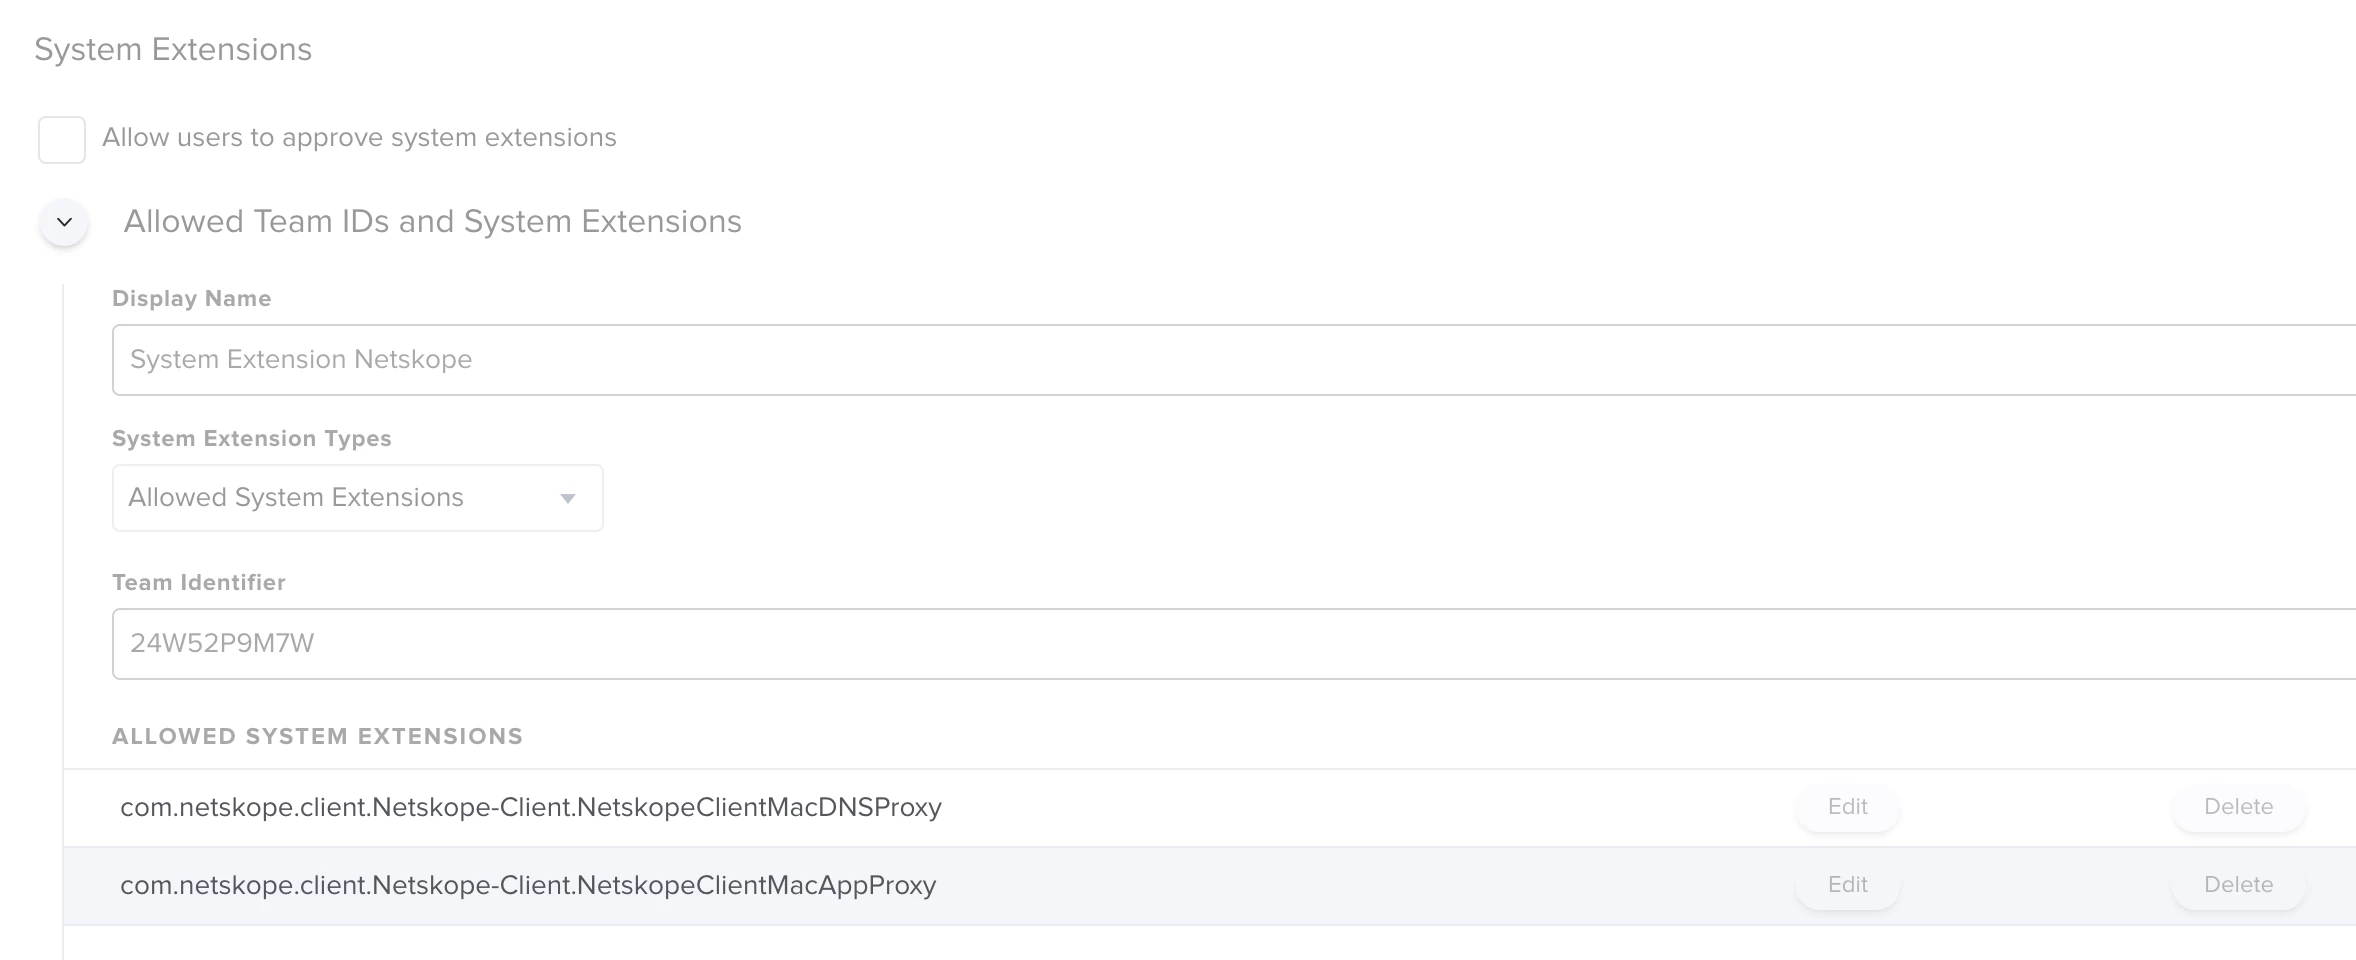
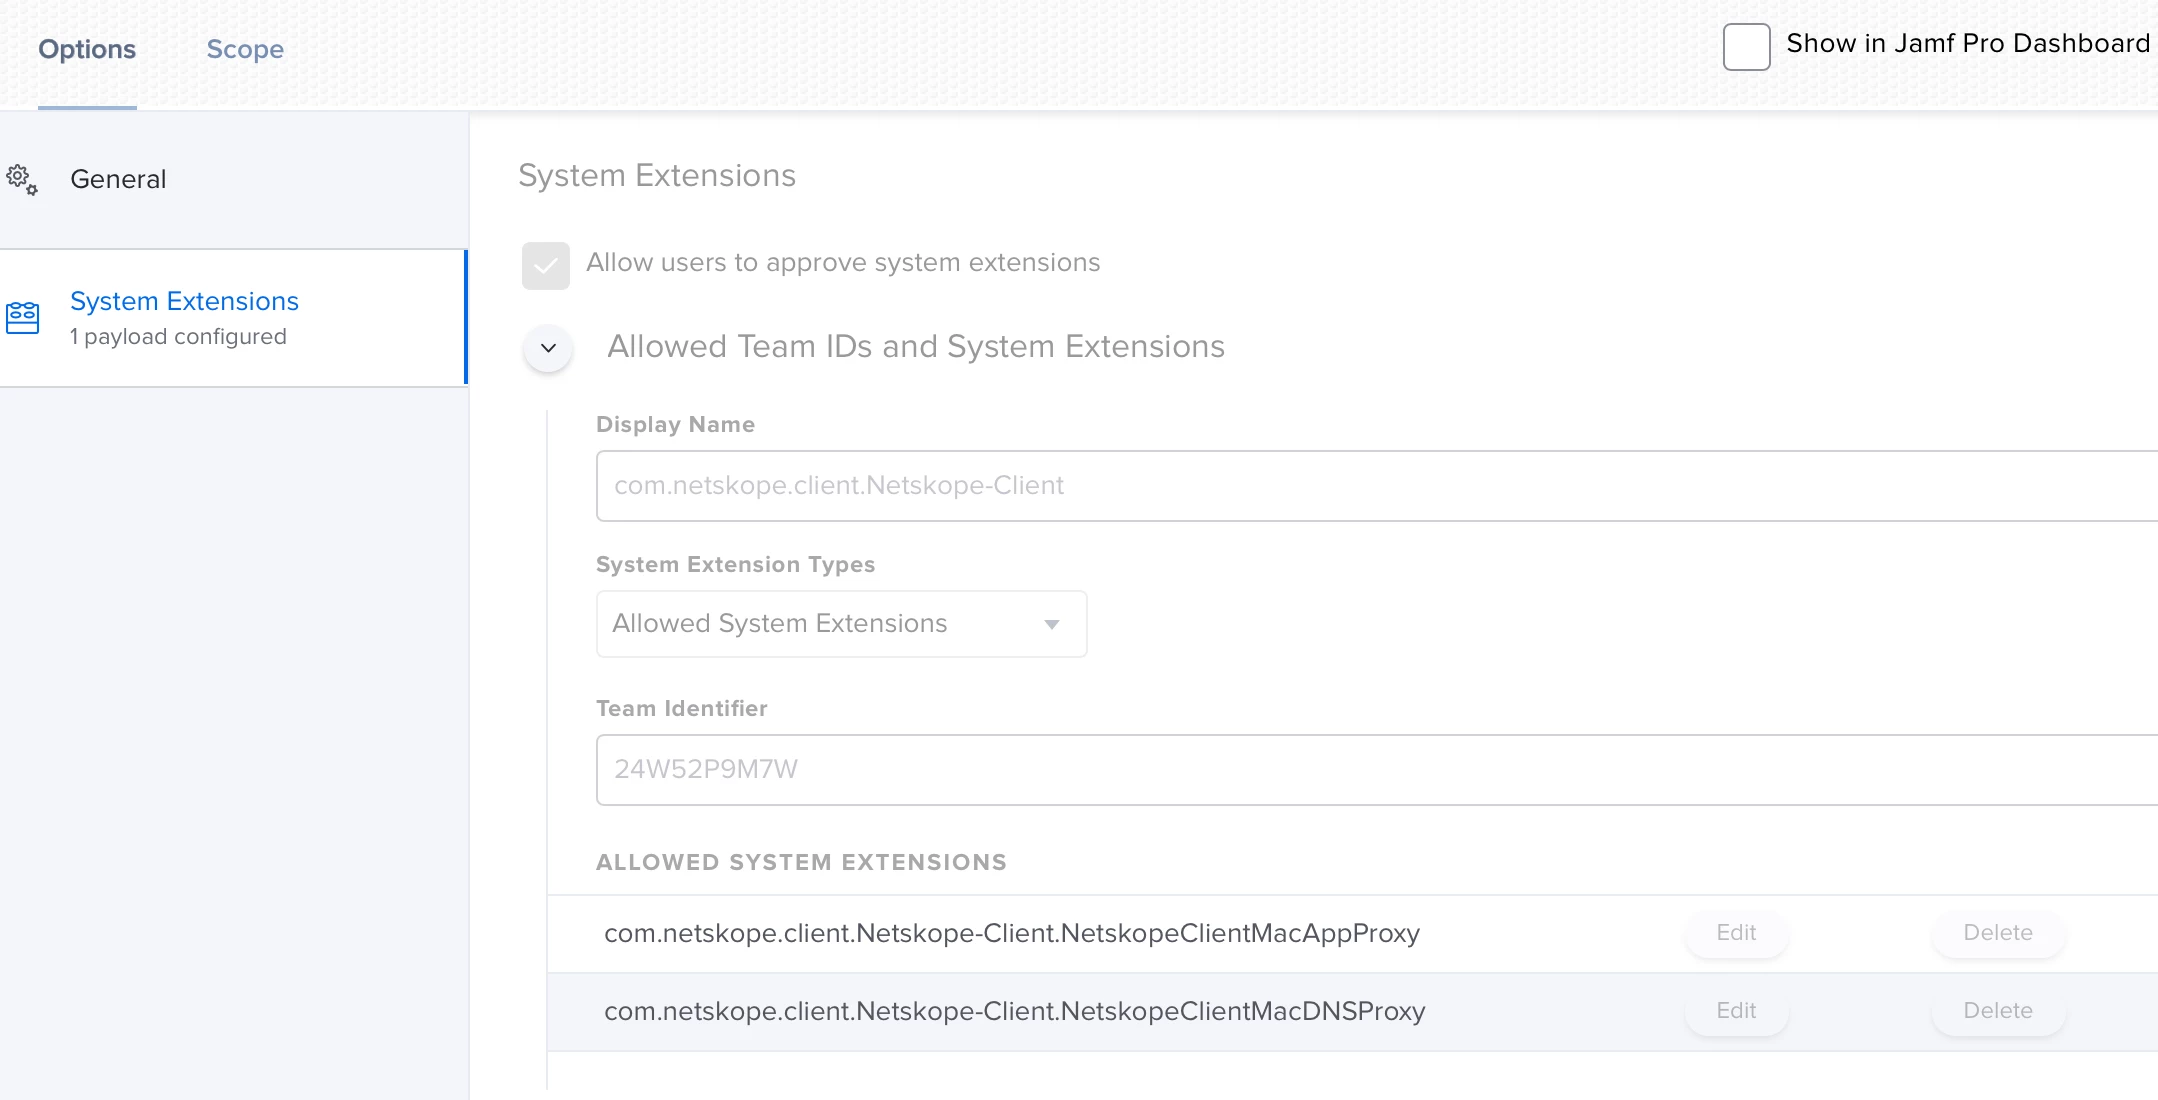
@mapurcel I haven't dealt with the Netskope System Extensions yet, but be aware that unlike Kernel Extensions you will need to provide both the Team Identifier and the System Extension bundle ID as Team Identifier alone is not sufficient for System Extensions.


I've been testing on Big Sur and Netskope v78 with the following profile and it doesn't appear to allow the System Extensions.


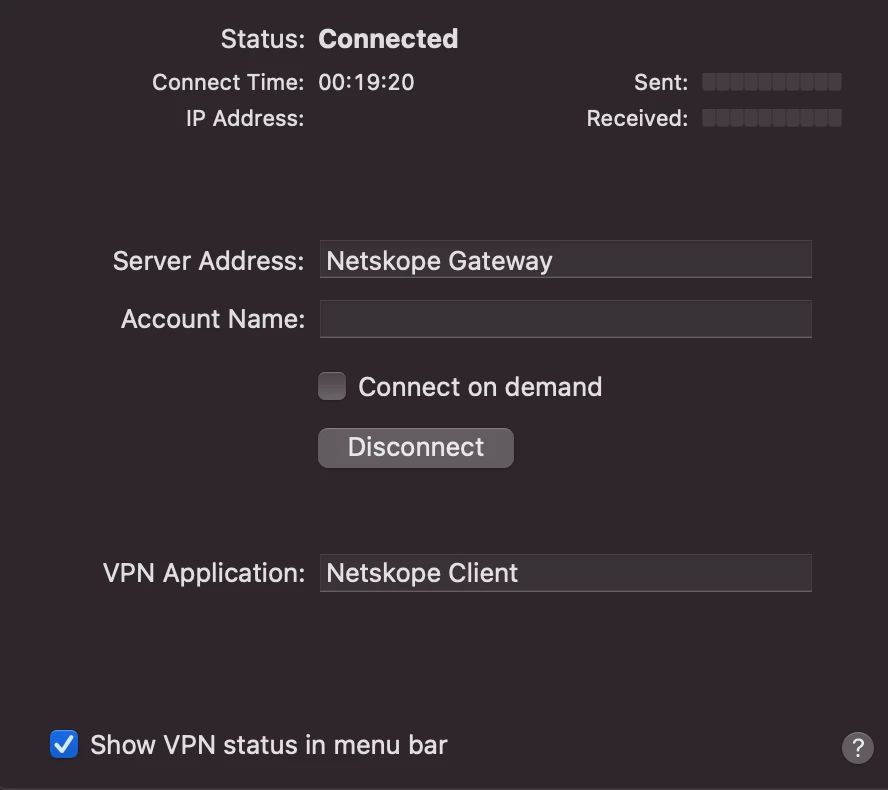
Ok I got it working sort of thank to @sdagley and @mapurcel I had tried System Extensions in an early build of NS and Big Sur and it didn't work so I tried again ... NS V78.3.0.523 and Big Sur beta 9. that said there is still a pops up that asks the user to allow the VPN/Proxy. However, if you don't interact with the pops ups and the machine reboot NS will phone home and download the current version you NS tenant is pushing our is V90


@sdagley

@patgmac Are you seeing the prompt when the Netskope tenant doesn't recognize the email, or when no email exists to be written to the .plist in the Managed Preferences folder? The latter was my problem.

Could be either. I don't think I've seen that email field be blank, but I have had instances where the profile didn't install so it had the same result.

Everyone else trying to get this working with Big Sur....I put Netskope engineering in touch with someone at Apple to help them learn what needs to be done to get their product working in BS. That person at Apple built them a couple sample profiles. One for SysExt's, and one for AppProxy VPN, takes care of all the prompts/approvals. I'm not sure if Netskope has made these profiles available yet, but wouldn't hurt to ask. Or ping me on Slack and I'll send them to you. (@patgmac)


I believe we will need to deploy a Web Content Filter payload alongside the System Extension profile but Netskope hasn't provided details around that and that payload isn't available in Jamf yet so it has to be a custom configuration profile.


I was able to test some more today and even if the user selects "don't allow" the VPN/Proxy" pop ups, NS will install them after a reboot. And the reboot is required for FileVault so :) on to the next Big Sur issue.

C


@stevewood , GREAT TIP!

Do you have/where did you get the API reference?

Greg


@gregsheppard

I do not recall. I believe it was from Netskope directly.


Looks like we still need a Web Content Filter payload in order to get past the "Netskope Client would like to add proxy configurations" prompt. Anyone hear from Netskope about the details required for that?


we dont deploy WCF for NS, only for Cisco AC for big sur and havent had issues so far.
only thing I needed to deploy aside from KEXT and SE was the VPN payload and the proper certs.

From their guide

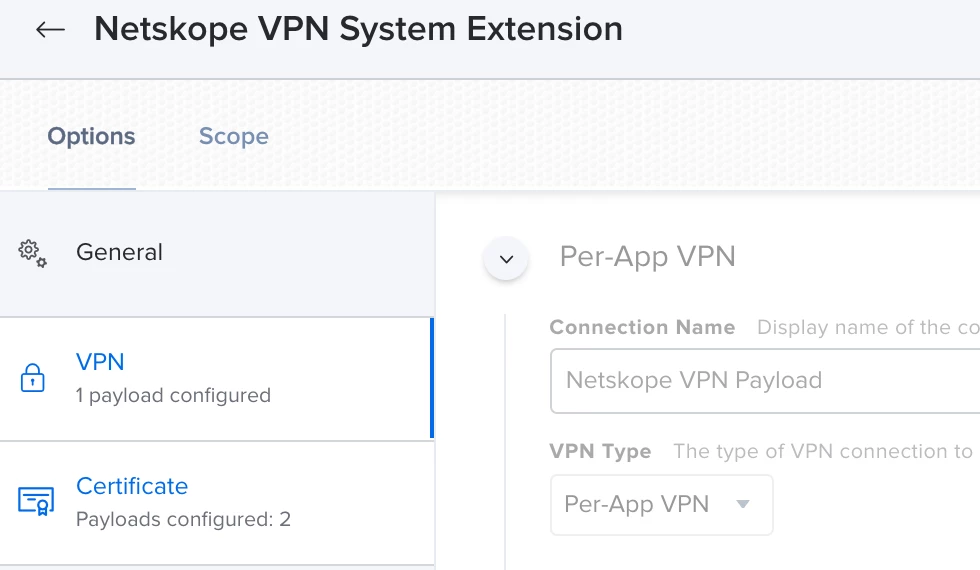
Configuration Profile for Auto Approval of VPN Payload (only for BigSur OS)
Go to Computers > Configuration Profiles > General

Click the Edit button. Under the Options section, select VPN and configure the following:

VPN Type : Select Per-App VPN

Per-App VPN Connection Type: Select Custom SSL

Identifier: Enter : com.netskope.client.Netskope-Client

Server: Enter Netskope Gateway i.e., gateway-<tenantURL>.

Provider Bundle Identifier: Enter com.netskope.client.Netskope-Client

Provider Type: Select App-Proxy

Select Include All Networks

Specify Provider Designated Requirement: Enter anchor apple generic and identifier "com.netskope.client.Netskope-Client" and (certificate leaf[field.1.2.840.113635.100.6.1.9] / exists / or certificate 1[field.1.2.840.113635.100.6.2.6] / exists / and certificate leaf[field.1.2.840.113635.100.6.1.13] / exists / and certificate leaf[subject.OU] = "24W52P9M7W")

Select Prohibit users from disabling on-demand VPN settings

Push Netskope Root and Tenant Certificates
Before you can push the root and tenant certificates, ensure that you do the following:

Download root and tenant certificates from Netskope MDM distribution page.

Login to Netskope WebUI with admin credentials.

Go to Settings > Security Cloud Platform > MDM Distribution. The certificate download options are displayed in the Certificate Setup section.

Convert the downloaded certificates to .cer format.

To push certificate via JAMF, login to JAMF admin console and do the following:

Go to Computer > Configuration Profile > New.

Under Options, give a name to this profile.

Select Certificate > Configure

Enter a name for the certificates.

Select Upload to upload the converted root and tenant certificates.

In the Scope tab, select the target computers.

Click the Save button.


HI @ beeboo

How do I add VPN application : Netskope Client

I am trying to replicate the proxy setting that Netskope pushes to the computer.


@user-NOQkvCrTvc see my post above yours, those are the exact steps from their support portal.

it needs to be deployed as a config profile alongside the 2 certs from NS.


Hi all, sorry for bringing up an old conversation again but we have successfully pushed out Netskope v.86.0.8 and have gotten around to auto approving the extension/proxy prompt but I cannot seem to get the tenant id to autofill. We are using the JAMF provided script. Does anyone know if and where we can modify the script to auto-fill in the tenant ID? I don't have very much scripting knowledge so I do apologize if this question sounds dumb or does anyone know of another method within JAMF to accomplish this? Thanks in advance.


Hi all, sorry for bringing up an old conversation again but we have successfully pushed out Netskope v.86.0.8 and have gotten around to auto approving the extension/proxy prompt but I cannot seem to get the tenant id to autofill. We are using the JAMF provided script. Does anyone know if and where we can modify the script to auto-fill in the tenant ID? I don't have very much scripting knowledge so I do apologize if this question sounds dumb or does anyone know of another method within JAMF to accomplish this? Thanks in advance.


Also in the same boat


Have you looked on the netskope website?  You have to get them to hook you up with an account.  They have the instructions to do this.  Also to get it to work right you will need to do an adlink on the backend of the netskope portal.  They failed to tell me that one.  and to make sure it works without blocking everything you need to whitelist the entire apple network.  You can ask Netskope for those settings.  Hope this helps and If I think of something else I'll update you.


This config caused me much consternation. I was initially utilizing script logic to pull the UPN from app-sso; however, during the debugging process some bad syntax got me Crowdstruck by our internal InfoSec team. So instead of continuing to that I'm not setting the RealName value on our managed Mac endpoints to the user UPN. The script then removes "RealName" from the results passing on the UPN to the Netskope installer.
The relevant portion follows:

#!/bin/zsh -v
loggedInUser=$( /usr/bin/stat -f %Su "/dev/console" )
echo $loggedInUser
loggedinusername=$( /usr/libexec/PlistBuddy -c "print :dsAttrTypeStandard\\:RealName:0" /dev/stdin <<< $(dscl -plist . read /Users/$loggedInUser RealName) )
echo $loggedinusername

I've a companion script running during PreStage which sets the RealName value; it looks like this:

#!/bin/zsh -v
#read the current logged in user
loggedInUser=$( /usr/bin/stat -f %Su "/dev/console" )
# loggedInUser=$( echo show State:/Users/ConsoleUser | scutil | awk '/Name :/ && ! /loginwindow/ { print $3 }' )

#list the REALM currently assigned to that Mac (we have 2 domains in our company)
/usr/bin/su \\- "${loggedInUser}" -c "/usr/bin/app-sso -l -j" | grep -- '"' | cut -d'"' -f2 > /private/var/tmp/app-sso-realm.txt
realm=$( cat /private/var/tmp/app-sso-realm.txt )

#extract the user_name value from the info associated with the REALM
# if [ -f "$AppSSO" ];
# then
/usr/bin/su \\- "${loggedInUser}" -c "/usr/bin/app-sso -i "$realm" -j" | grep user_name | cut -d'"' -f4 > /private/var/tmp/app-sso-upn.txt
SSOUserName=$( cat /private/var/tmp/app-sso-upn.txt )
# else
# SSOUserName=$ (cat | /usr/local/bin/az account show | grep "name" > /private/var/tmp/app-sso-realm.txt)

# fi

echo "<result>Logged in user is $loggedInUser
Domain is $realm
SSO user is $SSOUserName</result>"

FullName=`dscl . -read /Users/$loggedInUser RealName | awk 'BEGIN {FS=": "} {print $1}'`
FullName2=`echo $FullName | awk '{print $2,$3}'`
dscl . -change /Users/$loggedInUser RealName "$FullName2" "$SSOUserName"@"$realm"

Neither is original to me; I've adapted/modified to suit my enterprise.