This article and many others can be found on Rich Trouton’s blog Der Flounder
As part of Apple’s unveiling of Declarative Device Management (DDM) at WWDC 2023, Apple announced that DDM management included the ability to deploy MDM configuration profiles using DDM as the delivery mechanism in place of using MDM to deliver the profiles. Jamf Pro’s Blueprints leverages this capability to support device restrictions.
Let’s see how this works using a device restriction configuration, using the example of setting the following Apple Intelligence management functions to false in order to block the corresponding Apple Intelligence functions on macOS:
| Restriction | Setting available in version | Description | Key | Key value | Default setting in macOS |
| Allow Image Playground | macOS 15.0.0 | If key value is set to FALSE, prohibits the use of image generation. | allowImagePlayground | Boolean | TRUE |
| Allow Writing Tools | macOS 15.0.0 | If key value is set to FALSE, allows only anonymous access to external services | allowWritingTools | Boolean | TRUE |
| Allow Genmoji | macOS 15.0.0 | If key value is set to FALSE, disables Genmoji | allowGenmoji | Boolean | TRUE |
| Allow Mail Summary | macOS 15.1.0 | If key value is set to FALSE, prohibits the ability to create email summaries | allowMailSummary | Boolean | TRUE |
| Allow Mail Smart Replies | macOS 15.4.0 | If key value is set to FALSE, disables smart replies in Mail. | allowMailSmartReplies | Boolean | TRUE |
Apple Intelligence device restrictions.csv
For more details, please see below the jump.
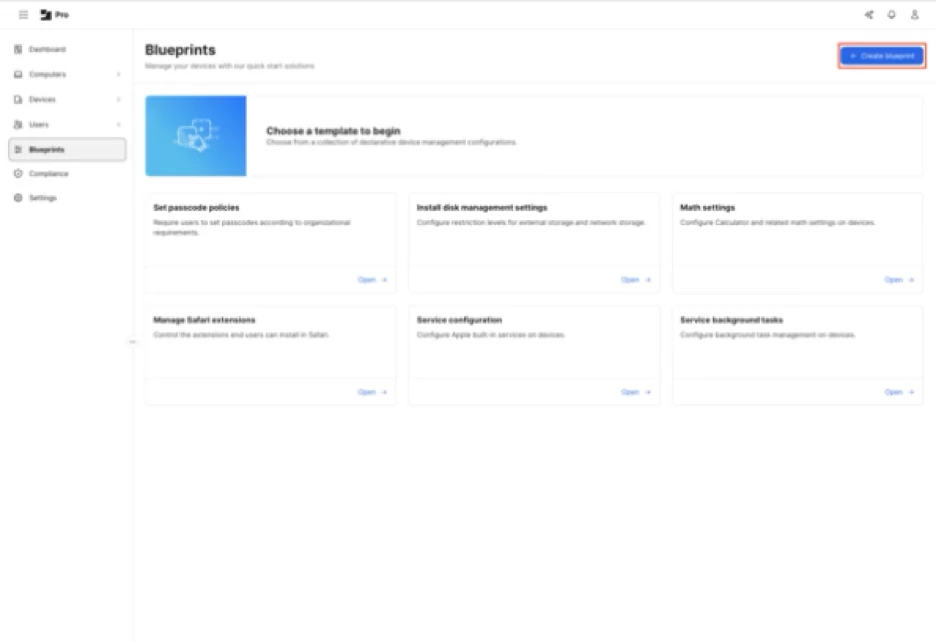
As of Jamf Pro 11.18.0, there is not a Blueprints template available for creating blueprints which manage device restrictions so the blueprint will need to be configured manually. To do this, use the following procedure:
1. Log into Jamf Pro.
2. Select Blueprints
3. Click the Create blueprint button.
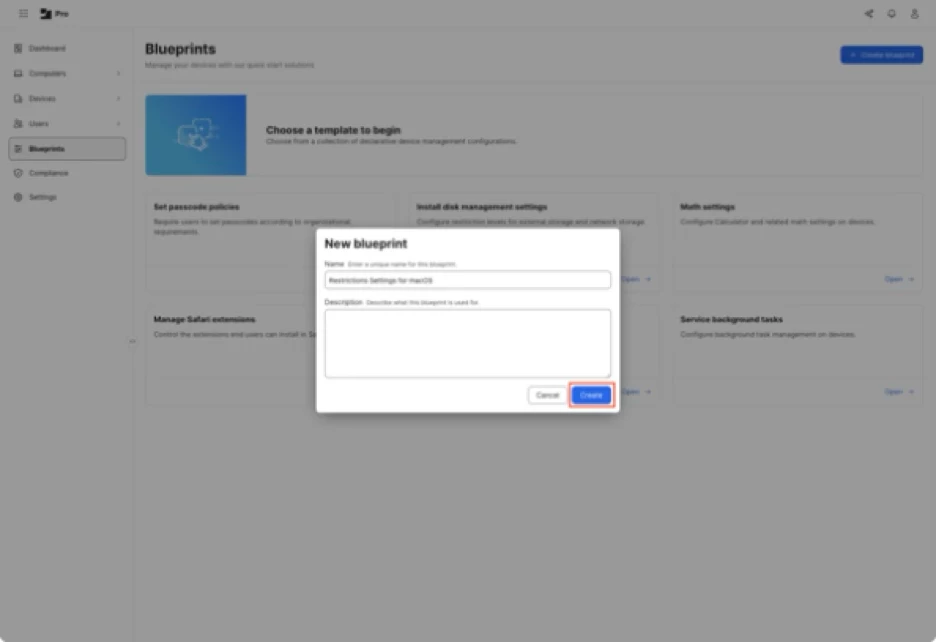
4. Give it a name when prompted and click the Create button. For this example, I’m using Restrictions Settings for macOS.
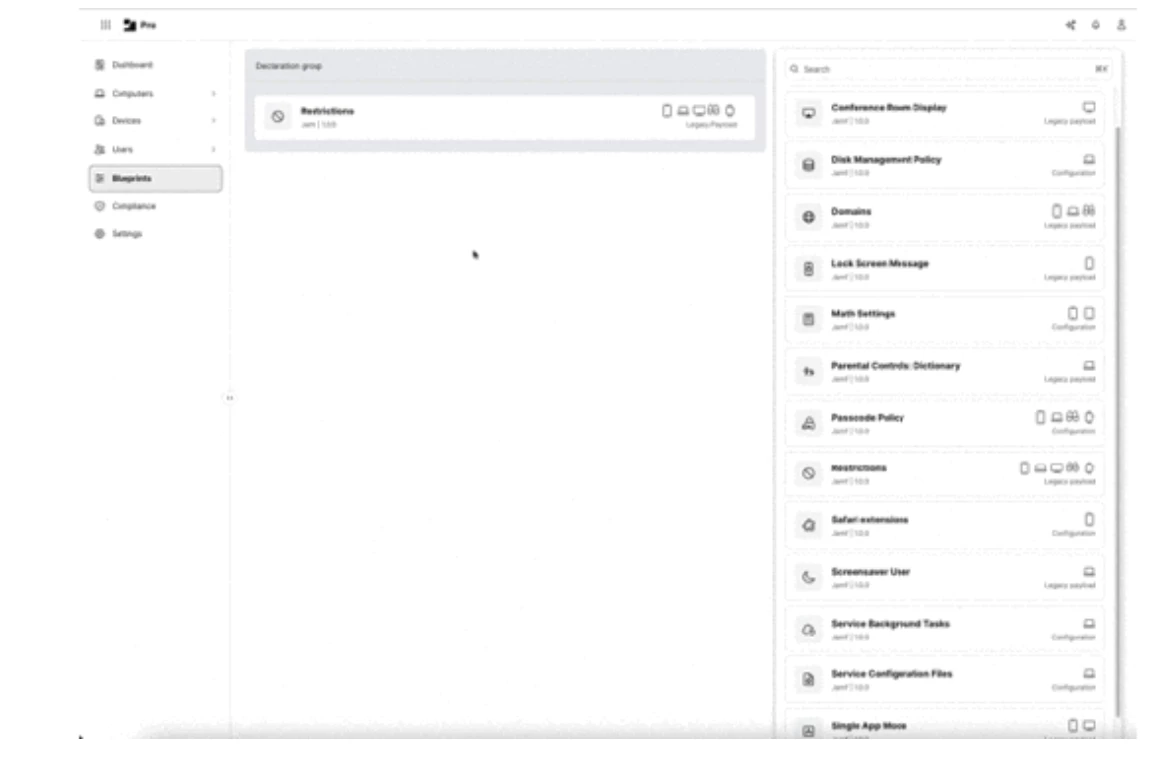
5. You should see an unconfigured Blueprint. Scroll down in the list on the right-hand side of the browser window to locate the Restrictions component.
Note: The Restrictions component is listed as being the Legacy Payload type. In Blueprints, a Legacy Payload type indicates that this is an MDM configuration profile being delivered via DDM.
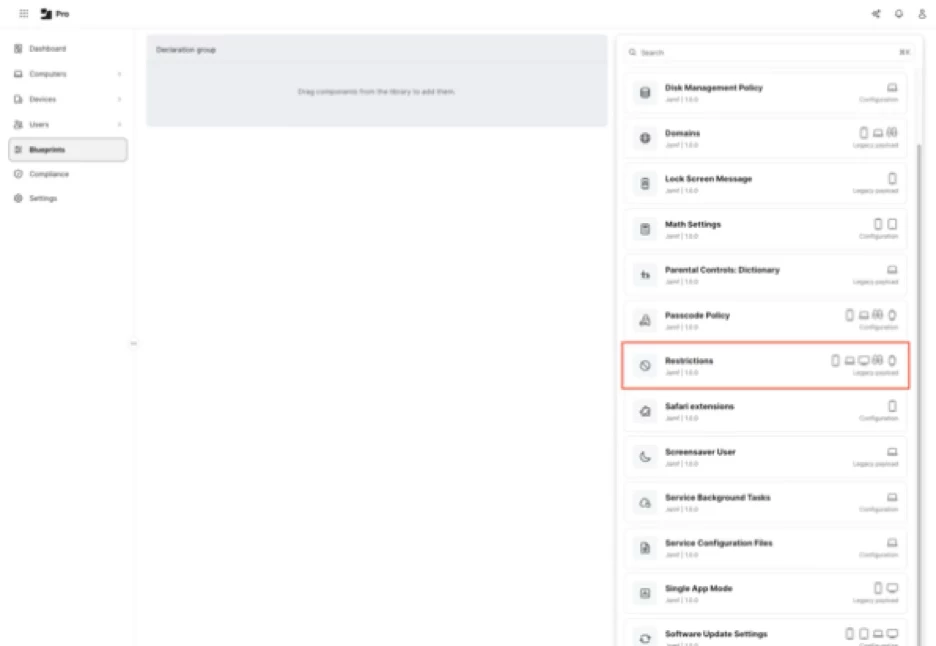
6. Click on the Restrictions component and drag the Restrictions component to the Declaration group section.

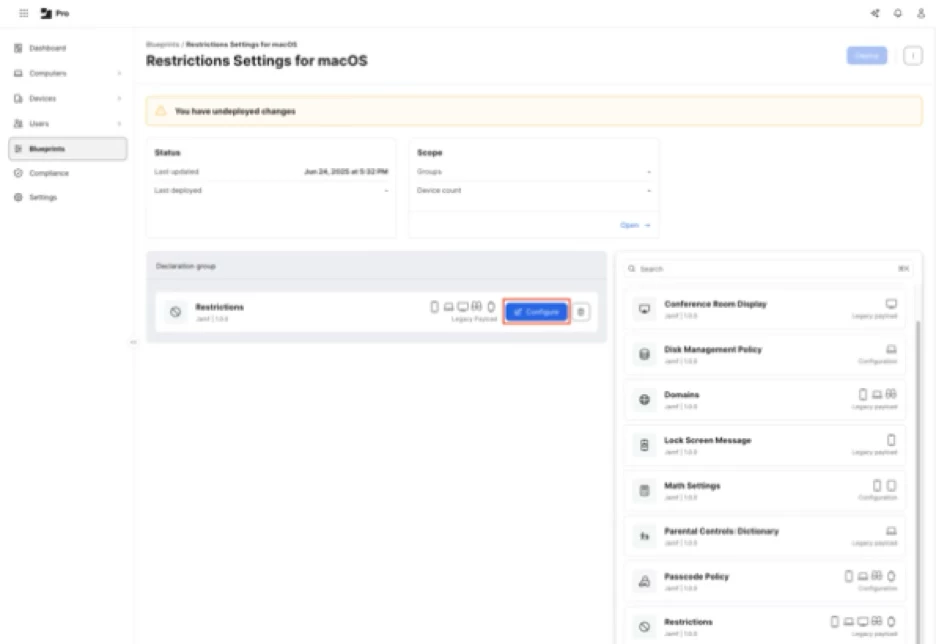
7. Mouse over the Restrictions component and you will see a Configure button appear. Click the Configure button.
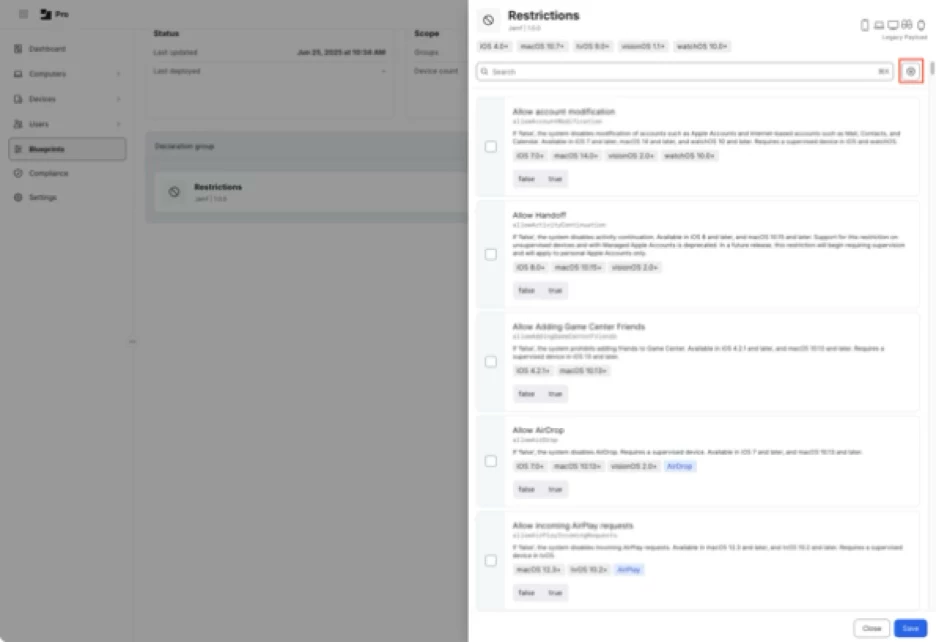
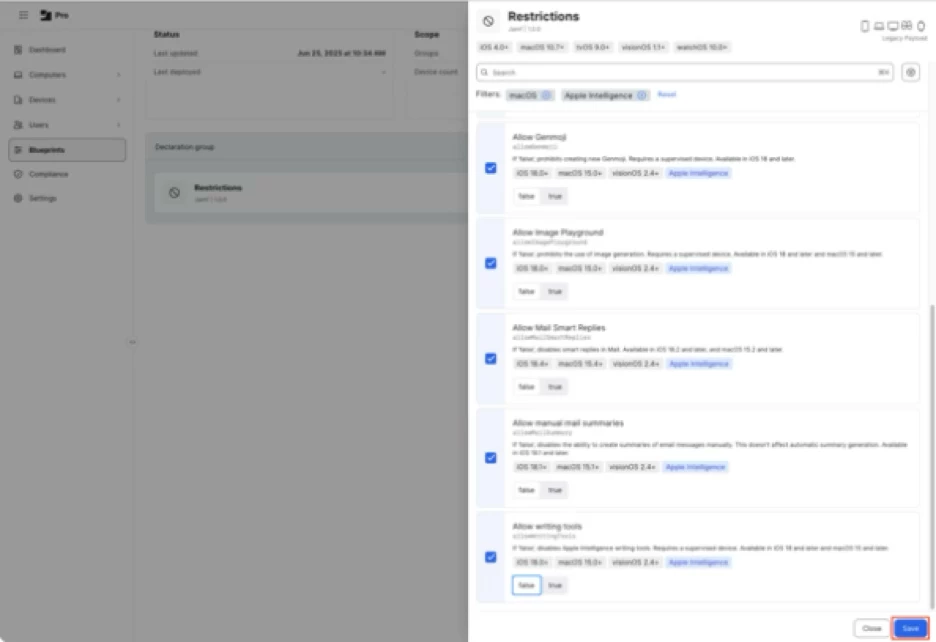
8. At this point, you will see all available Restrictions settings which are available for all Apple platforms. To limit to only those options available for both macOS and Apple Intelligence, you can click the filter button and then select macOS in OS Type and Apple Intelligence in Category.
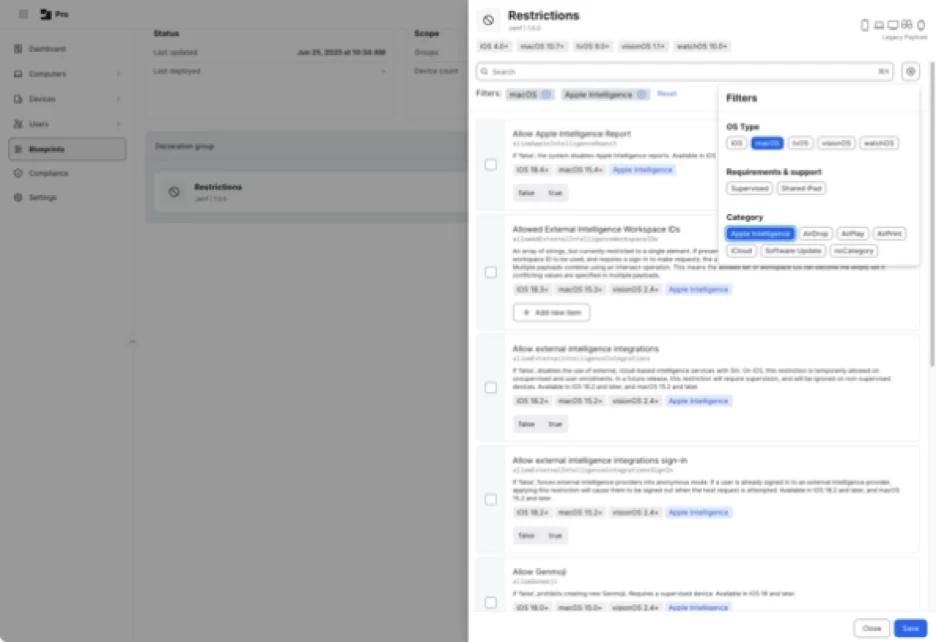
9. To apply the desired settings, select the following options and set them to false:
- Allow Genmoji
- Allow Image Playground
- Allow Mail Smart Replies
- Allow manual mail summaries
- Allow writing tools
10. Once all the settings choices have been made and verified, click the Save button.
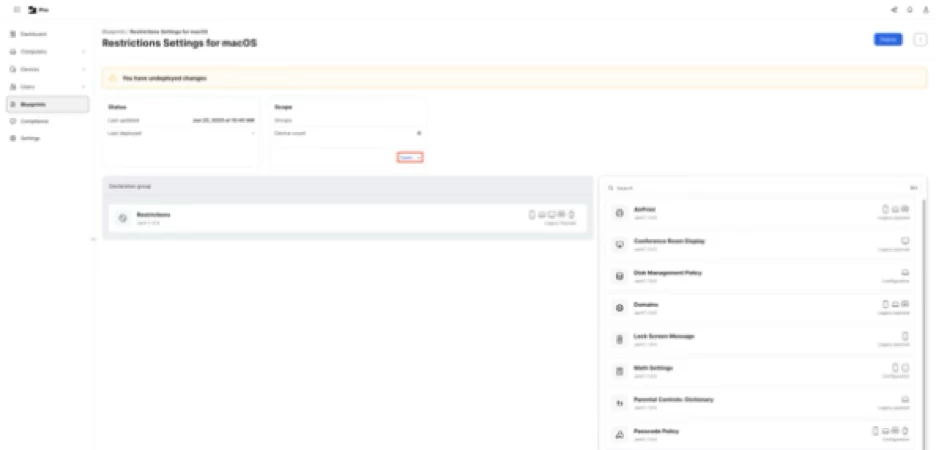
11. At this point, you should have a blueprint which has all settings configured but where no target scope has been set. To scope this blueprint, go to the Scope section and click the Open button.
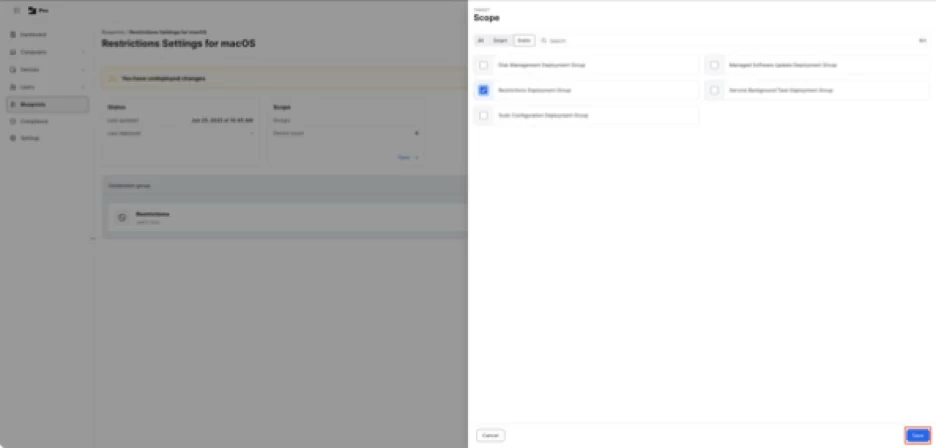
For this example, I’m selecting a static group named Restrictions Deployment Group.
Once the desired smart and/or static groups have been set and verified for the scope, click the Save button.
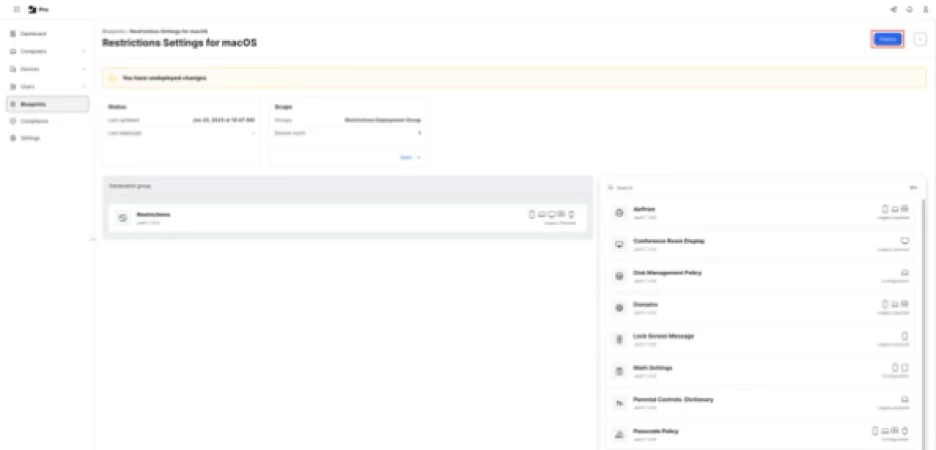
12. Once everything has been configured, Jamf Pro should inform you that you have undeployed changes. Click the Deploy button to deploy the new restrictions settings to the Macs you want to manage.
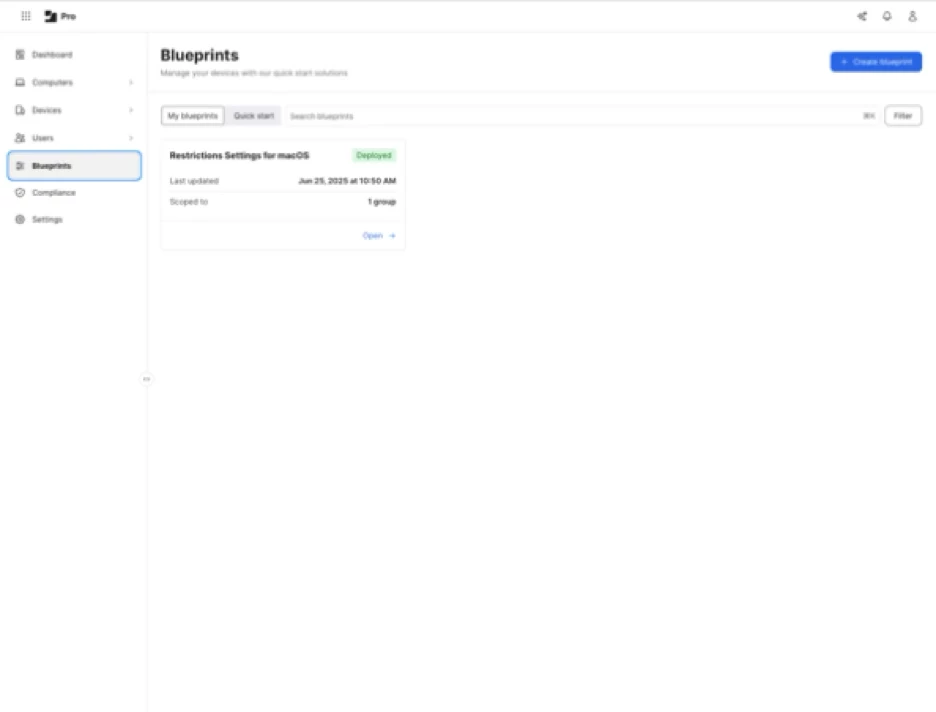
13. Once deployed, the Blueprints screen in Jamf Pro should show the newly-created Restrictions Settings for macOS blueprint as being deployed.
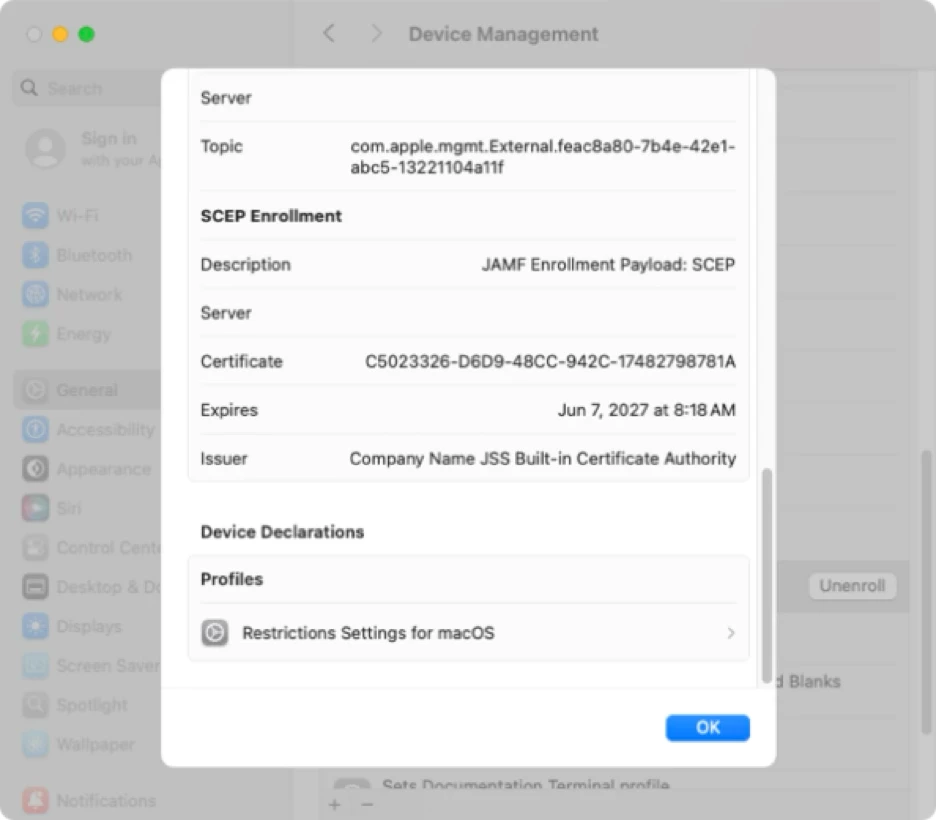
You can also check on the managed device’s end by opening System Settings: General: Device Management, locating the MDM enrollment profile in the list of profiles and double-clicking on it. When you scroll to the bottom of the enrollment profile’s window, you should see a Device Declarations section.
If you’re deploying an MDM configuration profile via Blueprints, you should see a Profiles section in Device Declarations. In the Profiles section, there is a listing with a name that matches the name of the blueprint which was deployed. In the case of our example, the listing shows Restrictions Settings for macOS.
If you click on the Restrictions Settings for macOS listing, you should see the details of what is being managed.
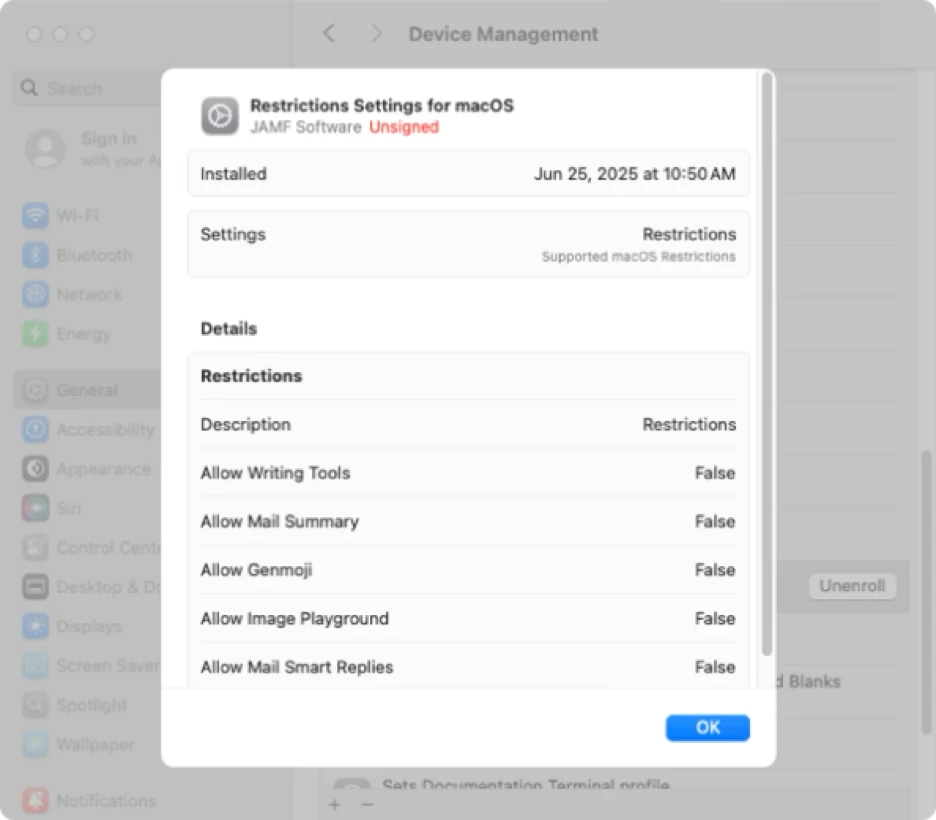
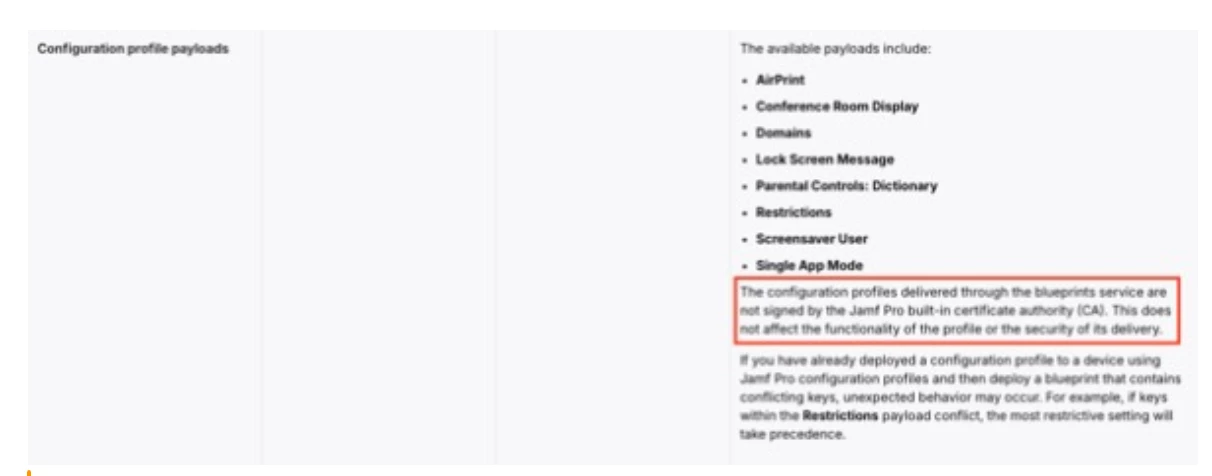
Note: The MDM profiles delivered via Blueprints are not signed. This is mentioned in the documentation available via the link below: