The last time I had to follow the article for integrating GSX into Jamf Pro, I found the instructions quite lacking. I'm referring to this article: https://docs.jamf.com/technical-articles/Integrating_with_Apples_Global_Service_Exchange_GSX.html
I worked on my own documentation and figured I'd share it with the community. I won't necessarily keep this up to date, but hopefully it helps people that might be looking to do the GSX integration with Jamf Pro. Hopefully Jamf will integrate these details into their technical document I linked above.
==============
This article explains how to create a GSX account and obtain an Apple certificate. You can integrate Jamf Pro 10.15.0 or later with Apple's Global Service Exchange (GSX).
Note: As of October 1, 2019, Jamf Pro 10.15.0 or later is required to integrate with GSX. If you are using an earlier version of Jamf Pro with a GSX integration, you must upgrade to Jamf Pro 10.15.0 or later to continue integrating with GSX.
General Requirements
Before you can integrate Jamf Pro with GSX, you must have the following:
- A GSX Account with the "Manager" or "Administrator" role, access to Web Services, and access to coverage/warranty information
- An Apple certificate
- (On-premise customers) Your IP address must be safelisted by Apple. To verify that your IP address is safelisted, contact Apple.
Creating a GSX Account
- Go to http://www.apple.com/support/programs/ssa/ to apply for a GSX account.
Note: To apply for a GSX account, you must have a service contract with Apple. Contact your Apple Account Executive to learn more about GSX. - Log in to your GSX account at https://myaccess.apple.com/
- Confirm that your account has either a “Manager” or “Administrator” role to Web Services. In the Application Access section, click on the “Current Access” text under Global Service Exchange. This will show you if you have the appropriate access role.
Note: This rest of this process is managed by Apple and is subject to change. Contact Apple if you need assistance creating your GSX account.
Obtaining an Apple Certificate
Obtaining an Apple certificate involves the following high level steps:
- Generating a certificate signing request (CSR)
- Sending the CSR and your GSX account information to Apple. Apple sends back Apple certificates (.pem)
- Converting the Apple certificates to .p12 format
- Uploading the certificate to Jamf Pro
Note: Steps 1-2 are managed by Apple and are subject to change. Contact Apple for details about the process. If you have questions, contact Jamf Support.
There are two articles on the GSX website that will provide you with details and guidance for the first two steps. Log into https://gsx.apple.com and in the “Search GSX” field, search for:
- “Guidelines to request support for GSX and Appointment Scheduler Web Services”
- “On-boarding process for GSX and Appointment Scheduler API”
Generating a CSR
To generate a CSR, follow the instructions located in the Certificates section of this GSX API FAQ site: https://gsxapi.apple.com/apidocs/prod/html/WSFaq.html
The command line openssl application can be used to generate the public/private key pair and certificate signed request (CSR). For alternatives on Windows or Java Keytool, read the FAQ site linked earlier.
Key Pair Generation
In Terminal, run the command: openssl genrsa -aes256 -out privatekey.pem 2048
When running this command, you will be prompted to enter the passphrase for the private key. This is your secure passphrase and should not be shared with anyone. This passphrase can be anything like a password.
CSR Generation
In Terminal, run the command: openssl req -new -sha256 -key privatekey.pem -out certreq.csr
Once you enter the command, you will be asked to fill out certain information. Fill out the prompts with the details requested, but keep the following in mind when filling out those details:
One of the fields prompted for would be "Common Name (e.g. server FQDN or YOUR name)". The FQDN is a very important field and it is case sensitive. Please be sure to provide the following value for this field:
- For test environment CSR : Applecare-APP157-[SoldTo ID].Test.apple.com
- For production environment CSR : Applecare-APP157-[SoldTo ID].Prod.apple.com
For example, if your soldTo is 0000012345, the value should be Applecare-APP157-0000012345.Test.apple.com for test and Applecare-APP157-0000012345.Prod.apple.com for production.
The leading zeroes are important and the soldTo should always be 10 digits.
Please note the following points while CSR generation.
- When answering questions related to org names, please put your organization's details and not Apple.
- The CSR file can be generated with any computer. There is no restriction that a CSR file should be generated only from the host.
- It is not mandatory that the IP used during CSR generation should be the same as the IP Address whitelisted.
- CSR can be created with DES or AES. It would be up to the partners to accept the risk of protecting their private key with DES instead of AES, since DES is less secure. This does not affect Apple's ability to issue the certificates or the resulting certificate.
- If a partner is using multiple servers, only one certificate is required which is generated by one CSR.
When prompted to enter the passphrase for the private key, enter the passphrase you used earlier.
A file named certreq.csr will be created in the folder where you ran these commands from. This file will be emailed to Apple to receive a client certificate in return.
Important: The CSR generated in this process is the only valid CSR accepted by Apple for GSX connections.
Sending the CSR and GSX Account Information to Apple
- Log into https://gsx.apple.com
- In the “Search GSX” field, search for the article titled: “On-boarding process for GSX and Appointment Scheduler API”. This article will include all the details you will need to get onboarded with GSX API access including 1) email address you need to message and 2) information you need to send in that message.
- When you send a message to the email address listed in the GSX article, make sure to:
- send the email from a valid corporate address and CC your Apple account manager
- copy and paste the Subject and Template and fill it out accordingly for your org
- attach your CSR file along with this message
The email template for new GSX API requests:
========
Subject:
Sold-To - Your Company Name - SSL On-boarding request for [GSX Web Services / Appointment Scheduler - specify all that apply]
Message body:
GSX Sold-to account number:
Primary IT contact’s name:
Primary IT contact’s email:
Primary IT contact’s phone number:
Primary business contact name(s) for API related communications:
Primary business contact email address(es) for API related communications:
Static outgoing server IP address(es) sending requests to GSX Web Services production environment:
Static outgoing server IP address(es) sending requests to GSX Web Services test environment:
Static outgoing server IP address(es) sending requests to Appointment Scheduler Production:
Static outgoing server IP address(es) sending requests to Appointment Scheduler test environment:
System design overview: [Applicable to and required for in-house/custom development]
List of API to be integrated: [Applicable to and required for in-house/custom development]
Third-party Integration Solution: Company and product name [if applicable]
========
Your request may be delayed if you fail to include the appropriate information. You can expect this process to potentially take 1 week to complete. This information is subject to change as Apple updates their requirements for GSX API access.
Converting the Apple Certificate (.pem) to .p12 Format
Create a .p12 file using the private key and Apple certificates by executing the following command:
openssl pkcs12 -export -inkey privatekey.pem -in cert.pem -out GSX_Cert.p12
Note: The GSX_Cert.p12 file contains your signed GSX certificate. If you do not specify a path before the file name when running the above command, the file will be in your working directory.
The certificate is saved as a .p12 file in the location you specified.
Note: The private key password is the password that you set when creating the CSR. You must also set an export password, which will be used as the keystore password when uploading to Jamf Pro.
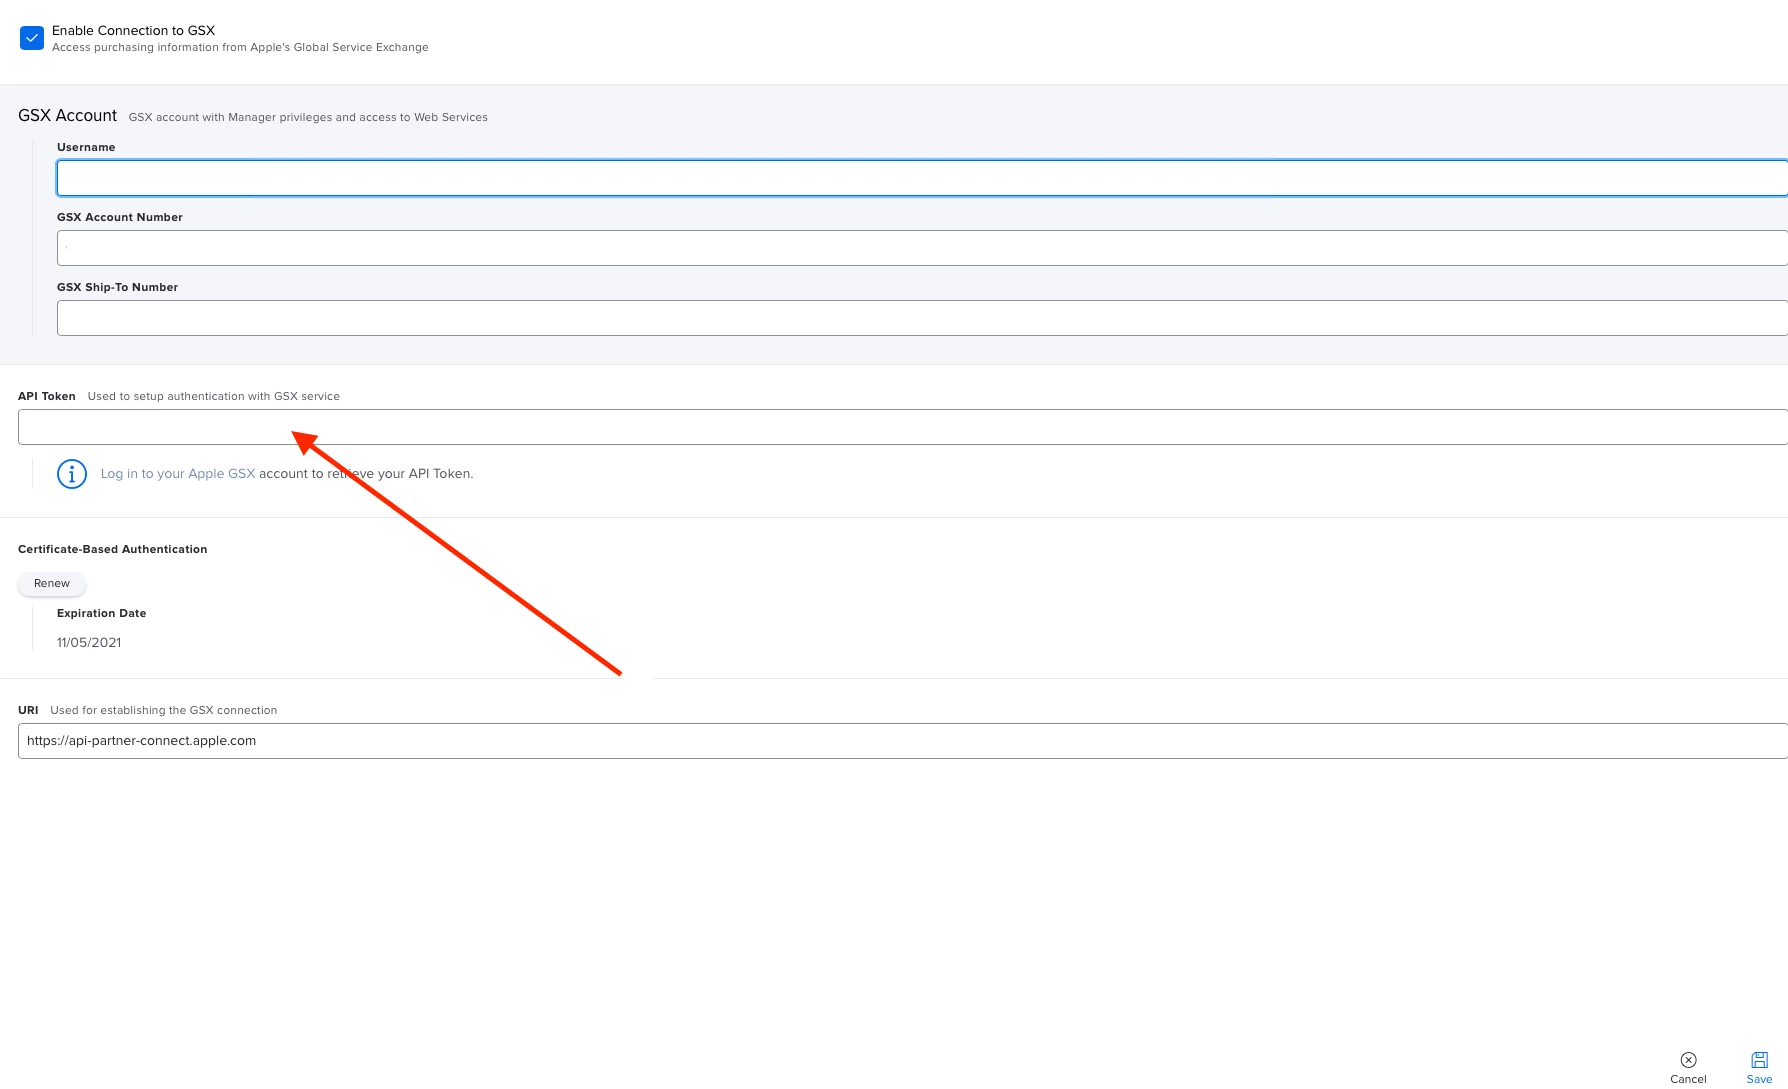
Configuring the GSX Connection in Jamf Pro
Configure the GSX connection in Jamf Pro by providing your Apple API Token and uploading your GSX certificate. For instructions, see "Configuring the GSX Connection Settings" on the GSX Connection page in the Jamf Pro Administrator's Guide.
SSL Certificate renewal and/or IP Address updates for GSX API access
There are two other considerations to keep in mind. The SSL certificate used for GSX API access is only valid for a set amount of time which means you will need to renew it at some point. Additionally, as an on-premise customer, if you make changes to the IP address of your Jamf Pro server, you will need to provide the latest information to Apple. The steps below will lead you to the GSX articles that should explain how to handle both those scenarios.
- Log into https://gsx.apple.com
- In the “Search GSX” field, search for the article titled: “On-boarding process for GSX and Appointment Scheduler API”. This article will include details for who to email and what information to include in the message for either renewing your SSL certificate or making changes to the IP addresses allowed for GSX API access.
Additional Information
For instructions on how to integrate Jamf Pro with GSX, see GSX Connection in the Jamf Pro Administrator's Guide.