Setting up HTTPS distribution share on a Yosemite server

denmoff
Contributor III

I'm trying to setup an HTTPS share to be used as a distribution point. The share seems to work fine when mounting it via the finder with https://servername/share. It prompts me that it's an unknown certificate, but once click ok, it mounts the share. The server is using a self signed certificate. I'm guessing that's where the hangup is when a client tries to download a package using that share. It appears as tho it is downloading in the progress bar in Self Service, but it eventually fails.

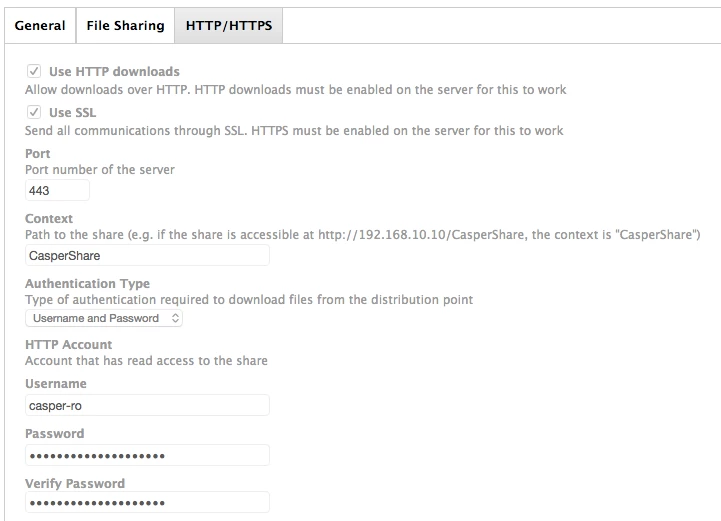
On the JSS, i have HTTP and SSL selected for the share, port 443, context is the share name, authentication type is certificate. I exported the self signed cert from the yosemite server and uploaded it to the JSS.

Any ideas?

1 REPLY 1

apizz
Valued Contributor

Know the post is a little old, but I just recently went through this with JAMF support and thought it'd be helpful to report the steps. Haven't fully tested deploying policies via HTTPS yet but have been able to download files from our distro point via the full HTTPS address. You are likely correct that the cert is/was your problem.

We are not running OSX Server.app version 5, which apparently has some problems.

1) In the Server app on your server, go to the Certificates tab, click the + button at the bottom and choose 'Get a Trusted Certificate'.
2) Click Next and enter the pertinent information needed to create the cert (email, institution, etc.). Once all information has been entered, click Next again.
3) You'll now have a series of text that is your CSR. Copy this text. You're going to need it to create the cert with the JSS's Built-in CA. You should also see now an item in the Certificates section that indicates a "pending" cert.
4) Login to your JSS on your server and click the gear from the top right and select Global Management from the left sidebar.
5) In Global Management, go to the PKI preference and click the 'Create Cert from CSR'.
6) Paste the previously copied CSR text from the Server.app into the CSR field and choose 'Web Certificate' for the certificate type. Create your cert.
7) With this certificate created with the JSS's built in CA, go back to the Server app and double-click the "pending" cert.
8) Drag and drop the downloaded JSS cert into the corresponding field. You now have your cert to apply to your SSL site.
9) Go to Websites in your Server app and first click on the HTTP site. We want to have your site redirect to HTTPS in the event it goes HTTP. To do this, double-click the nonSSL Server website and click the 'Edit' button next to the Redirects field.
10) Select the field next to "When users visit" and choose This website. It will automatically choose the subsequent option, which will simply redirect to the SSL site. Click OK.
11) Now that we have our HTTP redirecting to HTTPS, double-click the SSL site and choose the cert we just finished creating and assign it to the SSL site.
12) If you haven't already created a symbolic link for your CasperShare folder, we'll want to do that so our site can access our packages on the server. To do this, enter the following command into Terminal:

sudo ln -s /path/to/CasperShare /Library/Server/Web/Data/Sites/Default

13) Lastly, login to your JSS and make sure you have HTTPS enabled in your distribution point settings:

c19b34279b394258b8b5fc624a481b88

You can test your HTTPS site by entering the fullpath to a package on your distribution point. ex. https://jss.myserver.com/CasperShare/Packages/Adobe%20Flash.pkg - note that any spaces in your package name should be substituted with a %20 in the URL.

I'm currently working to try and limit who has direct access to packages on our distribution point so that not just anyone who knows the URL path can download anything they want.

Hope this is a helpful starting place.