As we all know, most Adobe apps are not multi-lingual and once installed in a specific language, the language cannot be changed. Everyone of us that has to deploy Adobe CC for worldwide customers in multiple languages has either the problem of pushing everyone to the English localized CC or using multiple installers for the appropriate language. It’s a well known fact that a complete Adobe CC package can take up to 20GB in size. Deploying Adobe CC Complete in five different languages will result in 100GB wasted storage.
I want to share a well-working and tested way to build a multi-language installer for Adobe CC packages. Using this technique, you will need to deploy the package sources only once. Small installer packages for the appropriate language are used afterwards to install the software in the language you want. This is totally supported by Adobe; modifying the installer in this way is intended by Adobe and documented too. Please find the source links above for this.
It doesn’t even matter if you want to deploy an old-style serial number package or a CC team version; this works for both license versions.
Step 1: Create the source package
Download and install Adobe Creative Cloud Packager (Adobe CCP) from the Volume Licensing Portal.
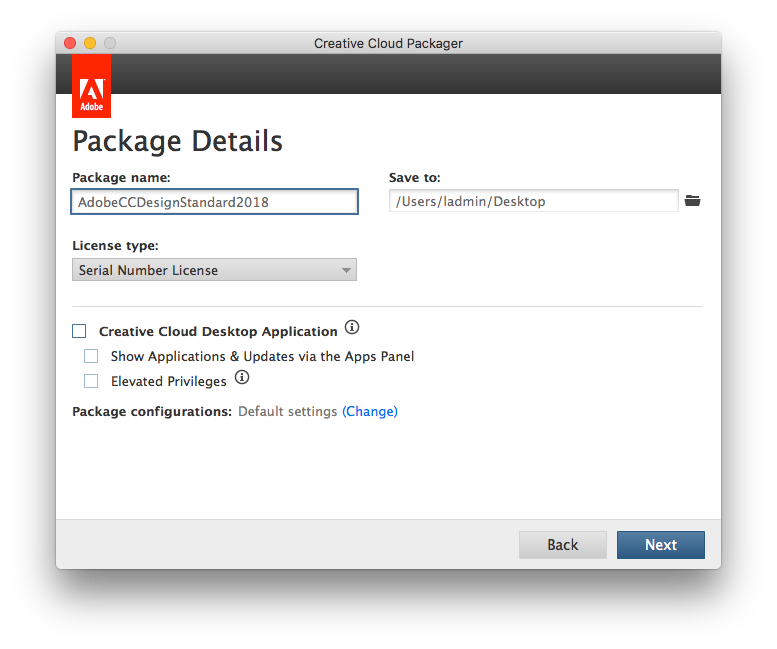
After logging in with your Adobe ID, select Create Package. In Package Details, choose whether „Serial Number License“ or „Named License“.
Best practice tip: Don’t use blanks in the package name; blanks may sometimes cause an error during installation (thanks Adobe, by the way…)
Please note that the screenshot below is for a Serial Number License and therefore the CC Desktop app is disabled. This may vary by your needs.
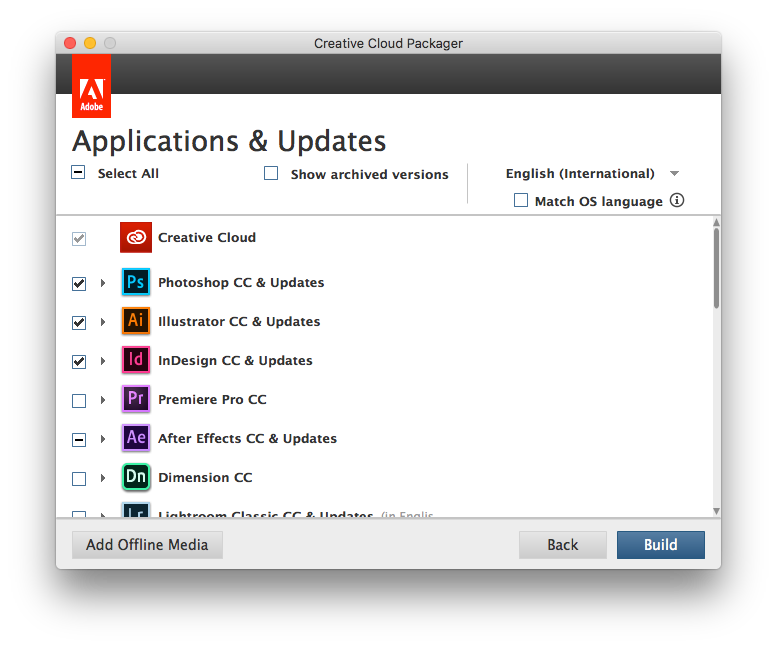
In the „Applications and Updates“ panel, select all applications that you want to build in the package. In this case, the installation language doesn’t matter. Later I’ll describe why this doesn’t matter. Make sure that „Match OS Language“ is disabled.
Choose Build to build the package.
Step 2: Copy the created package to /private/tmp
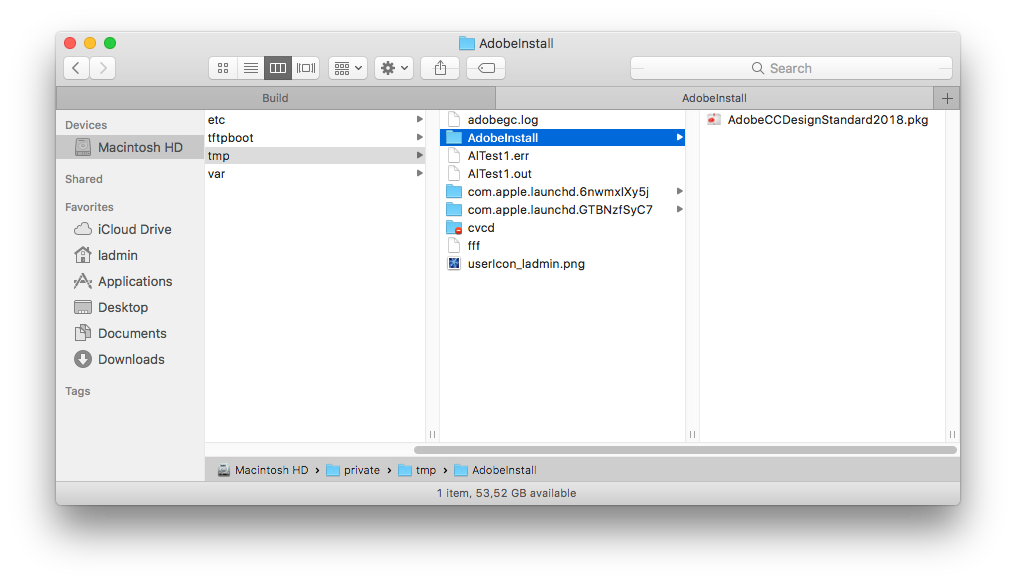
In Finder, press cmd+shift+G (or choose Go > Go to Folder from the Finder menu) and enter /private/tmp. Within /private/tmp, create a subfolder called AdobeInstall. Copy the install package within the „Build“ folder to /private/tmp/AdobeInstall. Do not move the package! When moving, you’ll need to re-create the package if something breaks or a reboot has to be done. You also may want to remove the „_Install“ from the package name.
Step 3: Create the source package in Composer
Drag&Drop the AdobeInstaller folder from /private/tmp into Composer. You’ll need to drag&drop the AdobeInstall folder instead of the .pkg itself - otherwise Composer will recognize that there’s already a package and the contents are not copied; instead you’ll get the „Convert to source“ option, which will break the package when using it.
Set owner & group recursive to root:wheel for AdobeInstall and all subfolders. Choose „Apply Owner & Group to all enclosed“ items. DO NOT USE „Apply Permissions“ to all enclosed items!
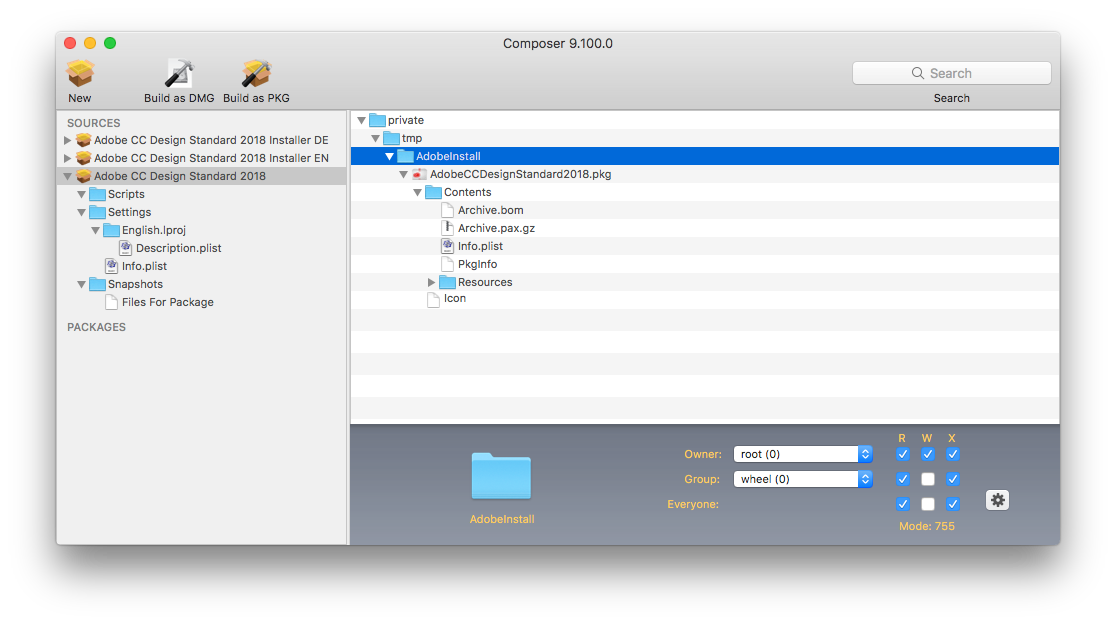
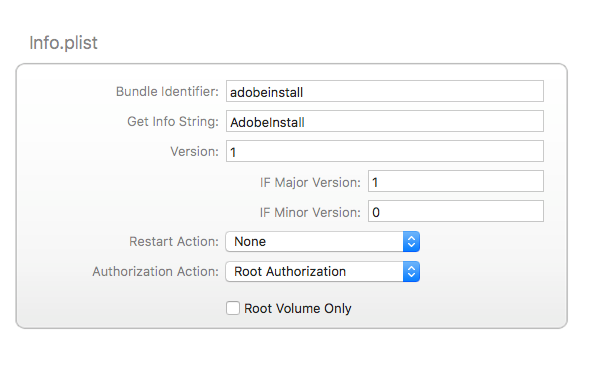
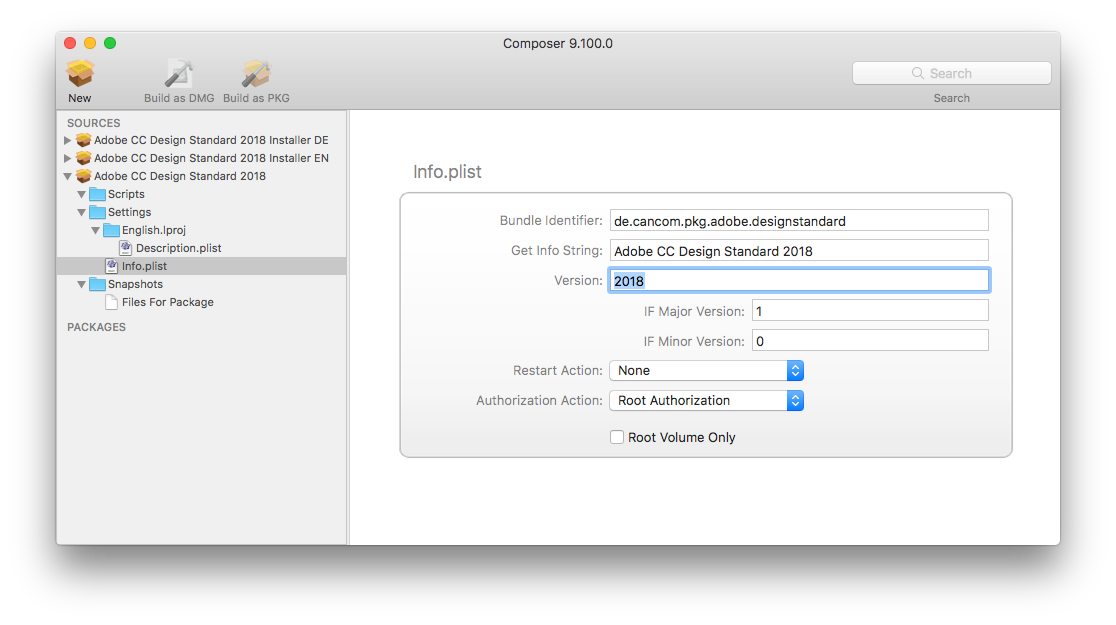
Open the package source and choose the Info.plist (the package Info.plist, not the Info.plist that is contained within /private/tmp/AdobeInstall).
Set the appropriate bundle identifier and version string.
Step 4: Create the localized installer package
Within /private/tmp/AdobeInstall, right-click the Adobe package and choose Show Package Contents. Open the „Contents“ subfolder and copy the Info.plist file to your Desktop. We’ll need that file later.
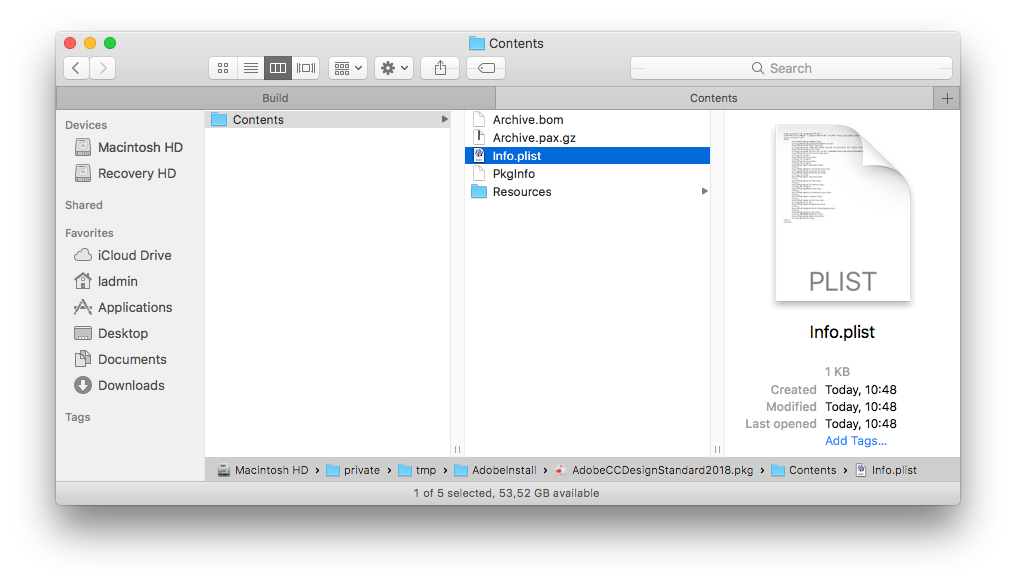
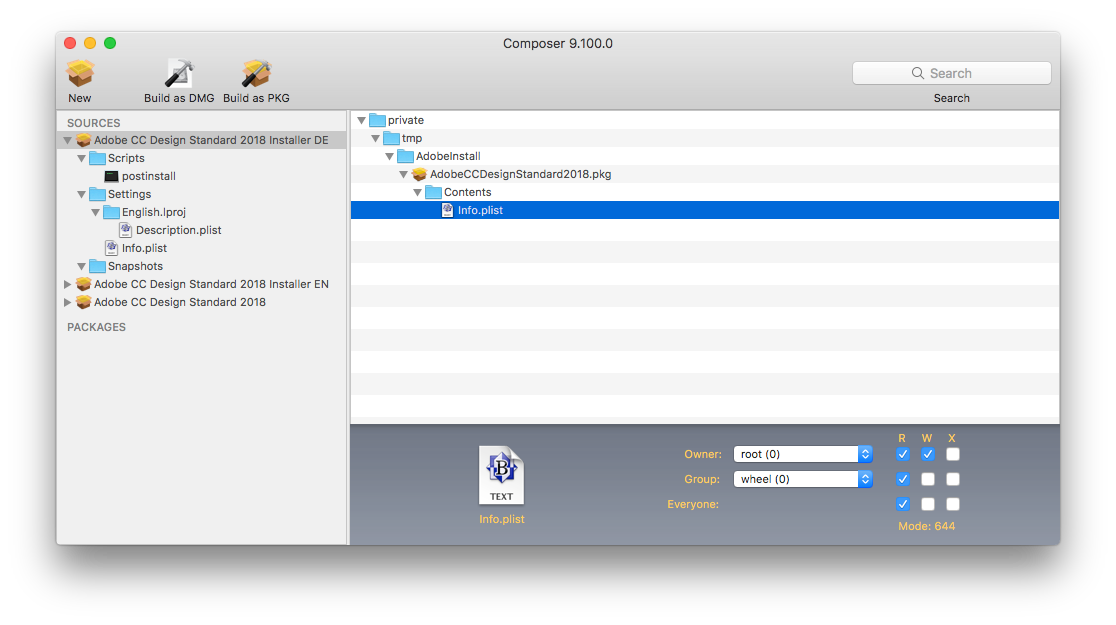
To get the correct folder structure for the localized installer package, drag&drop the Info.plist from /private/tmp/AdobeInstall/AdobeCCDesignStandard2018.pkg/Contents/ into Composer. Set owner & group recursive to root:wheel for AdobeInstall and all subfolders. Choose „Apply Owner & Group to all enclosed“ items. DO NOT USE „Apply Permissions“ to all enclosed items!
The created package source will only contain the Info.plist as file content.
Give the package an appropriate name; It’s totally safe to use blanks here, so don’t hesitate and use them! ;)
Edit the Info.plist (the package Info.plist, not the Info.plist that is located in the package sources) to match the Bundle Identifier and version number of the previously generated sources package. Add an „.installer.$LANGUAGE“ to the bundle identifier. Please note that the bundle identifier needs to be unique for each package, so make sure you’ll use a different identifier for each package you create.
Add a post install bash script to the package. Use the following script:
#!/bin/bash
## postinstall

PackageName="AdobeCCDesignStandard2018.pkg"

########################
# DO NOT MODIFY BEYOND THIS LINE
########################

echo "Adobe Installer: Starting product installation"
if installer -pkg "/private/tmp/AdobeInstall/${PackageName}" -target / 2>&1
then
    echo "Adobe Installer: Product installation finished successfully. Deleting temporary installer from /private/tmp"
    rm -rf /private/tmp/AdobeInstall/*
    exit 0
else
    echo "Adobe Installer: There was an error during Adobe Product installation. Leaving temporary installer in place."
    exit 1
fi
Make sure that the PackageName variable matches the name in your package source.
The output of the post install script can be found in /var/log/install.log. This may be useful for debugging.
Step 5: Edit the Info.plist
Now it’s time for the magic to happen. Open the Info.plist file that you previously copied to your Desktop. Remember? ;)
Use an appropriate text editor for editing the plist. Don’t use TextEdit, because it’ll break the file! Use TextWrangler, BBEdit or any text editor of your choice instead.
After the last key, add the following two lines and save the file:
<key>InstallLanguage</key>
<string>de_DE</string>
The result should look like the following:
The language codes should match the current ISO language codes; examples can be found here: https://msdn.microsoft.com/de-de/library/ee825488(v=cs.20).aspx.aspx)
Please note that you replace the dash with an underscore (default for macOS codes). For example, use „de_DE“ for a German installer and „en_US“ for an English localized CC package. You can use any installer language that is supported by the Adobe installer here.
Use the edited Info.plist file from your Desktop to replace the Info.plist in the Composer source for the appropriate installer language. Make sure that the permissions for the Info.plist file are set to root:wheel after replacing the original Info.plist.
You can repeat the steps above as often as needed - every package will result in an separate language installer. Just edit the Info.plist on your Desktop to match the language you want to install.
Each package that is created with CCP has an unique bundle identifier (found in the Info.plist too):
<key>CFBundleIdentifier</key>
<string>com.adobe.Enterprise.install.$UUID</string>
Because of this, you cannot use any Info.plist from an Adobe installer to get this working; you’ll need to use the Info.plist that is unique to each package and edit it.
Step 6: Build the packages
All packages should now be ready to build using Composer. Make sure that a valid signing certificate is used when building the packages. As the packages are flat, they can be safely moved. Quite in opposition to the original Adobe CCP packages.
Step 7: Upload the packages and set the package options
As final step, the packages can be uploaded to your distribution point. For testing purposes, it’s totally fine to do local tests and execute each package after another.
The priority is the main thing that this will work. First, the packages sources need to be installed (priority 10, for example). Second, the installer for the language needs to be executed (priority 12, for example). The installer package will replace the Info.plist within the source and execute the package installation afterwards.
The reason why this works is simple: the hardcoded value in the Info.plist overrides all other settings that may be configured within Adobe CCP. This includes the „Match OS“ function as well as the install language you have chosen. Technically, an Adobe CCP created installer package does always contain any supported language. The choice, which language of the Adobe apps should be installed, is only done when installing the package. The source files for installation are always the same, no matter if you selected Englisch International, Chinese or German as installation language.
This construct can be extended for as much localized installers as you want. The big benefit of using this technique is simple: The sources are packaged only once and not multiple times, which will slim down the needed space enormous.
Feel free to adopt or modify this workflow on your needs. I’d appreciate any comments or improvements for the workflow above. Enjoy!
-Michael
Sources:
https://helpx.adobe.com/enterprise/help/customize-packages.html
https://helpx.adobe.com/enterprise/package/help/deploying-packages.html